04/20/19: Phase 2 Implementation

PROGRESS

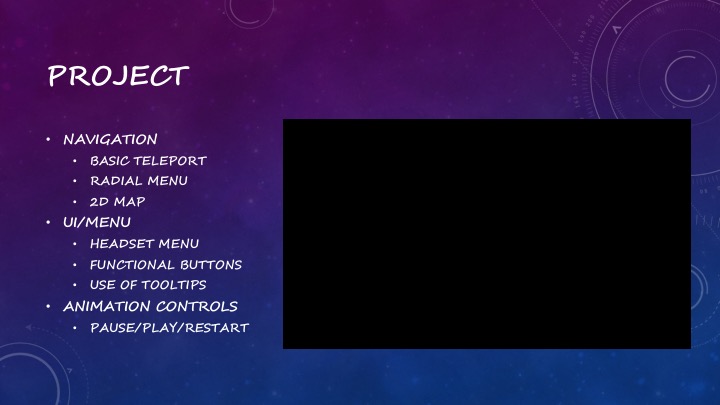
Last week’s successful gaze development paid off. Scene 01 no longer requires the use of controllers!

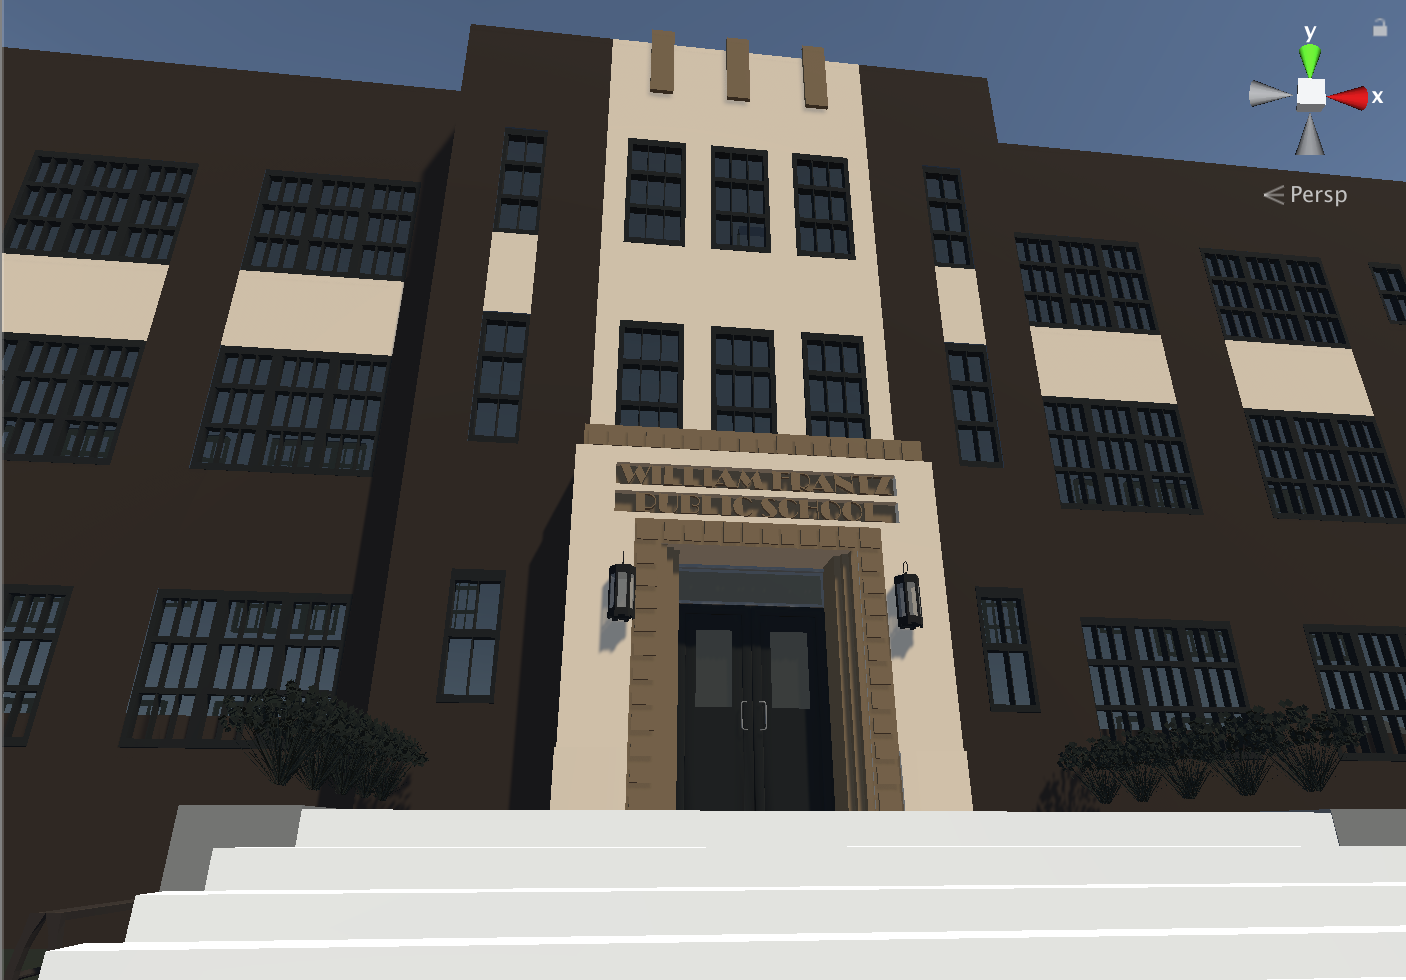
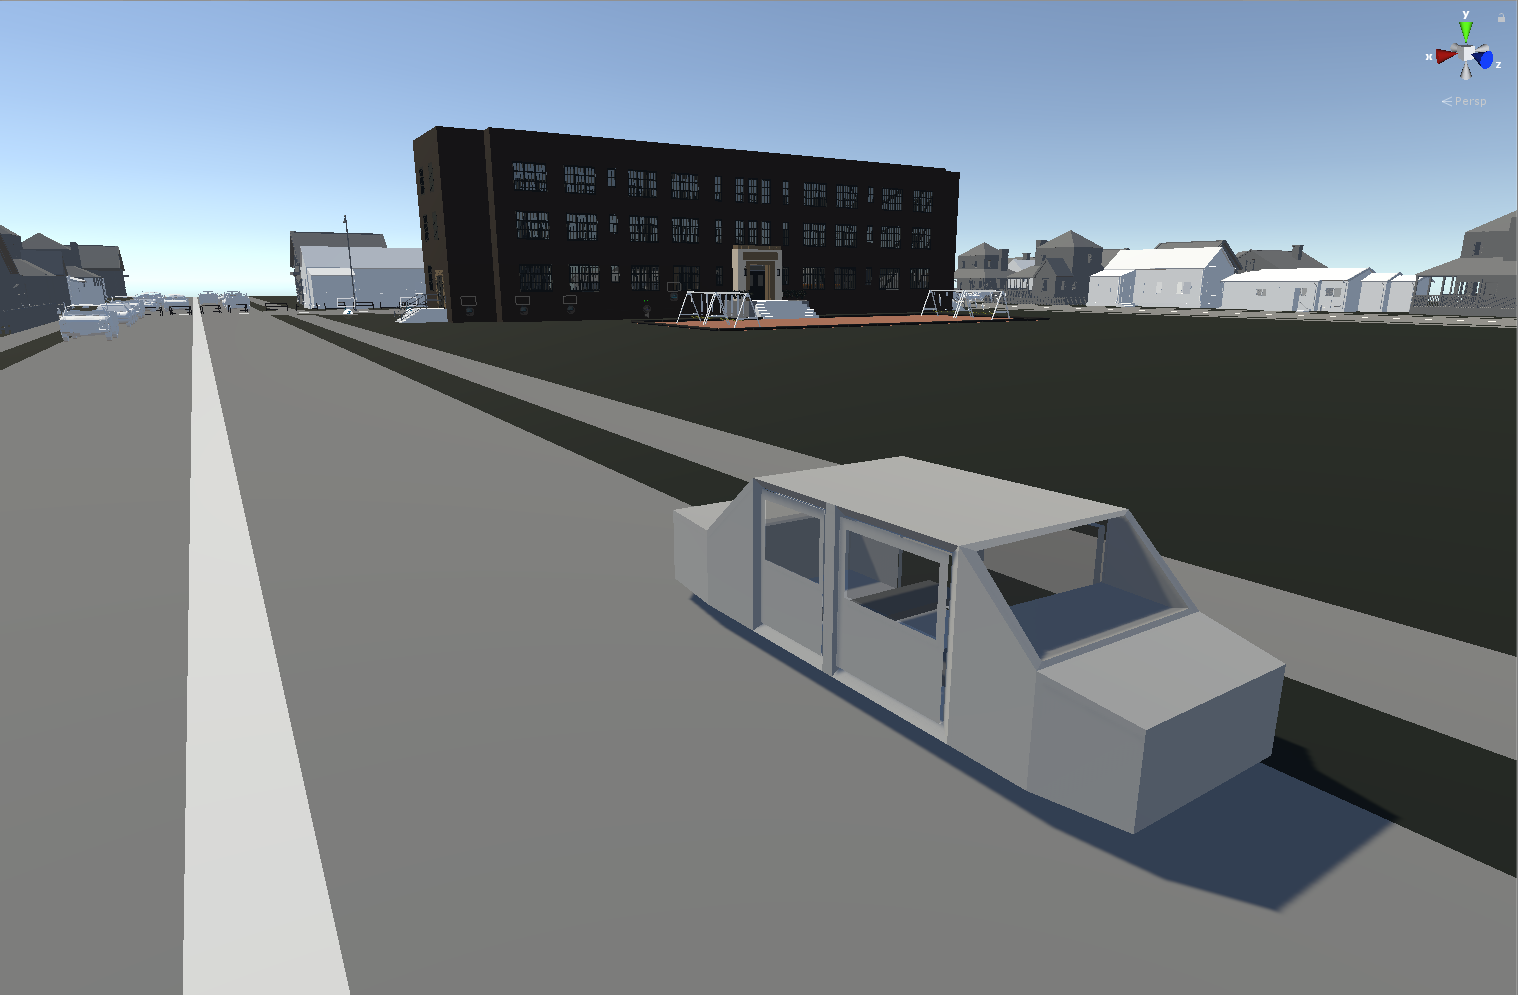
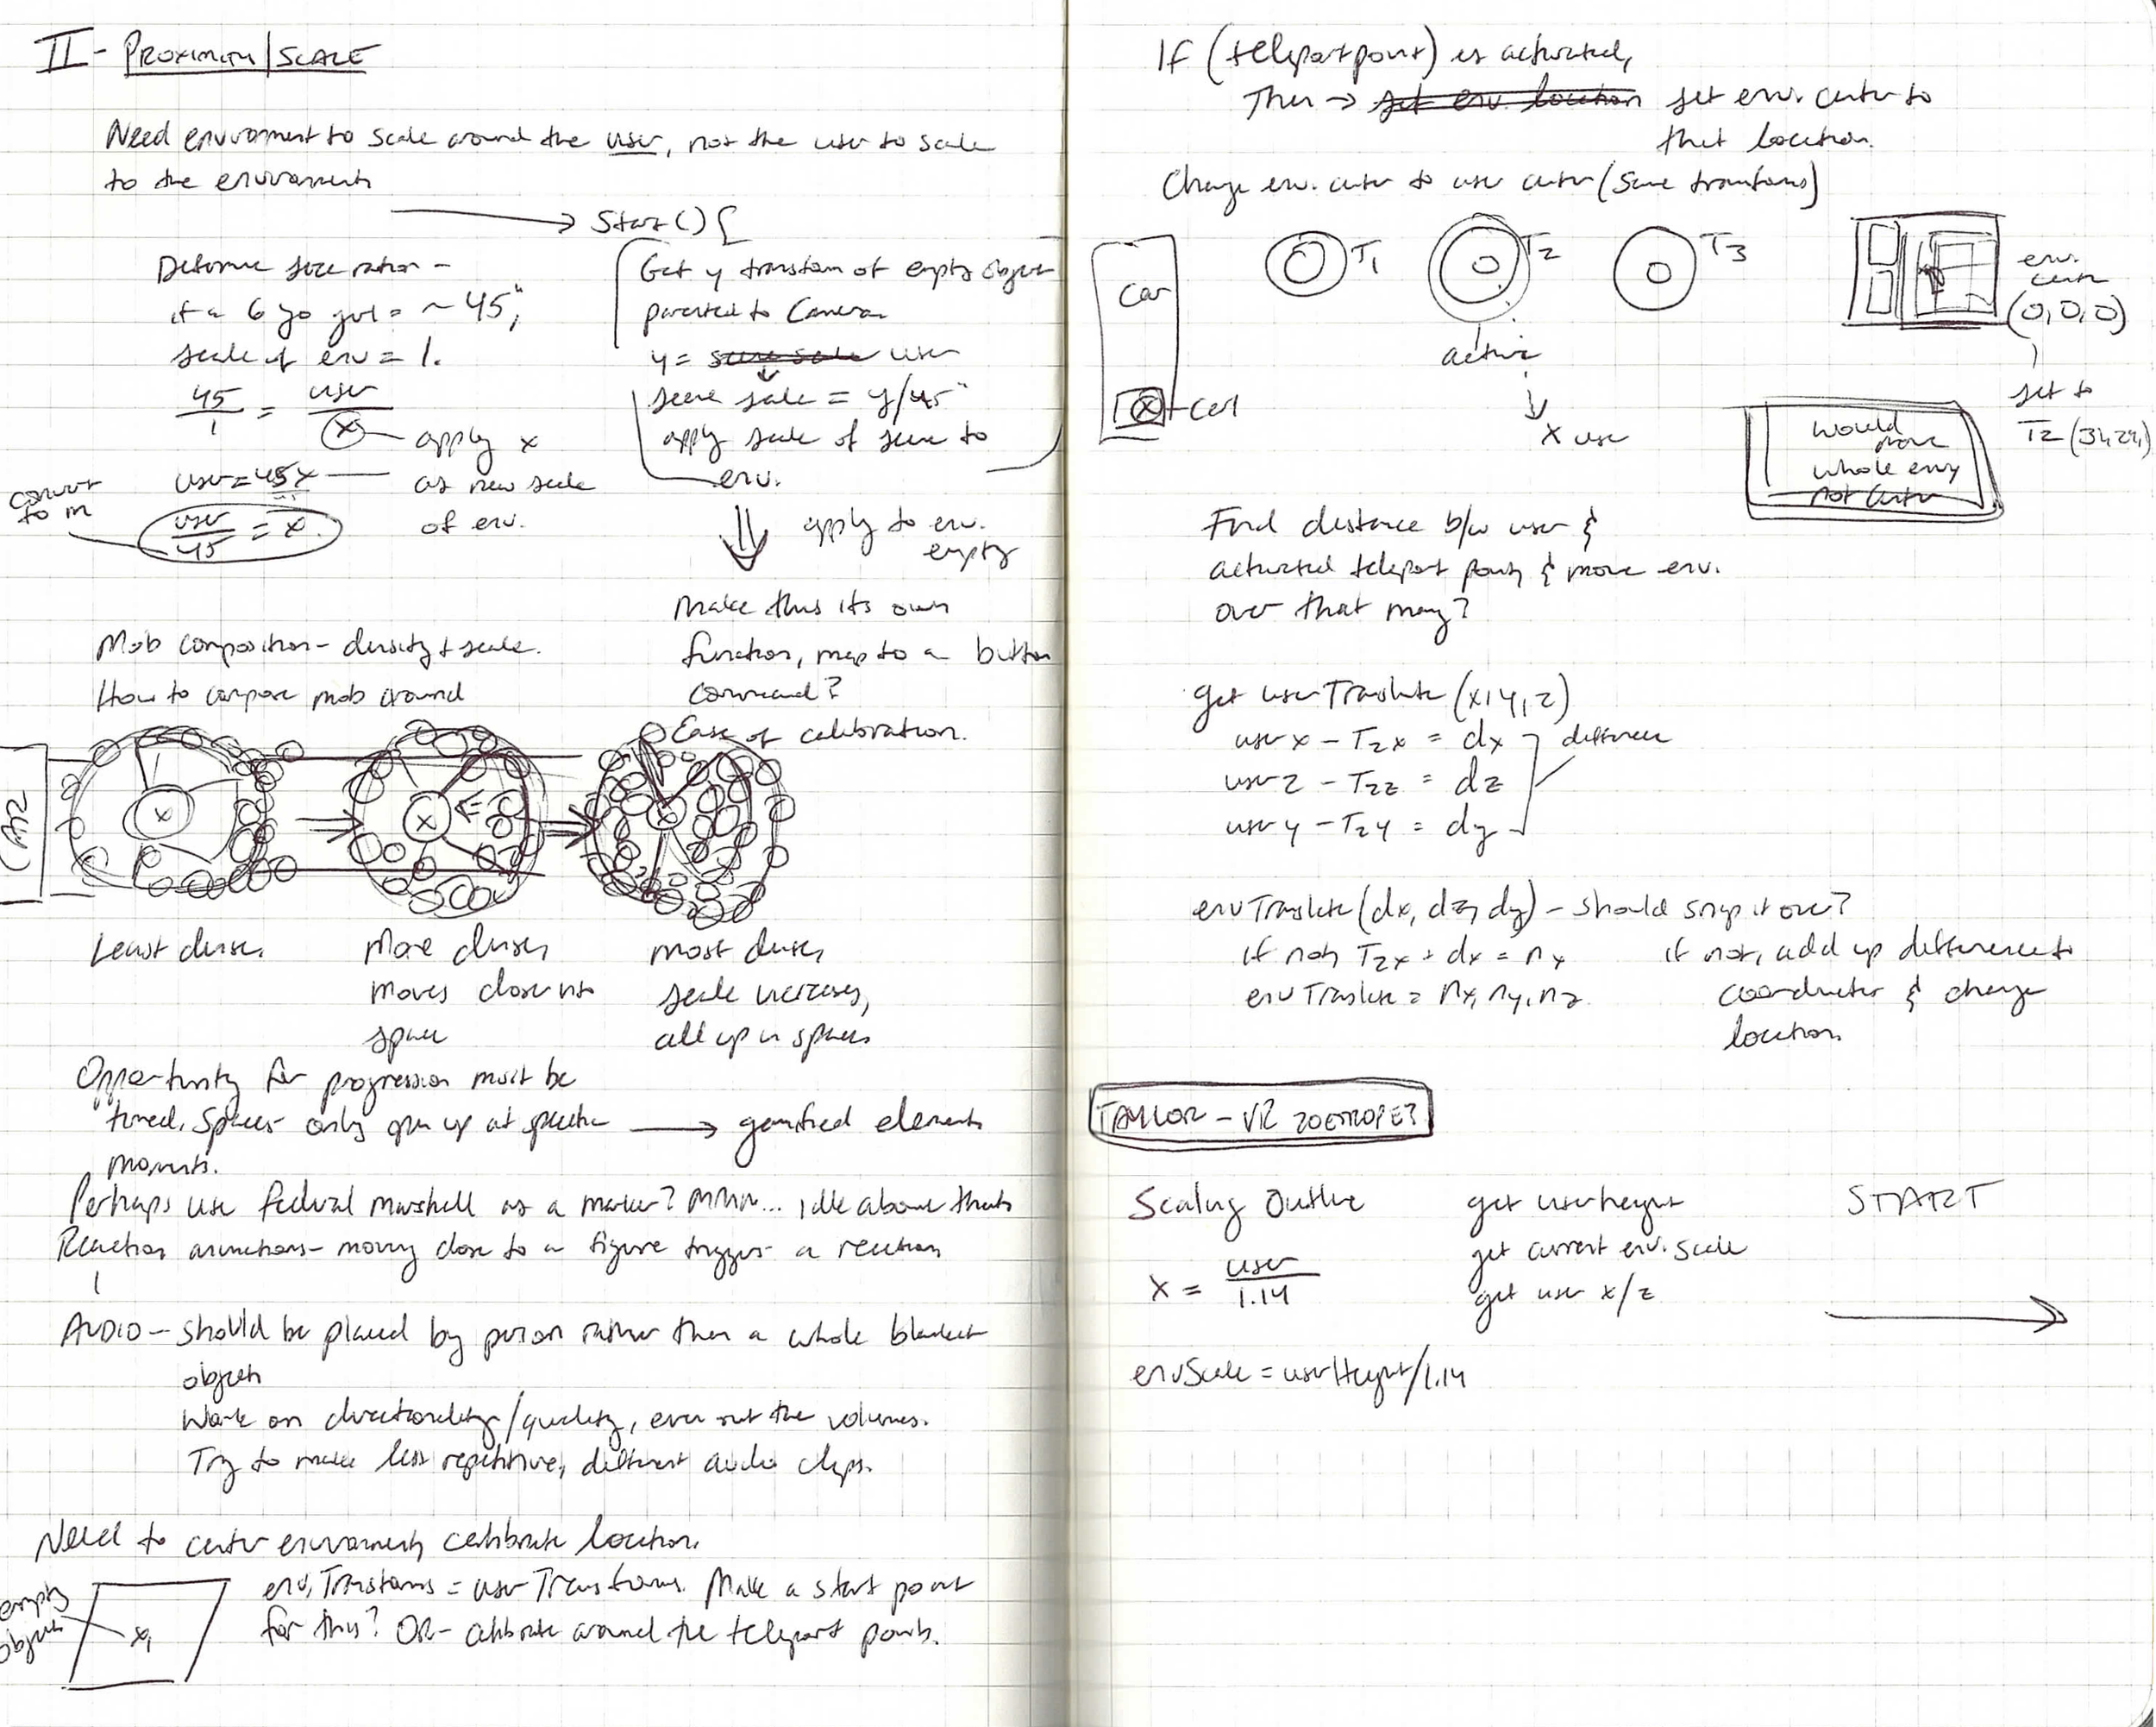
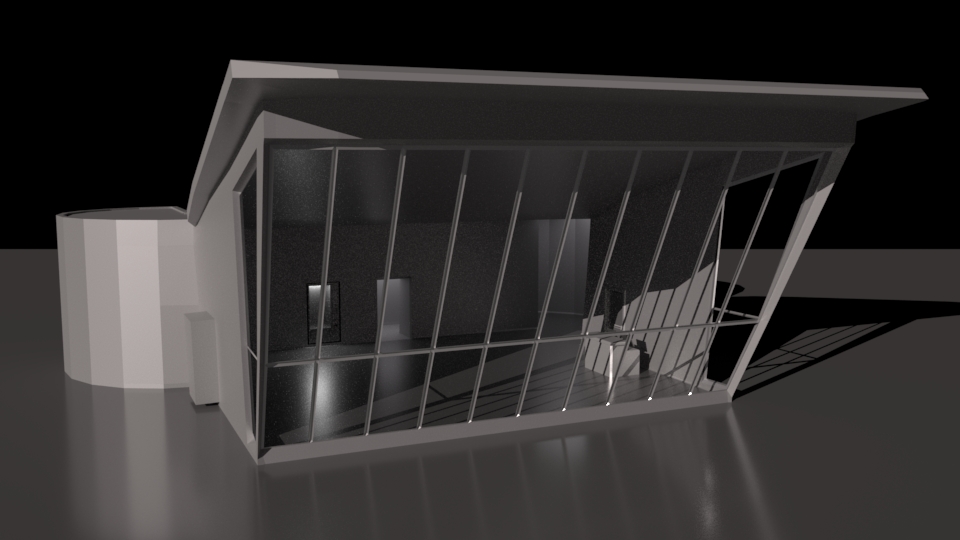
Big achievement of the week was adding in all the gaze-based teleport points to the scene I constructed for demos 2 weeks ago. The actual script for applying a ray to the camera and teleporting to a point with a trigger didn’t require much modification. The trouble I had was deconstructing EVERYTHING that was attached to the original, time-based teleporting and attaching it to the new ones, then making sure to activate/deactivate the next and previous points to prevent the user from going backwards. I also added a light to each point that increases in intensity when starting at the teleport point as an indicator for myself and other players.

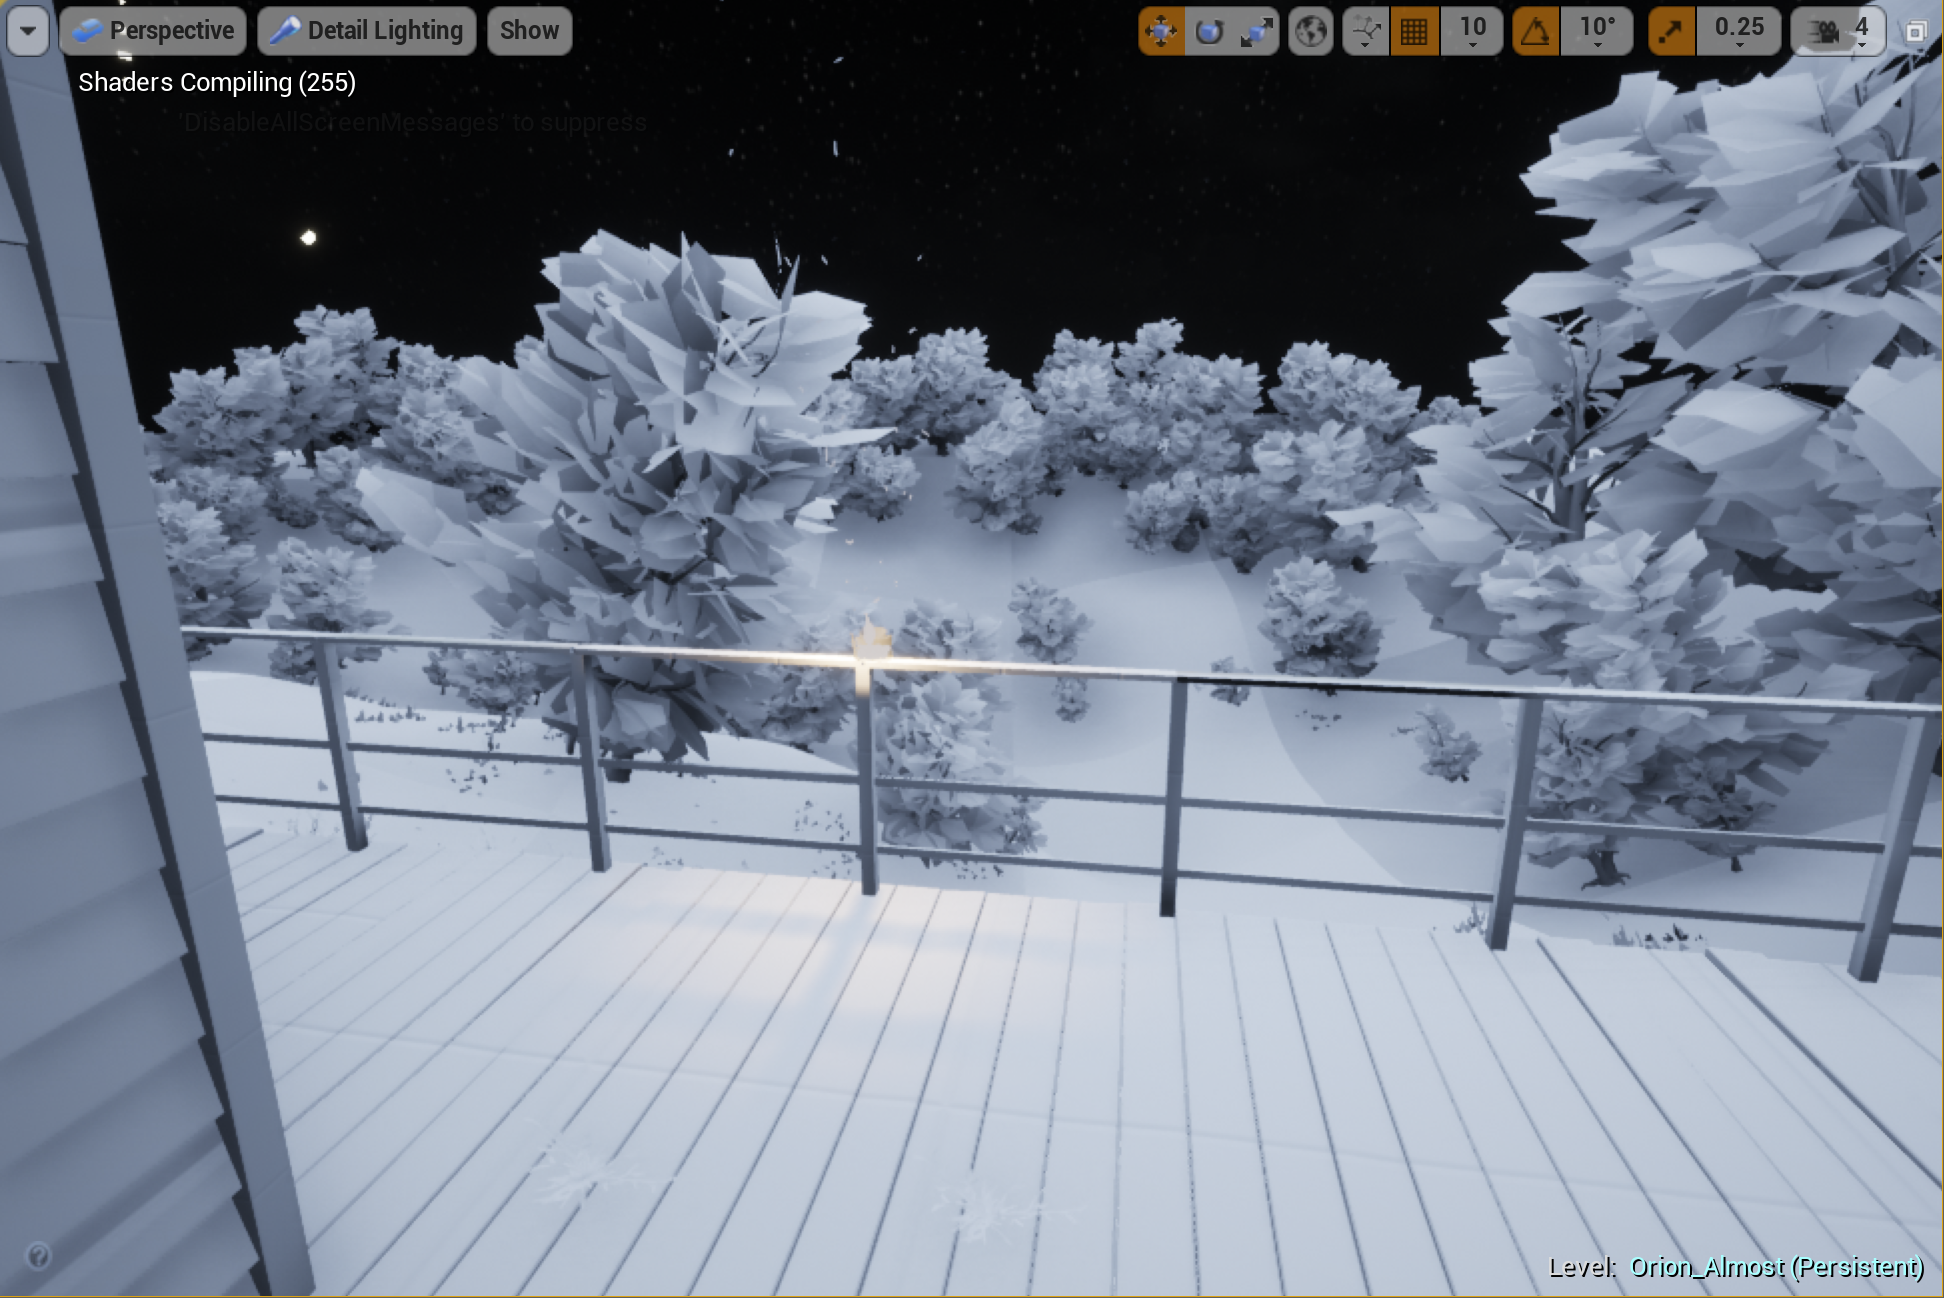
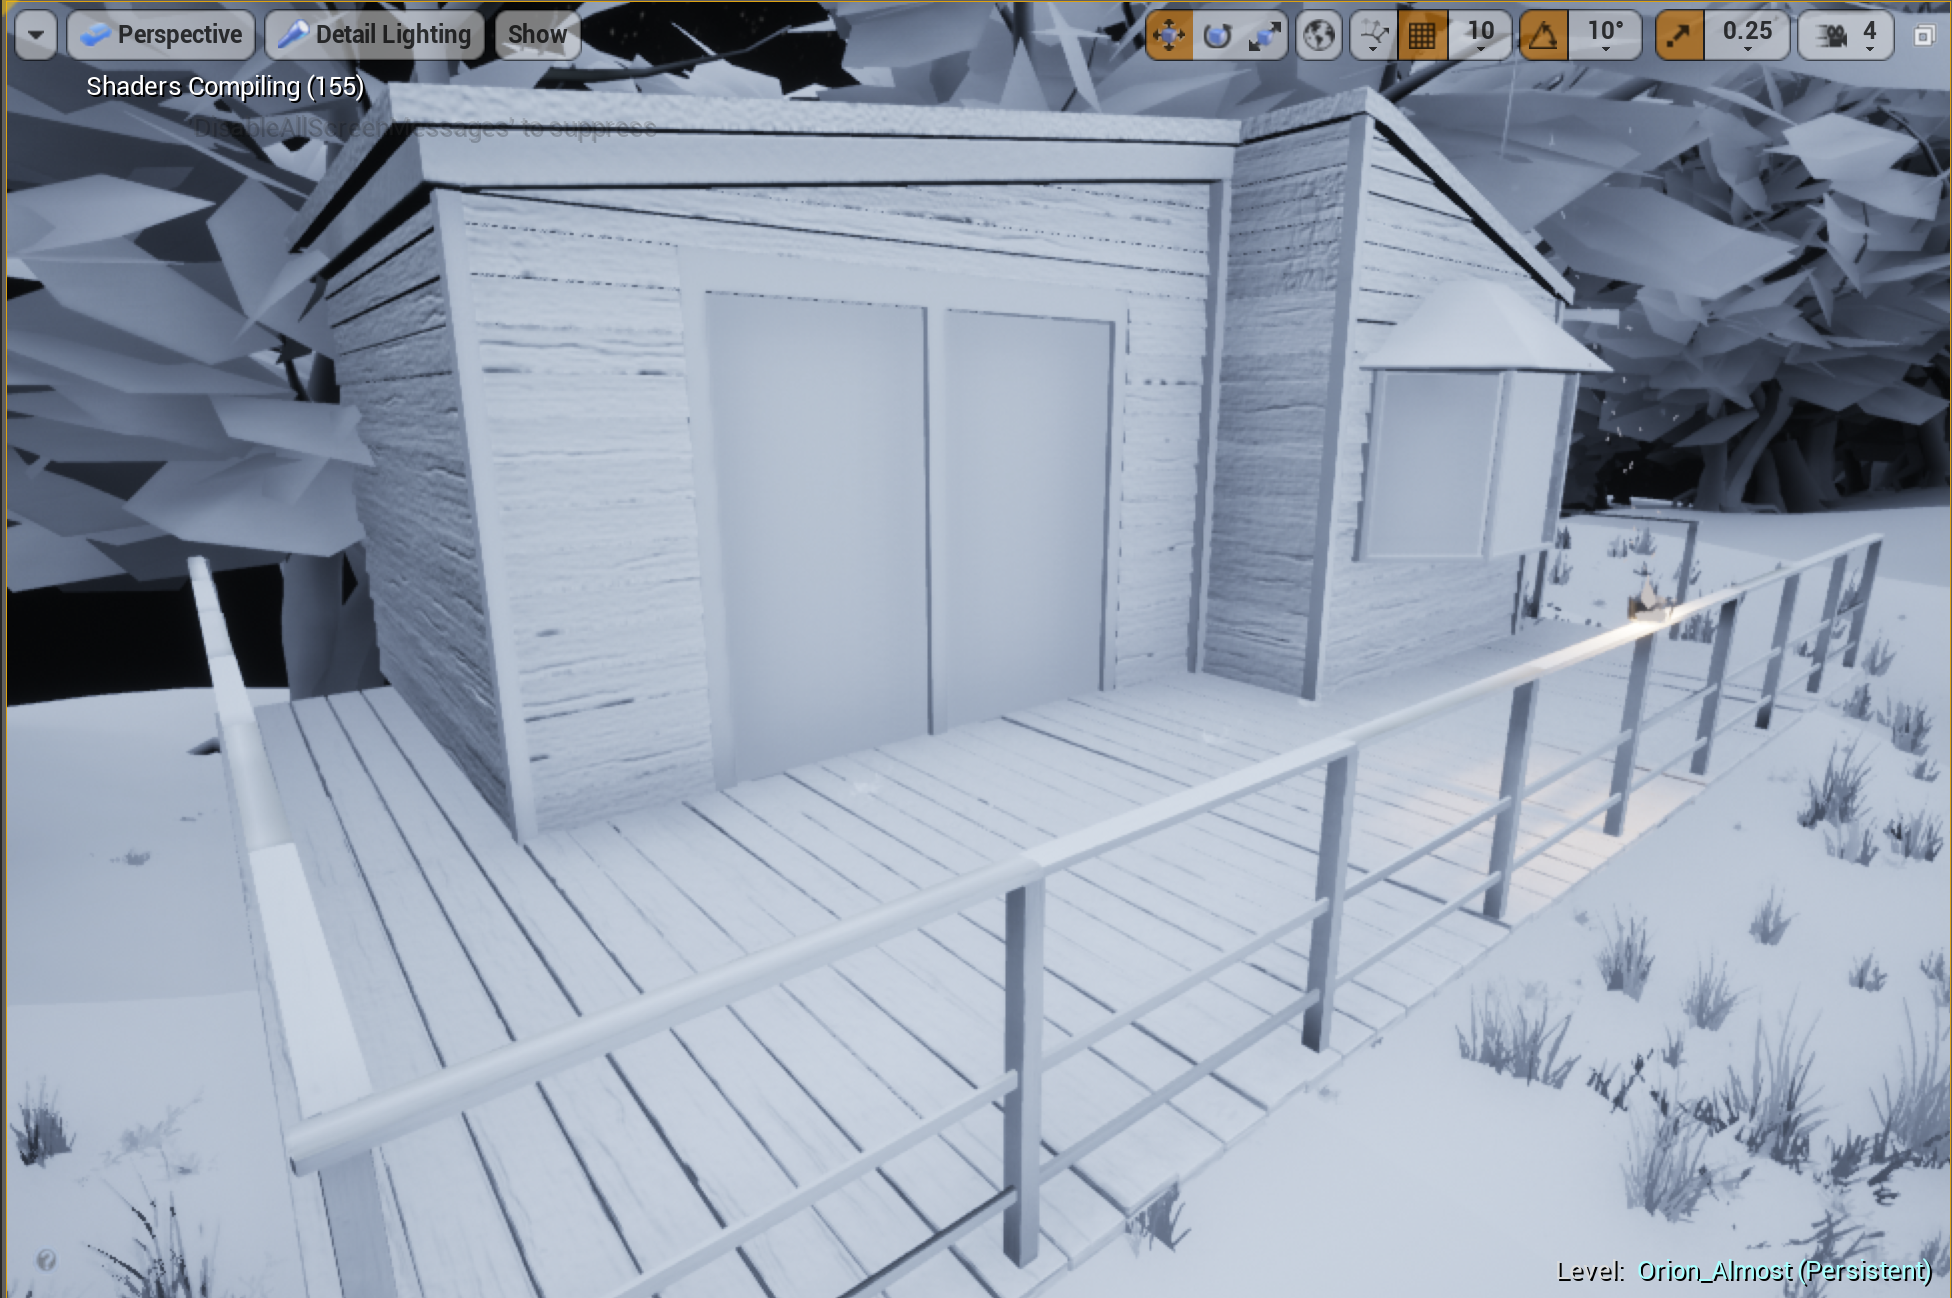
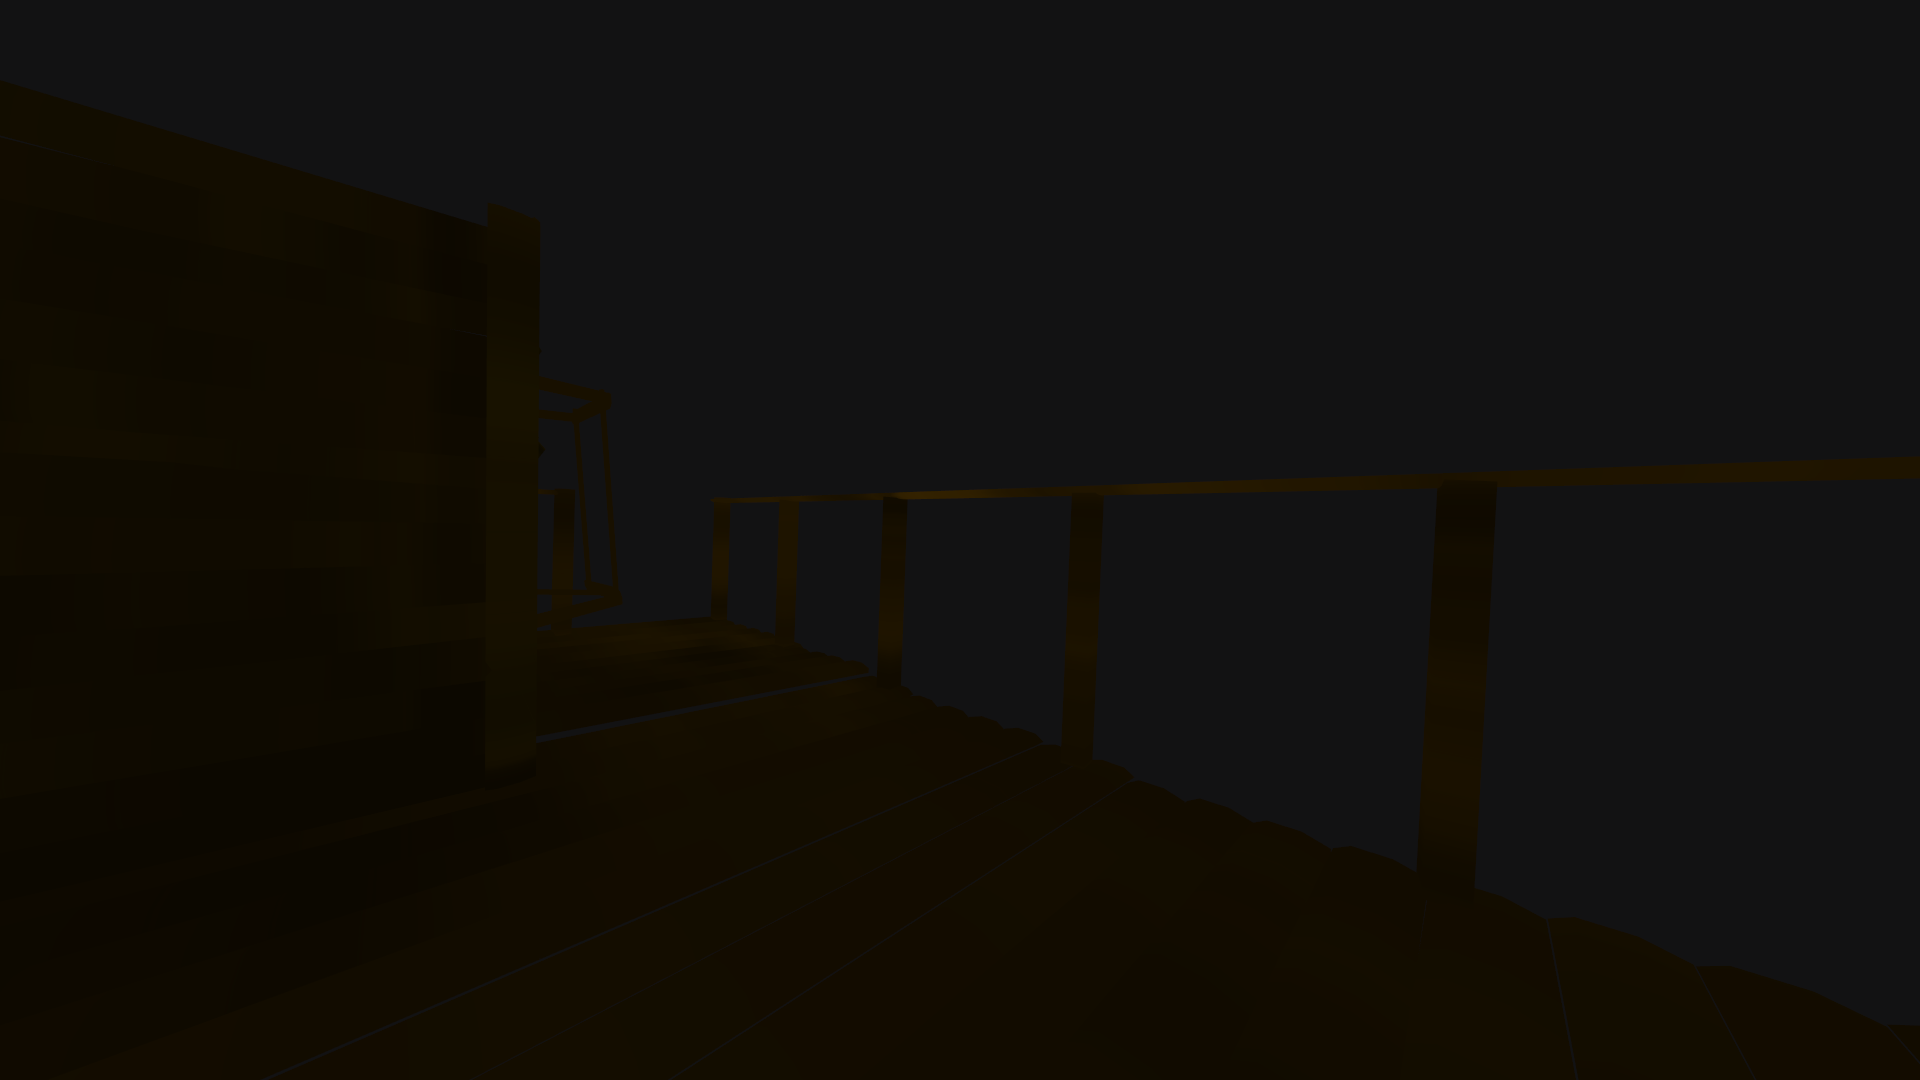
Me testing gaze teleporting in Scene 01. 04/19/19

After adding these features and testing myself, I found a few errors shown in the video above.

The range of the headset was set too short, which made it difficult to reach the next point. It prevents the user from triggering anything too far ahead of their position in the scene, but unfortunately it also prevents me from reaching some of the teleport points. I organized the mob variations before a visual of the next step was actually required to progress, but because the ray only reacts to objects in the Teleport layer, the user can look straight through the legs of the mob and still activate the next point without ever gaining direct visual contact. And the doors of the school are intended to be a trigger that ends the experience - instead, the user just keeps activating the teleport function and re-spawning directly in front of them. After addressing these issues (minus the points visible through the mob’s legs), I added a gaze-based “start” button at the main menu to create a completely controller-free experience and introduce this concept before actually entering the scene.

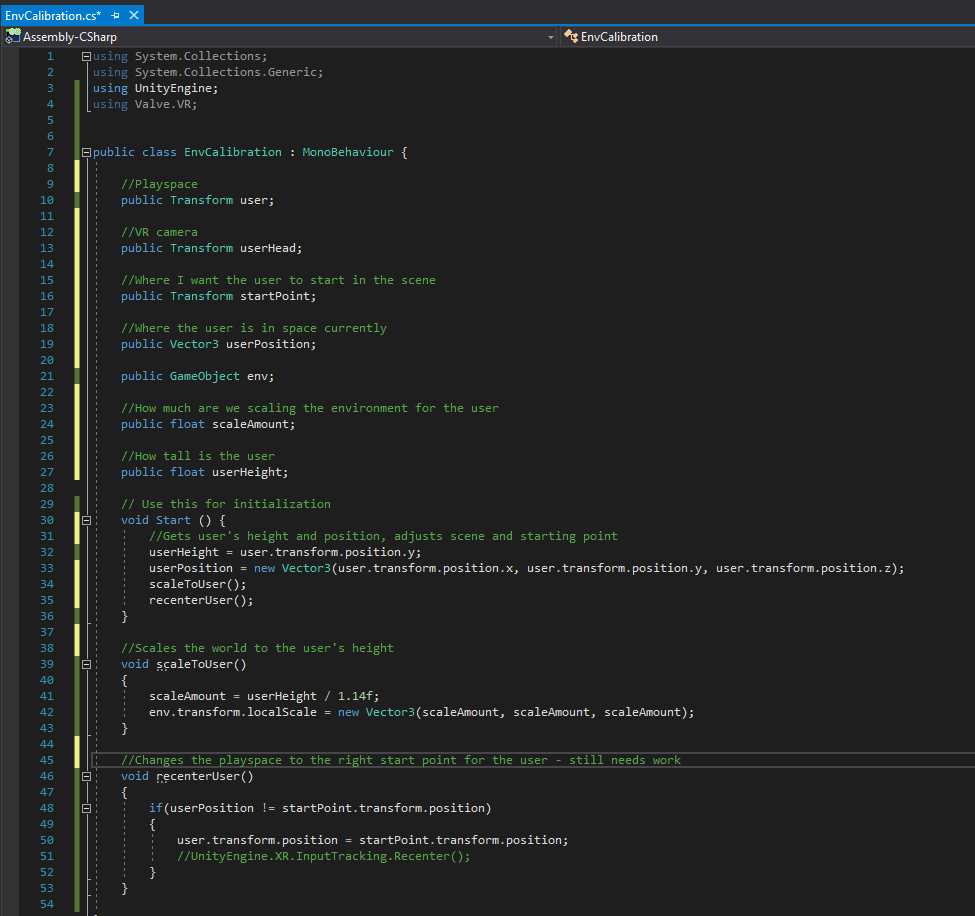
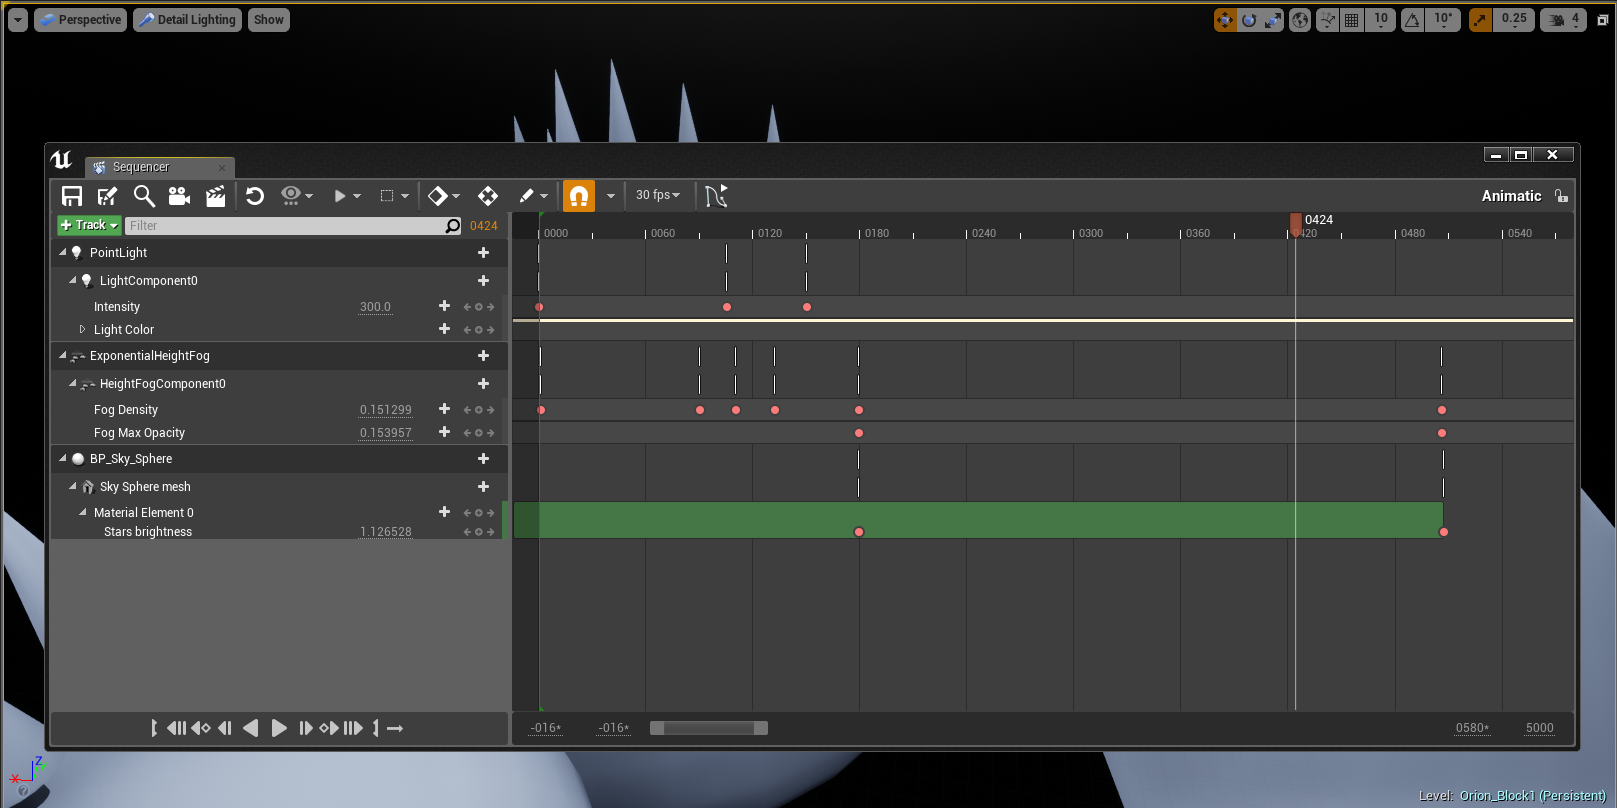
Script commenting for

For my own process, I realized that many of the scripts I’m writing/using will be useful to us moving forward in development and in various other projects. I took a quick break from scene development to add comments to the scripts for my own sanity and ease of understanding down the line. Just a new habit that I’m trying to develop, thanks to Matt’s Programming for Designer’s class.

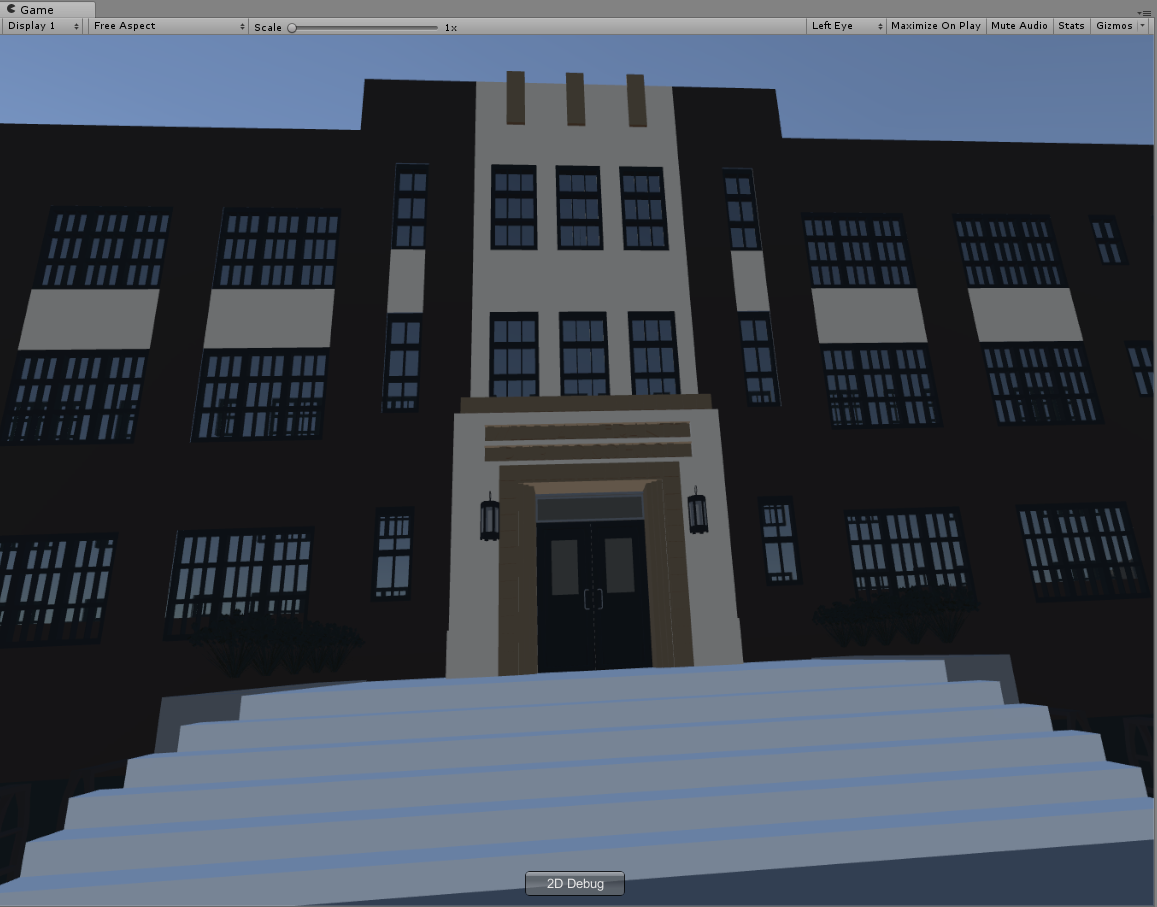
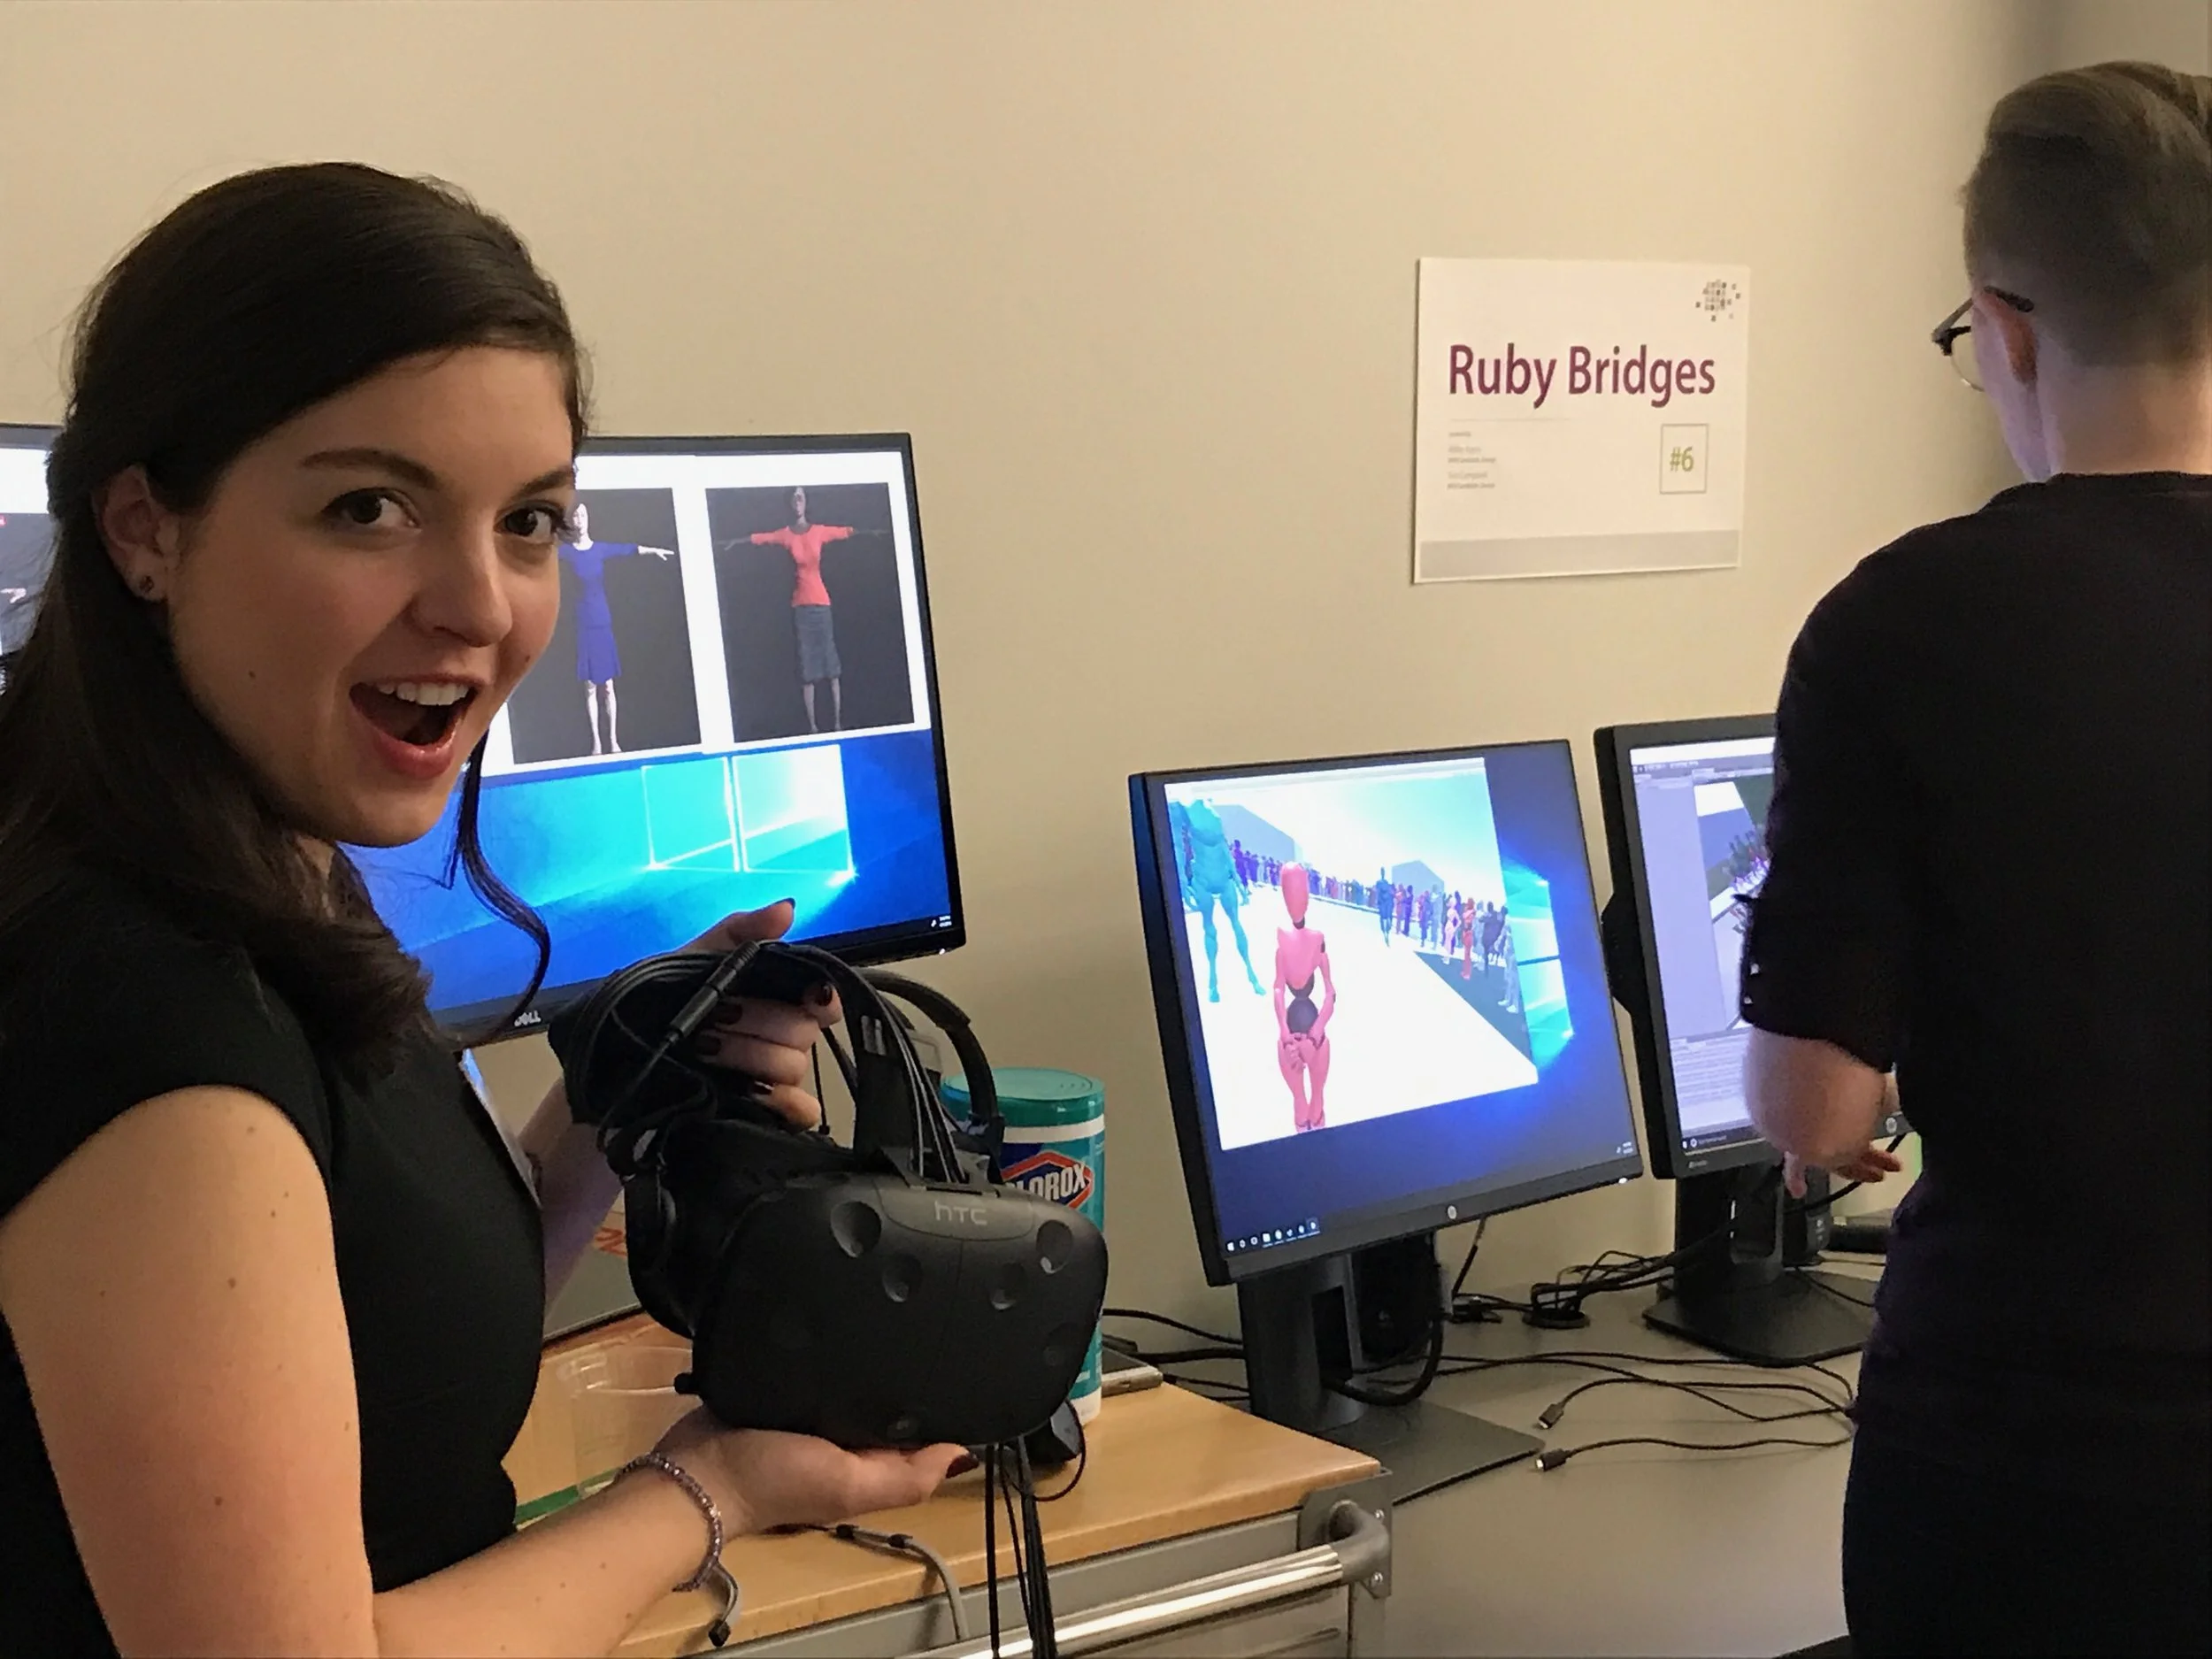
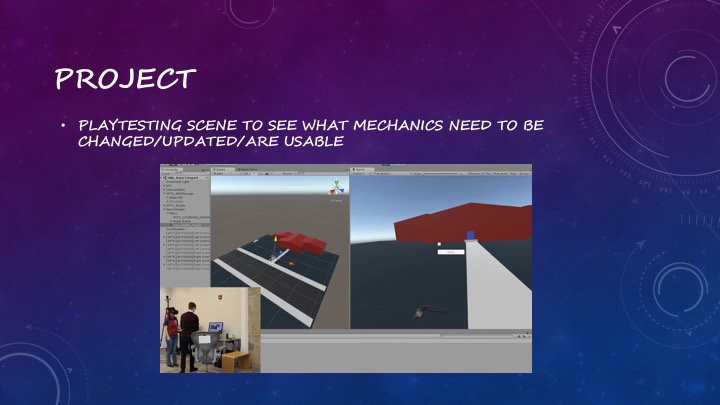
We were fortunate enough to host a VR Columbus meeting on Friday evening at ACCAD and demo this new scene with gaze teleportation for the first time. Below is one of the recordings I took of a user moving through the experience from the main menu all the way to the end. Sound from the experience is included below.

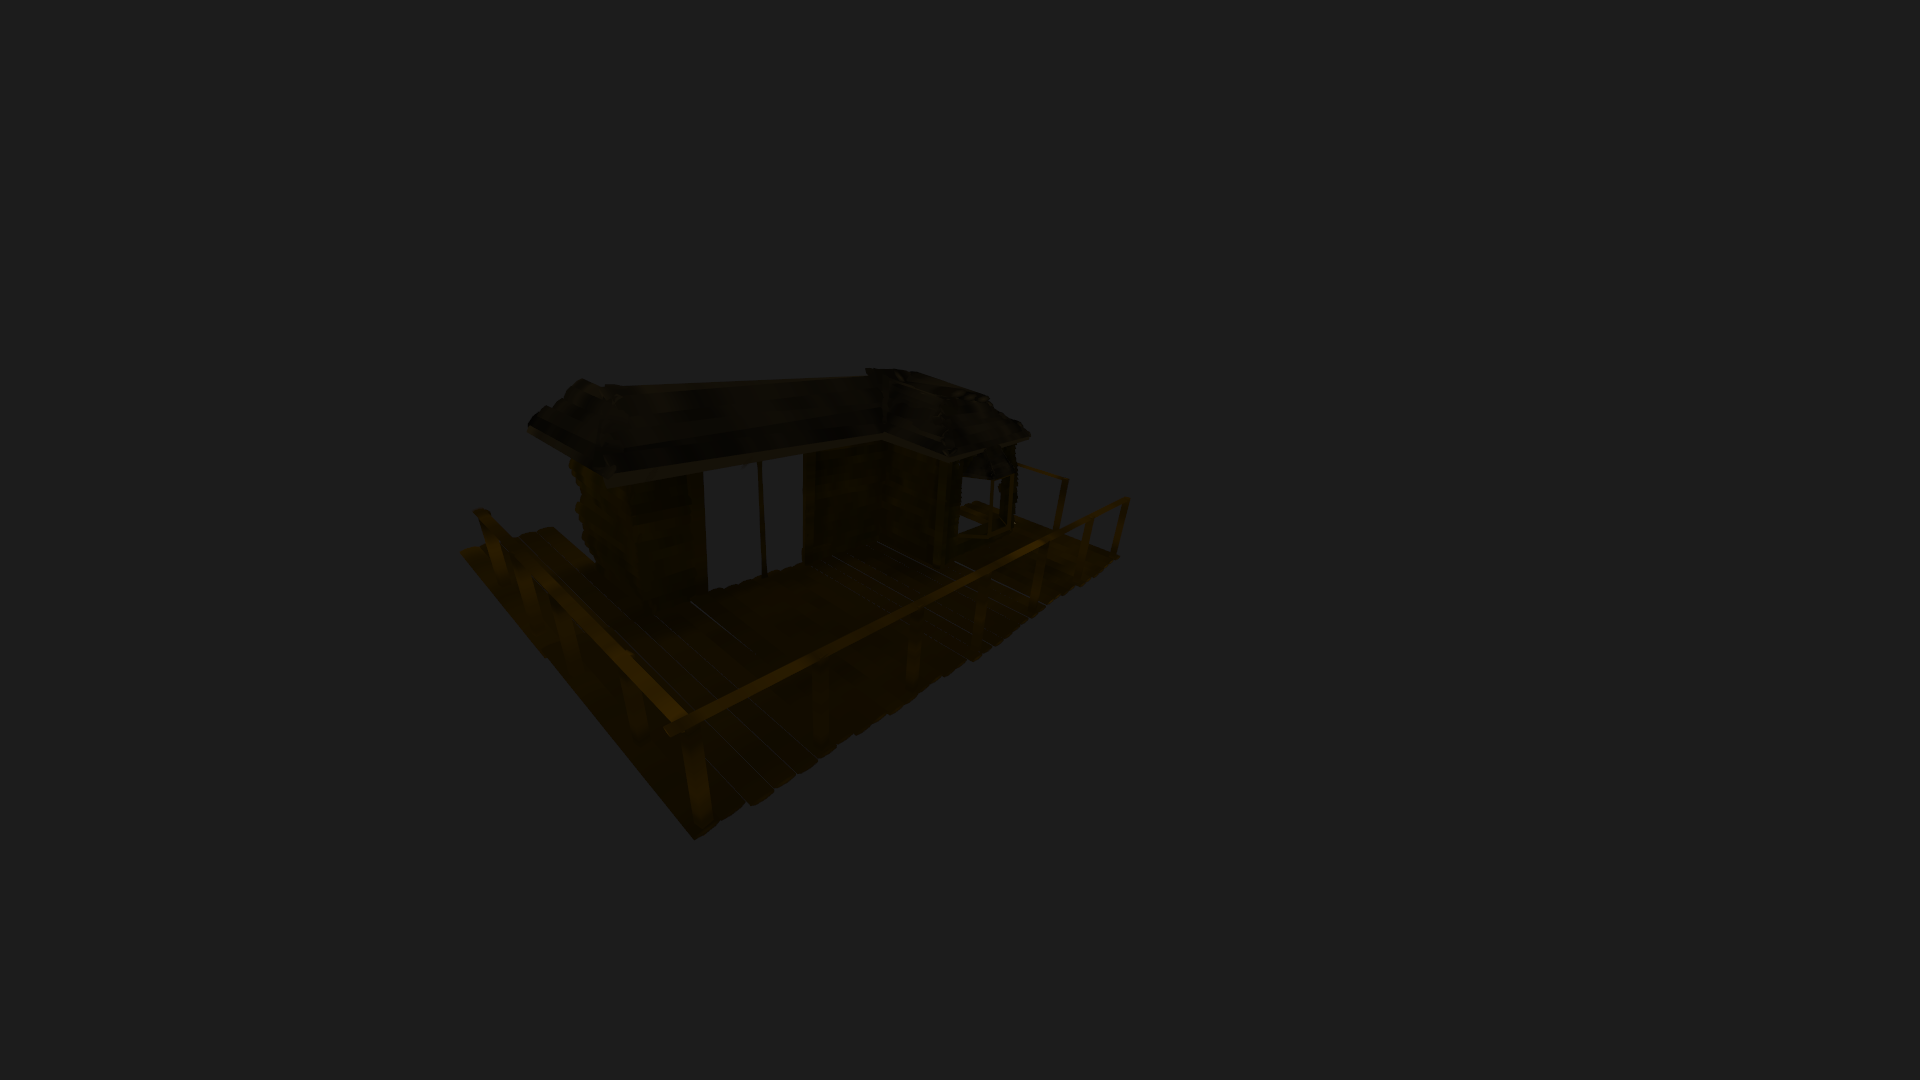
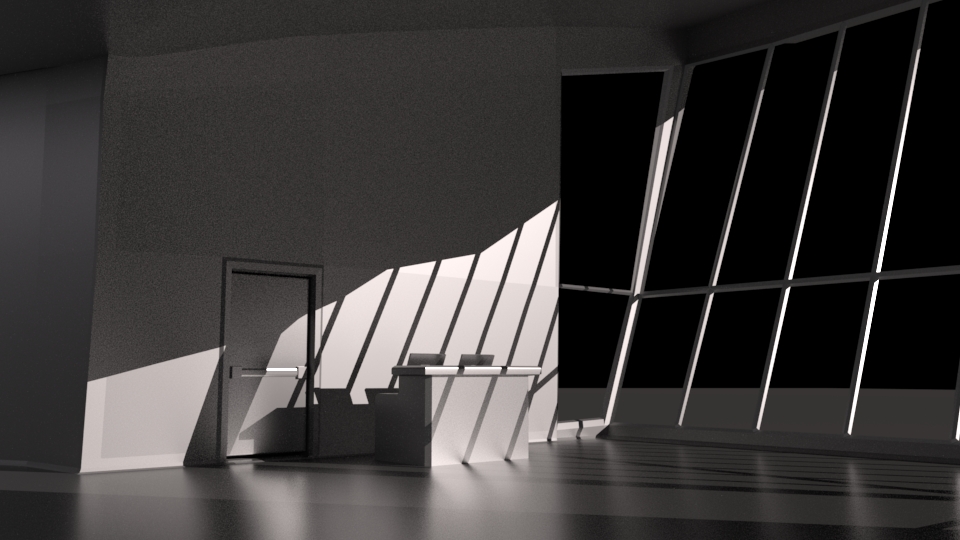
User playtest at ACCAD, 04/19/19.

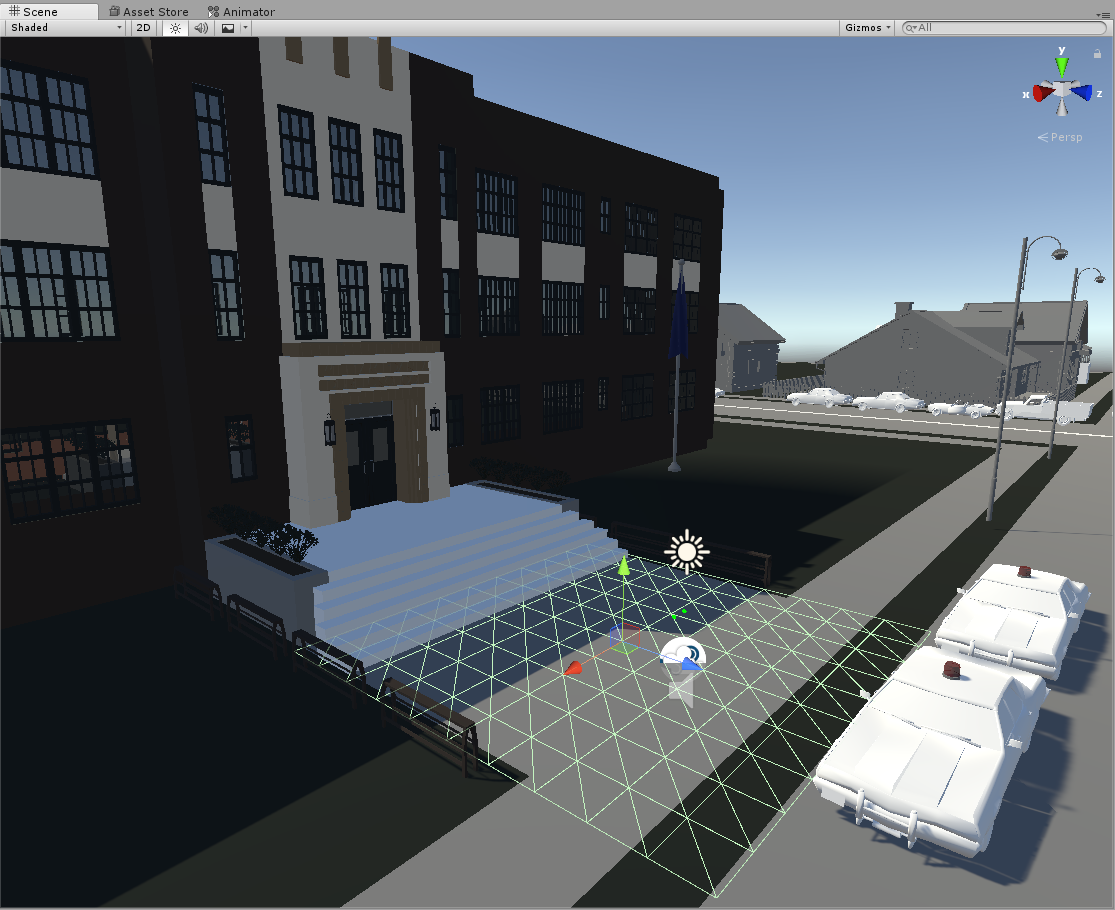
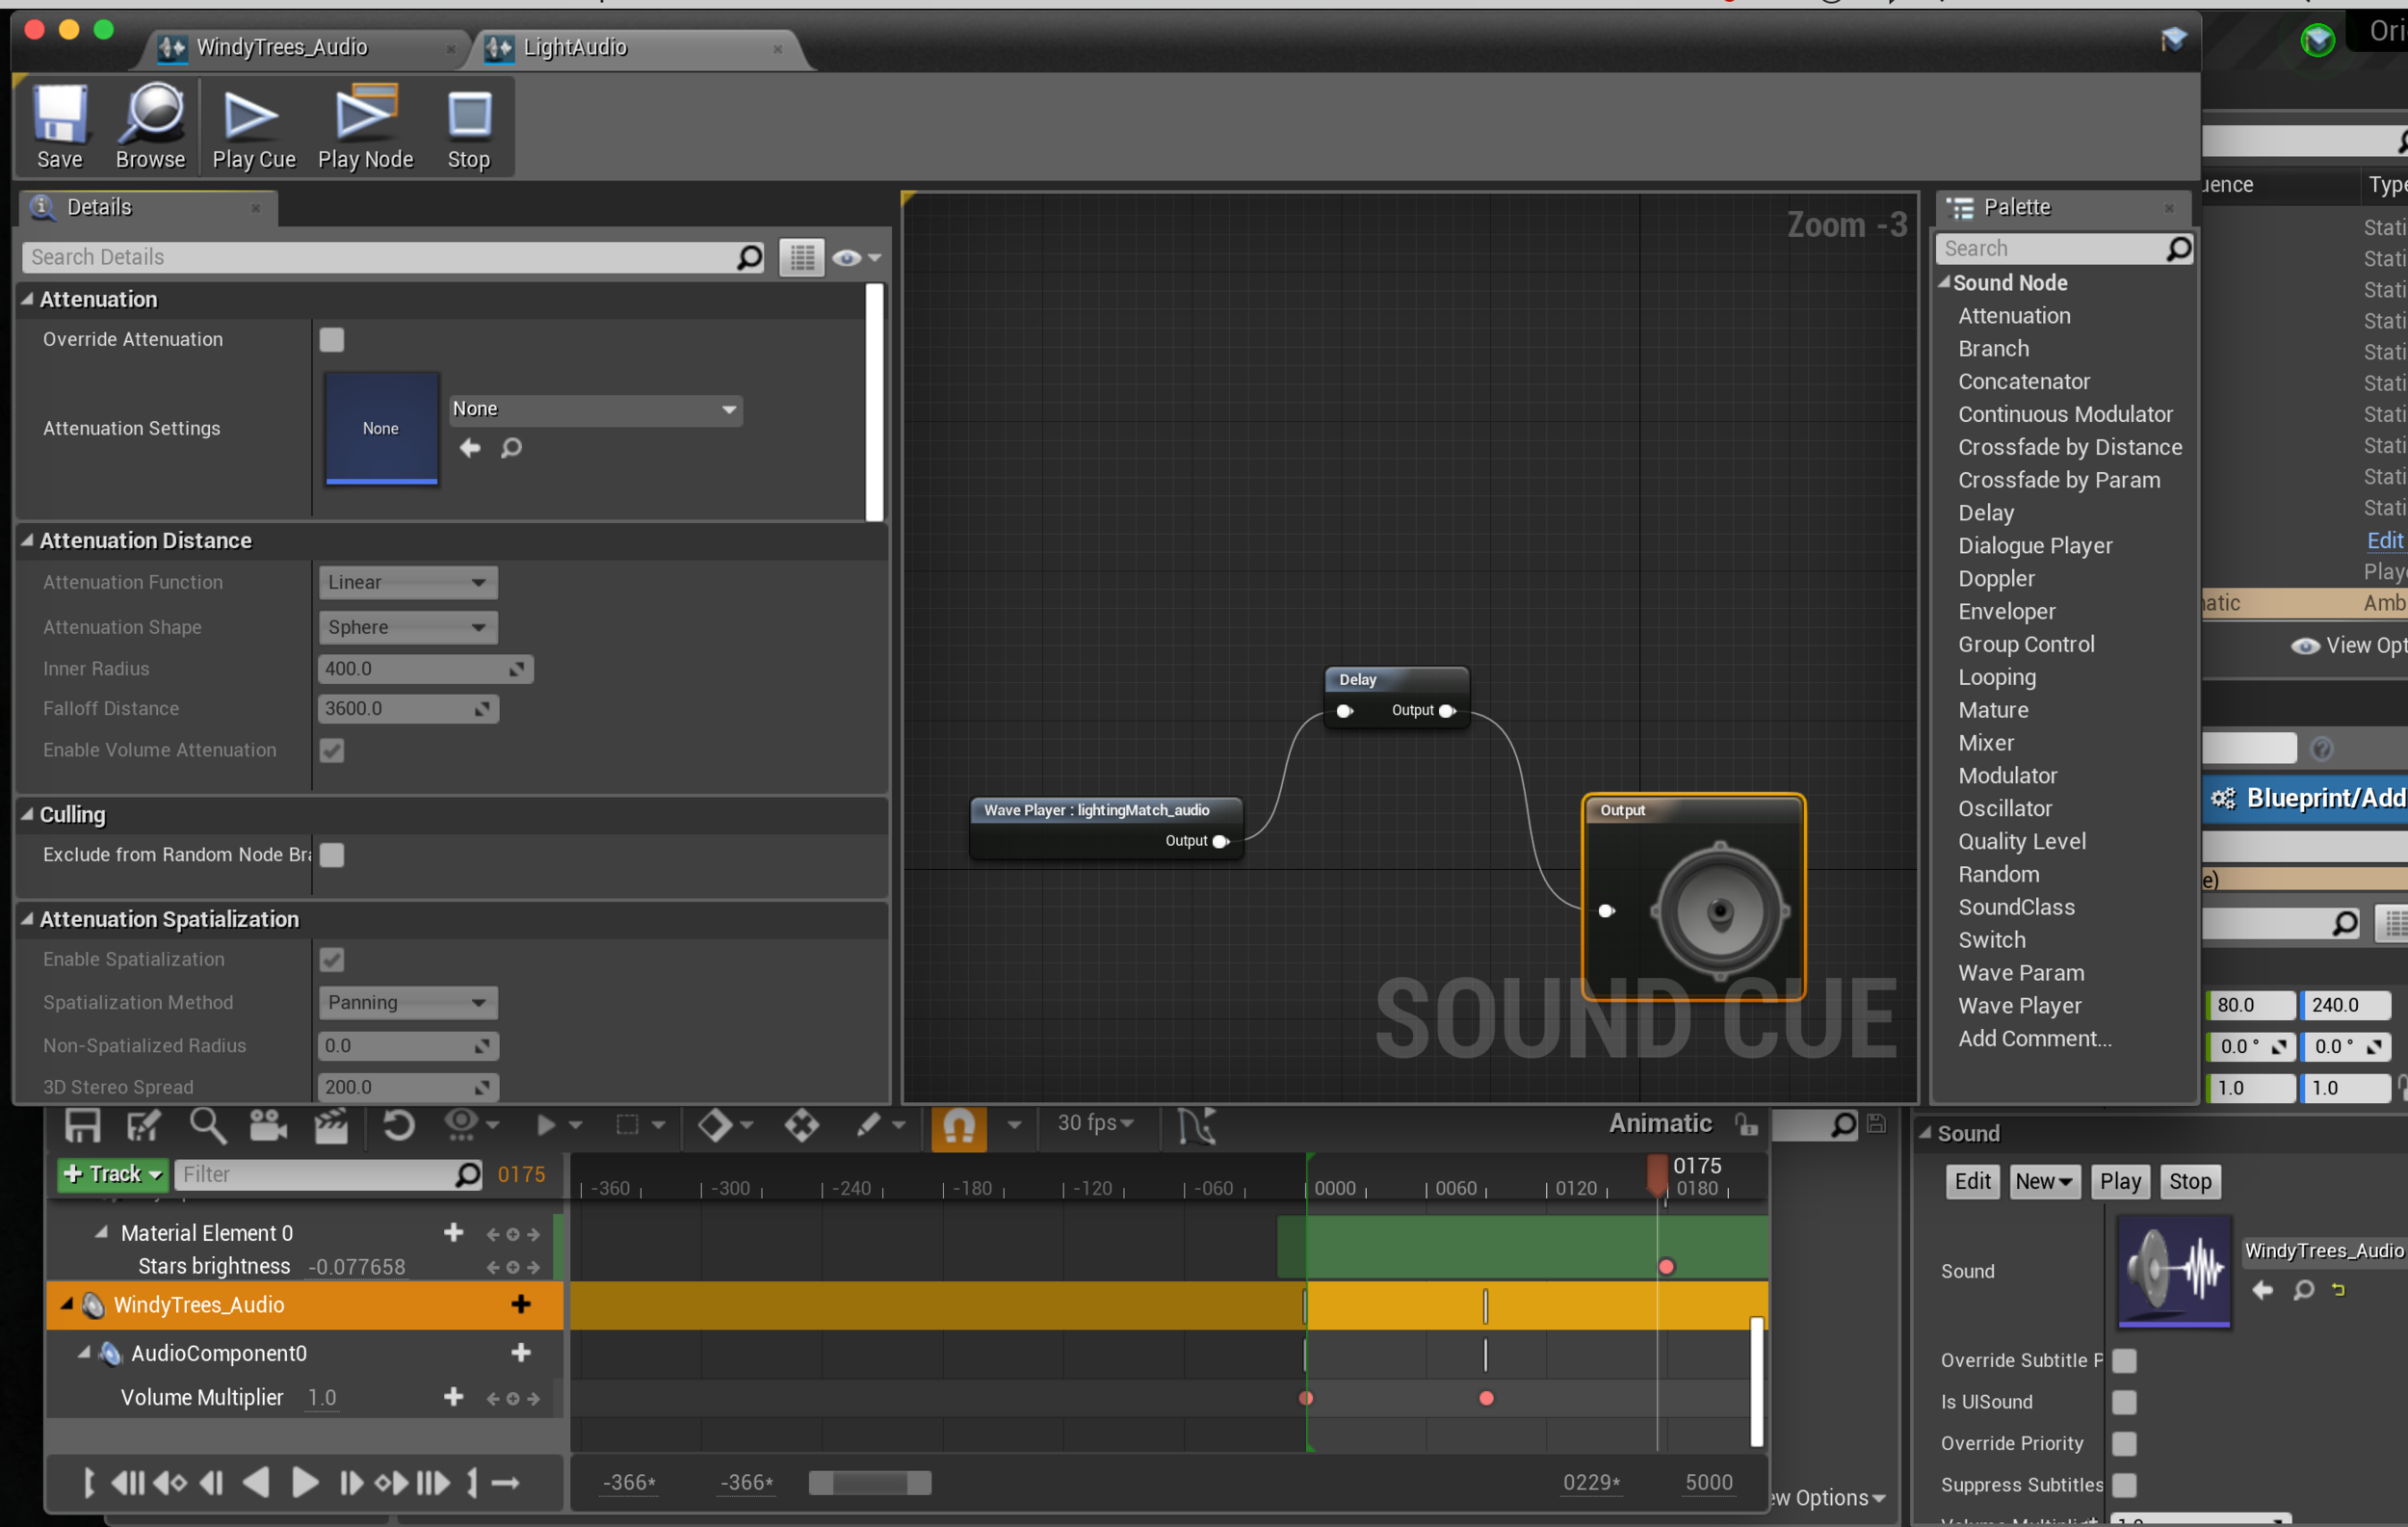
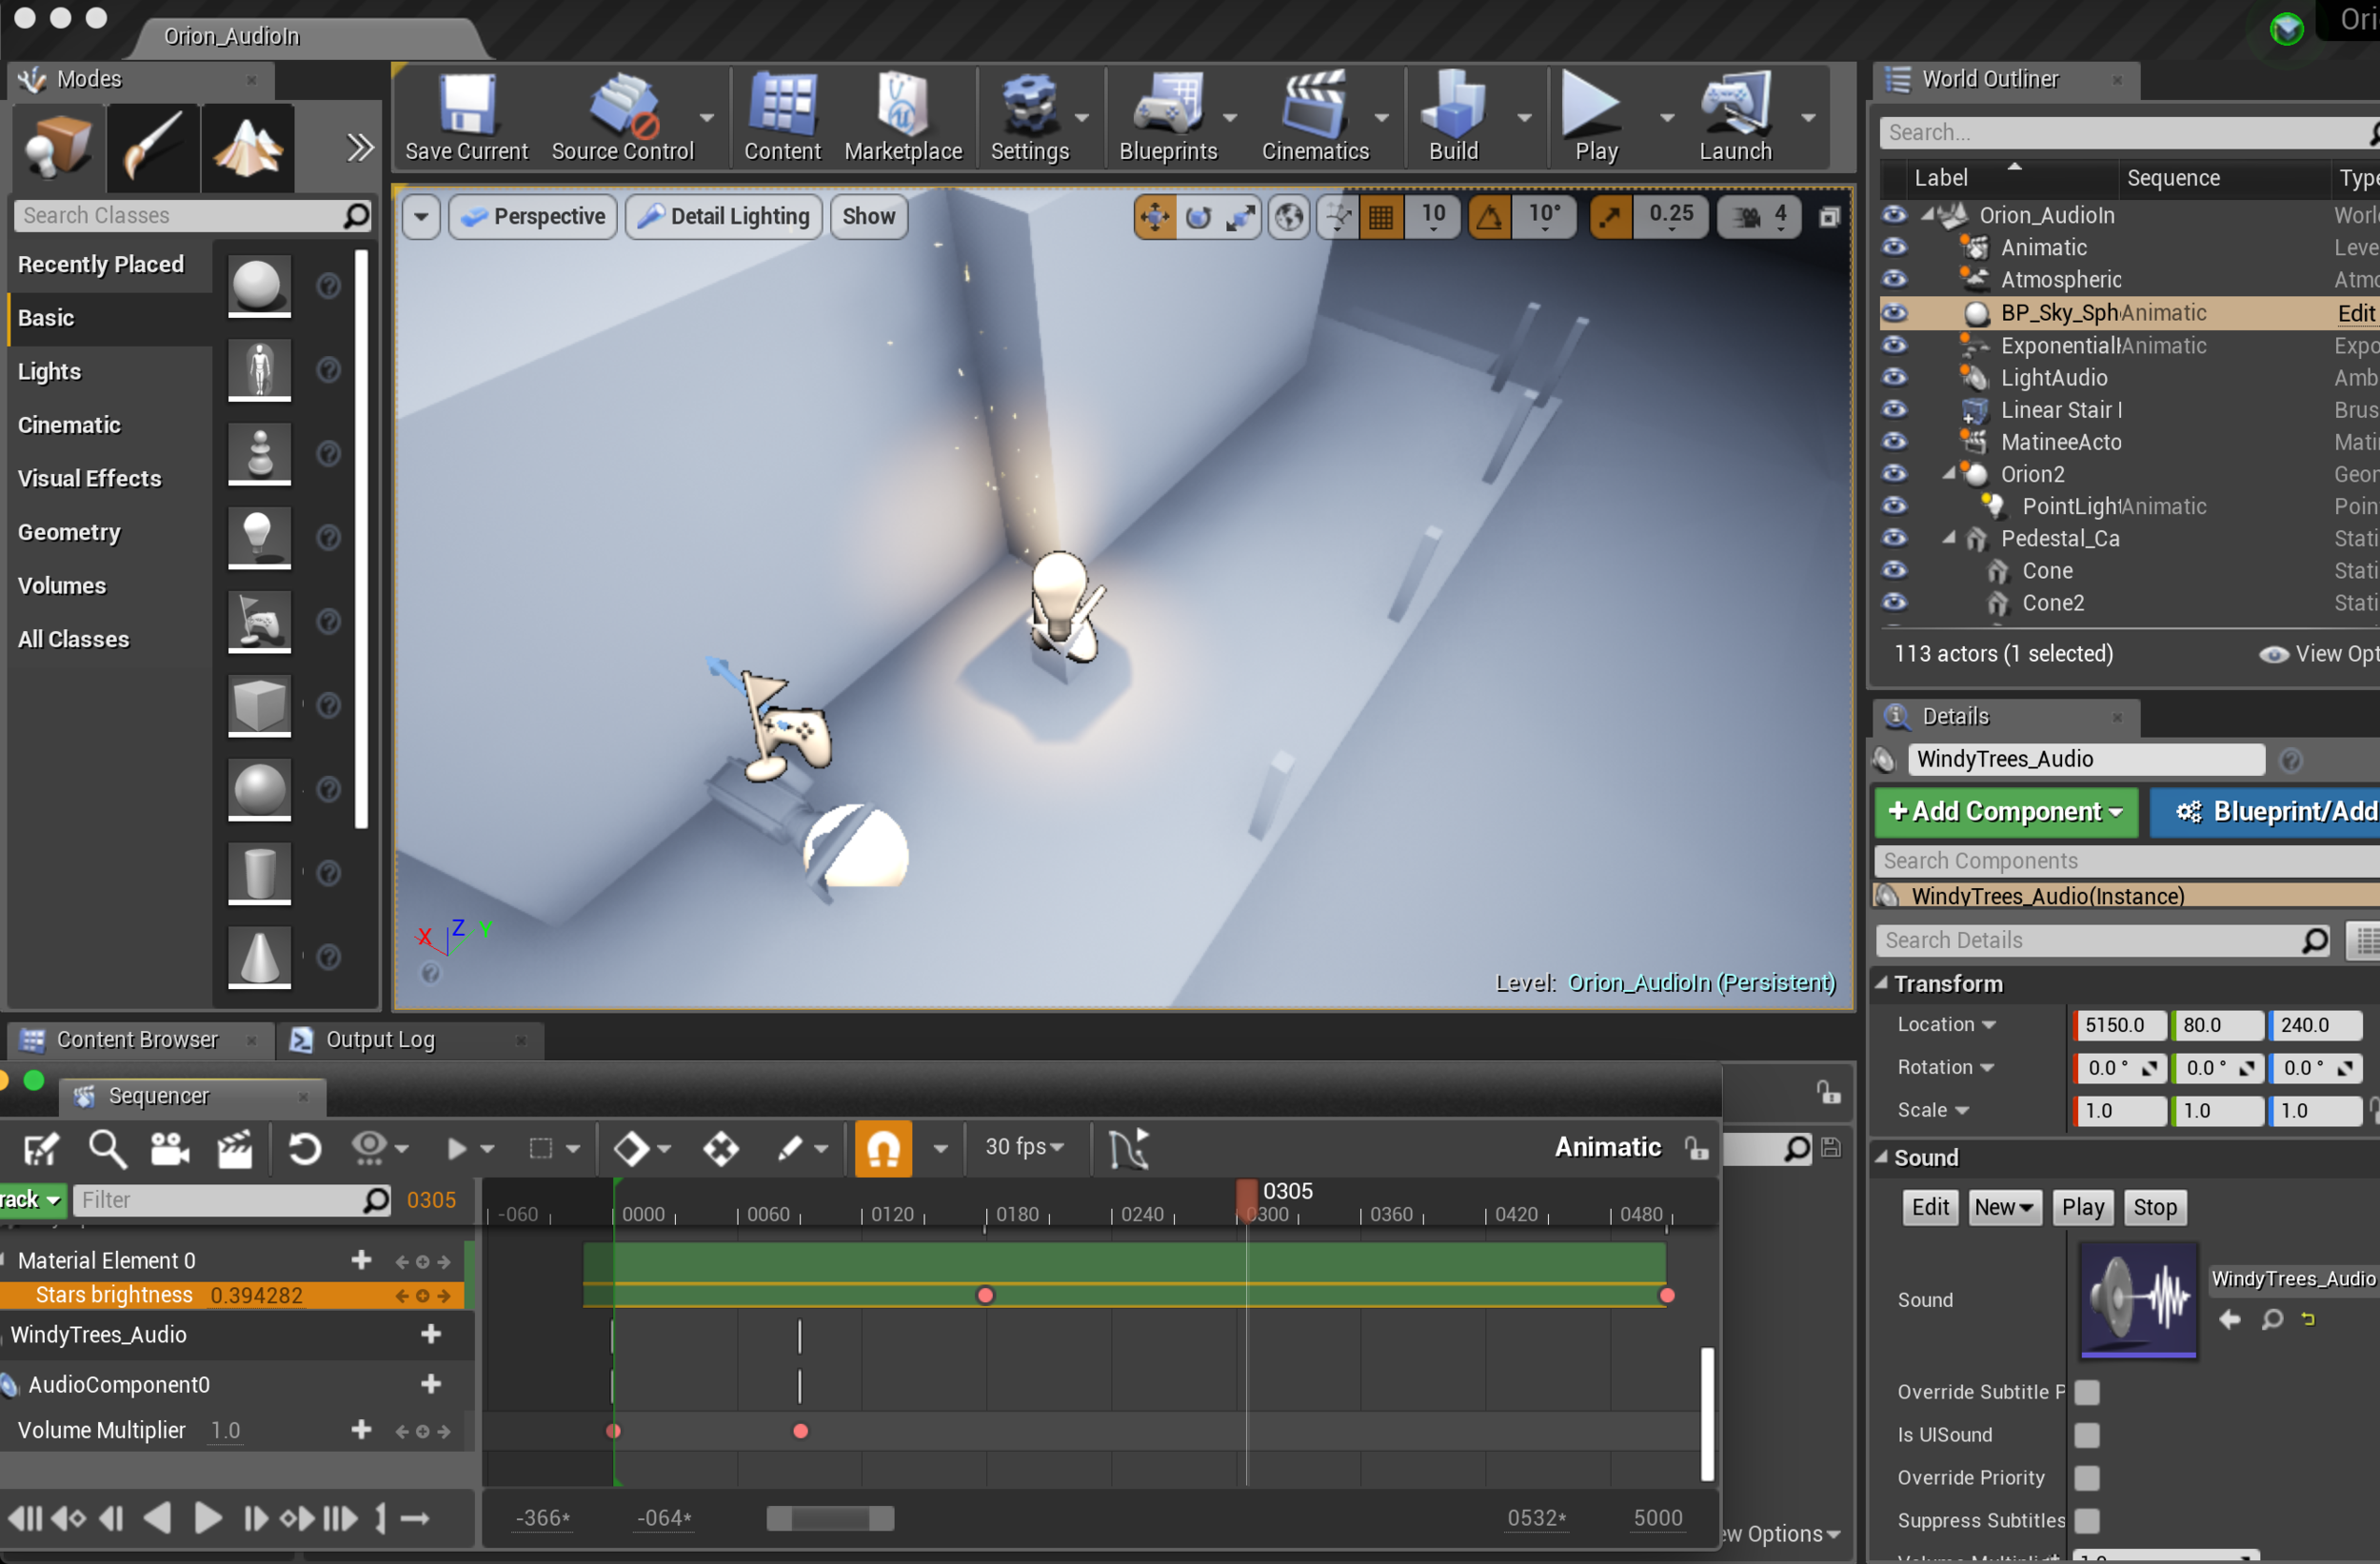
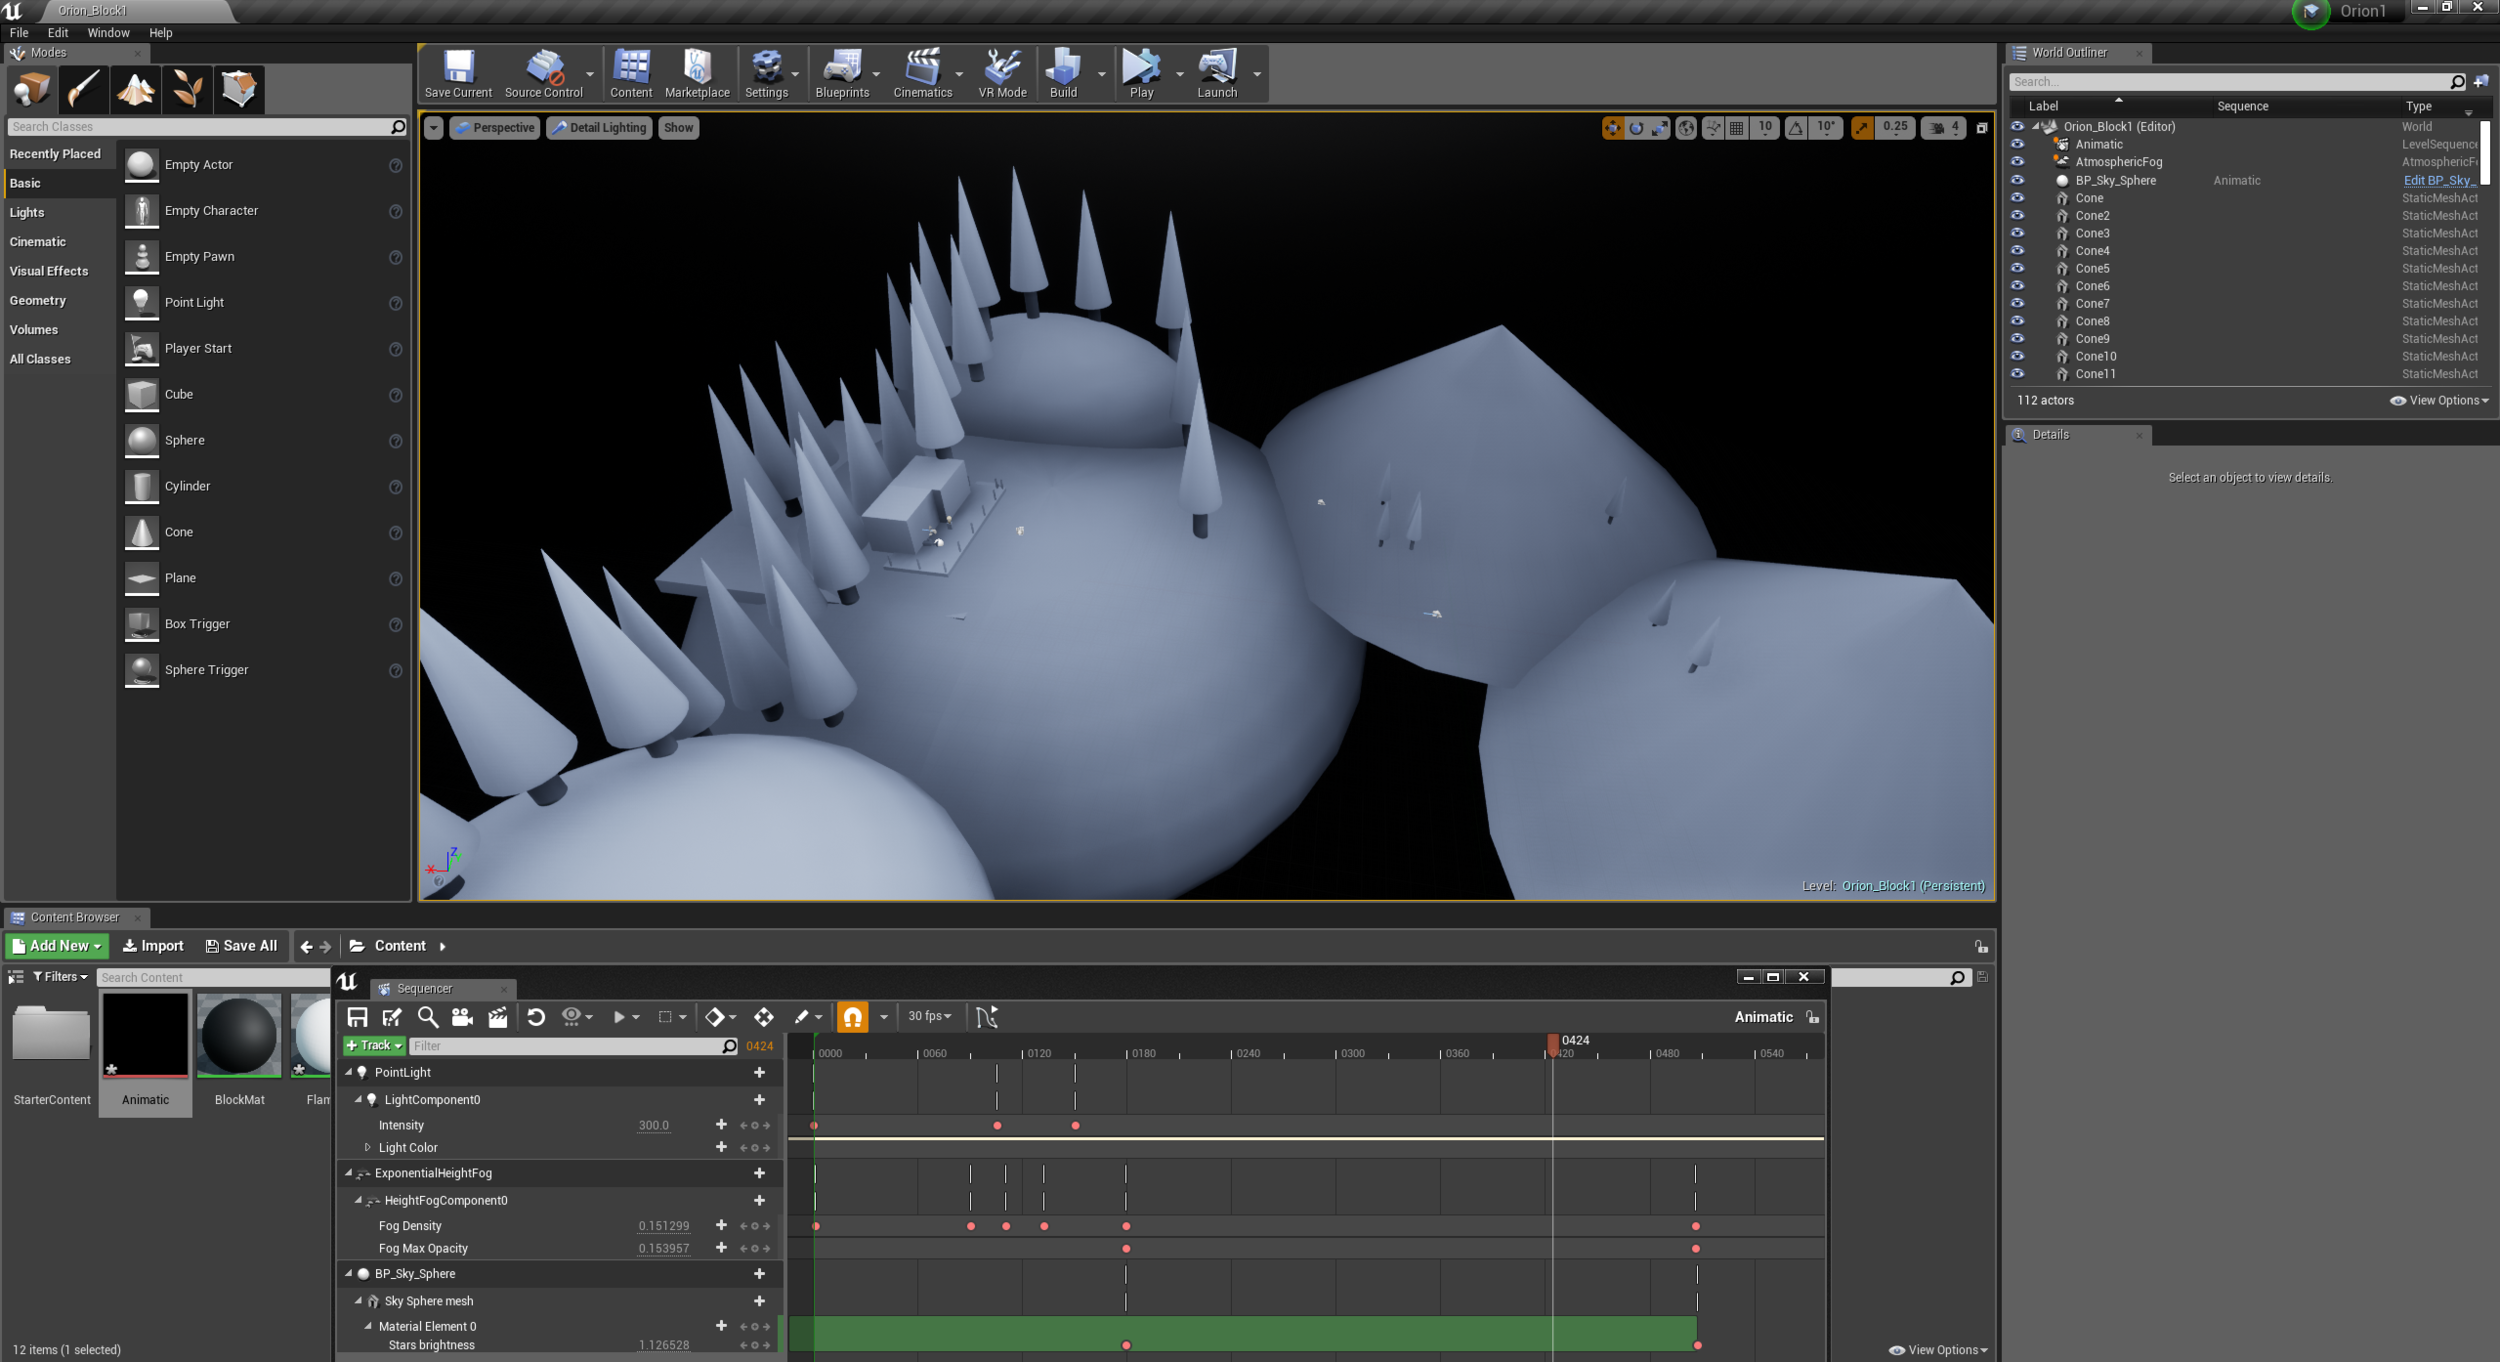
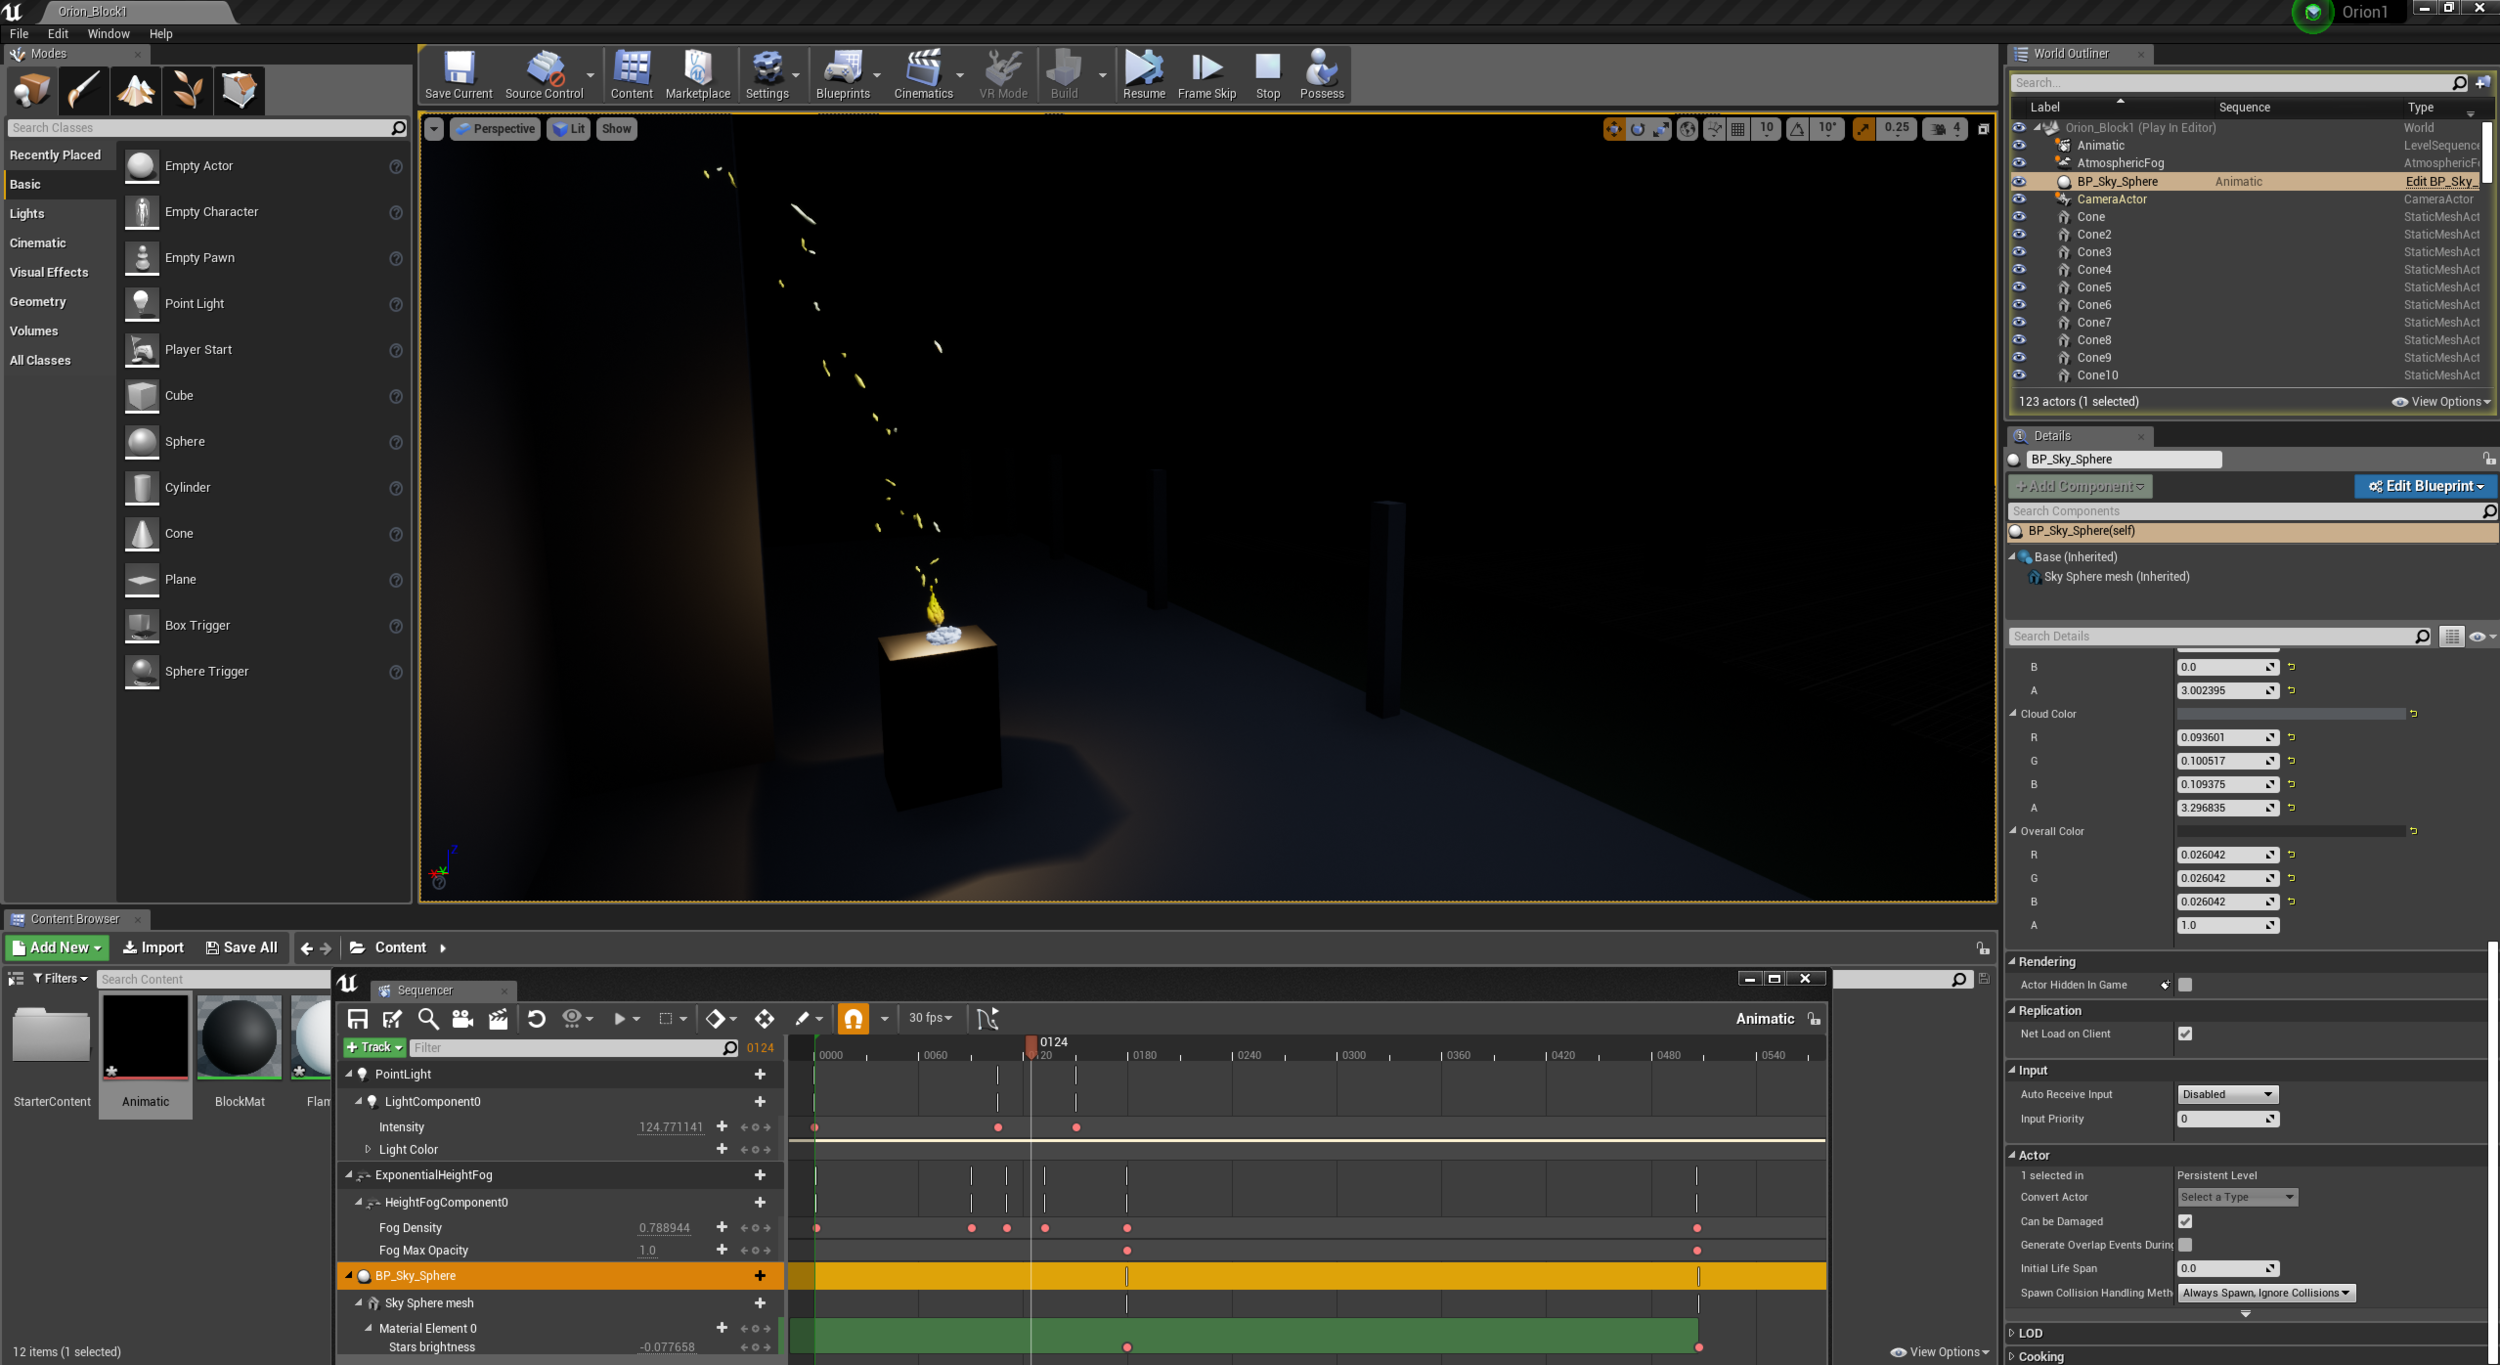
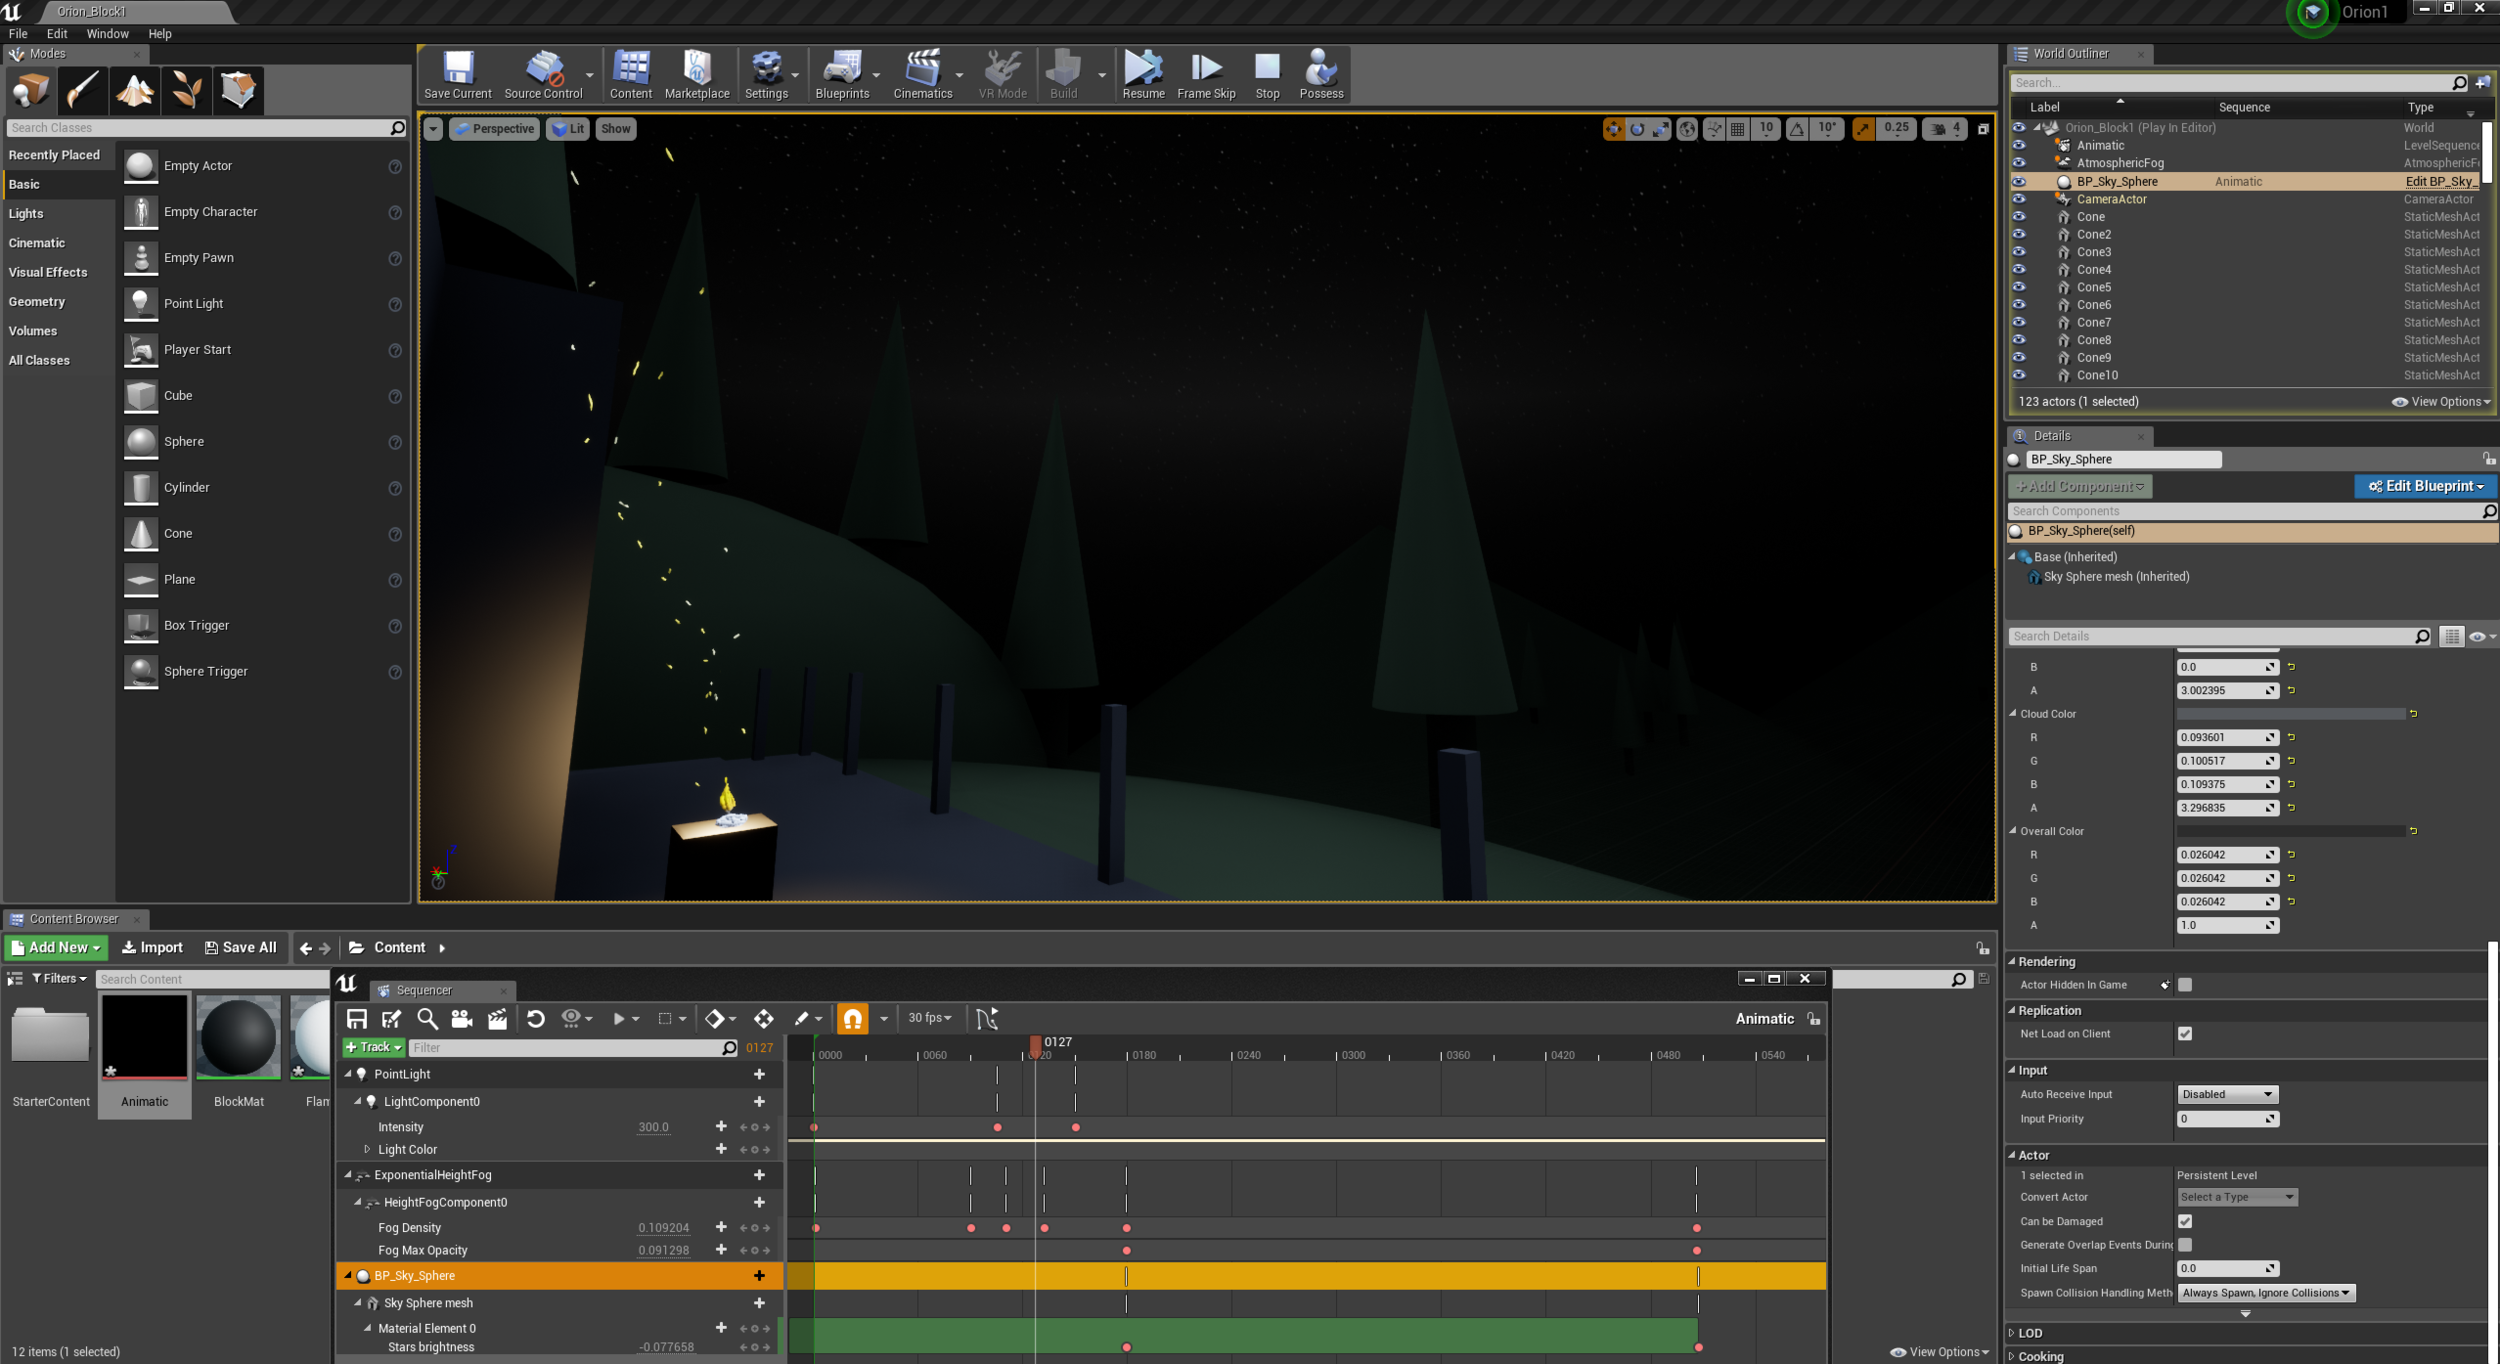
While users were in the experience, I was watching the scene editor (as pictured above) to get an idea of where people were looking and changes that needed to be made for easier gaze detection. Blue lines in the scene above indicate where the ray is being cast from the user camera. When the line turns yellow, the user is making contact with the teleport point.

After watching a few users go through, I think I experienced a case of “designer blindness”, where after working on an experience for a certain amount of time you get so proficient at moving through it that you miss some potential user issues. I was really surprised at how much people tend to move their heads in VR! The teleport points require you to hit the collider for 3 seconds before activating, and for most people they would only manage to make it for two before their head twitched and the count restarted. From this, I imagine making the colliders larger would help. The further they are away, the more difficult it is to activate. Users would tell me “I’m looking right at it!” when really the ray was hitting the floor just below the trigger point. The light cue was somewhat helpful, but I think the user needs more than that to figure out where their gaze is actually falling. I think adding a light reticle to the camera will help this issue, and I’ll be testing it in the next week just to see how it feels. I’m concerned that the reticle is going to add a layer of separation between the user and the scene, reminding them again of the technology and breaking flow/immersion.

I know this is just a prototyped proof of concept, but the teleporting points are not especially obvious in the scene and their function is not clear from the start. Tori and I are still required to brief the user before the experience begins, reminding them to look around, to stand up, and that the points are even there. We’ve been planning on using Lucille Bridges’ character as a means of progression, walking ahead and calling our attention with audio cues, but even then I’m not sure how to transfer these attributes of “focus” and indication of action to a human figure. Or even if it’s required- maybe a glance at Lucille Bridges’ face is enough to move the user forward. This is a point of experimentation for Tori and myself beyond the current prototype.

What’s Next

Overall, I think this is a good foundation to build from. Now that I have an understanding of user action and progression, I feel I can start layering smaller interactions from the user and mob into the scene. This phase is due next week - I’ll save my thoughts on the summer for then. But in the immediate future, Phase 2 requires troubleshooting and adjustment of all the colliders in the scene. I will also be testing some reactions to proximity and gaze with one or two of the crowd members. Ideally, a user will look someone in the eyes and cause an insult to be hurled or an aggressive motion to occur. To aid in user gaze accuracy, I will add a reticle to the camera to see what that effect is like.

OUTSIDE RESEARCH

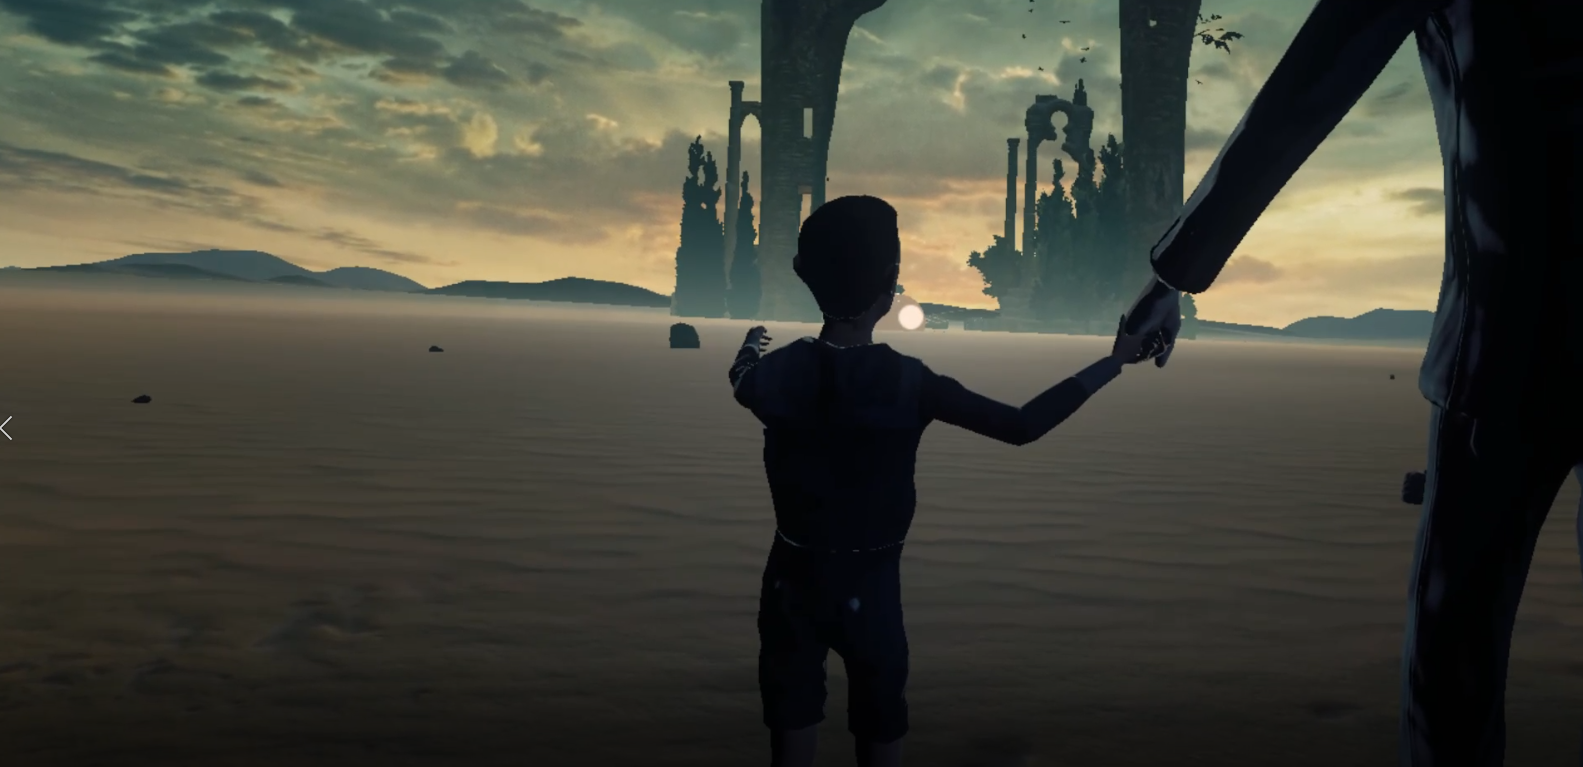
Research this week included three experiences on the Oculus Rift: Dreams of Dali, The Night Cafe, and Phone of the Wind. The descriptions in all three really drew me to them, as they’re meant to be contemplative experiences requiring you to navigate space and uncover the narrative (or lack there-of).

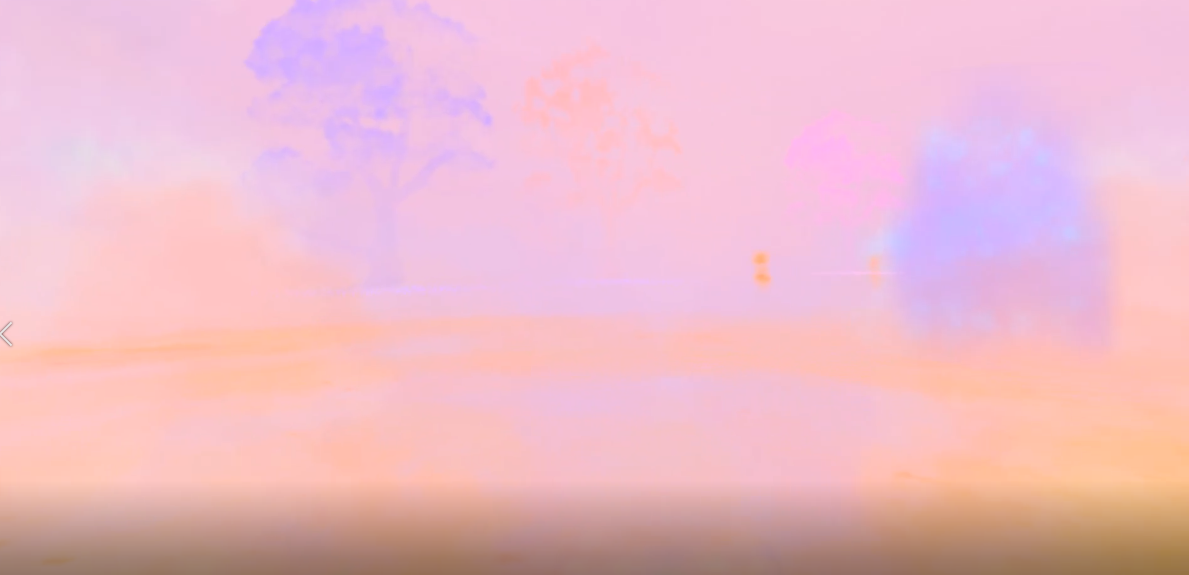
I started with Dreams of Dali. This experience was on display at The Dali Museum in St. Petersburg, FL for over two years, and explores Dali’s painting “Archaeological Reminiscence of Millet’s ‘Angelus’”. Looking at their page about this experience, I noticed that the experience is available in multiple formats for VR headsets and a “linear 360” view. This might be the first time I’ve seen that much variety available on a museum page. The VR experience was also covered by admission to the museum - nice of them, the ones I’ve done so far on-location have required additional ticket purchases.

“Archaeological Reminiscence of Millet’s ‘Angelus'“, Dali.

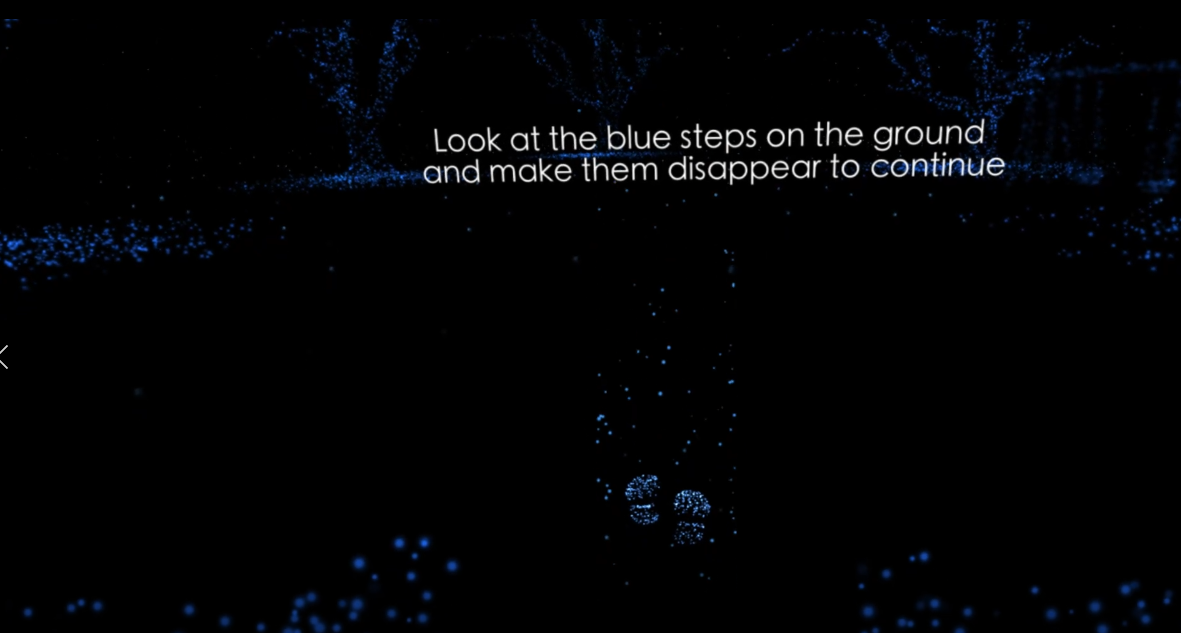
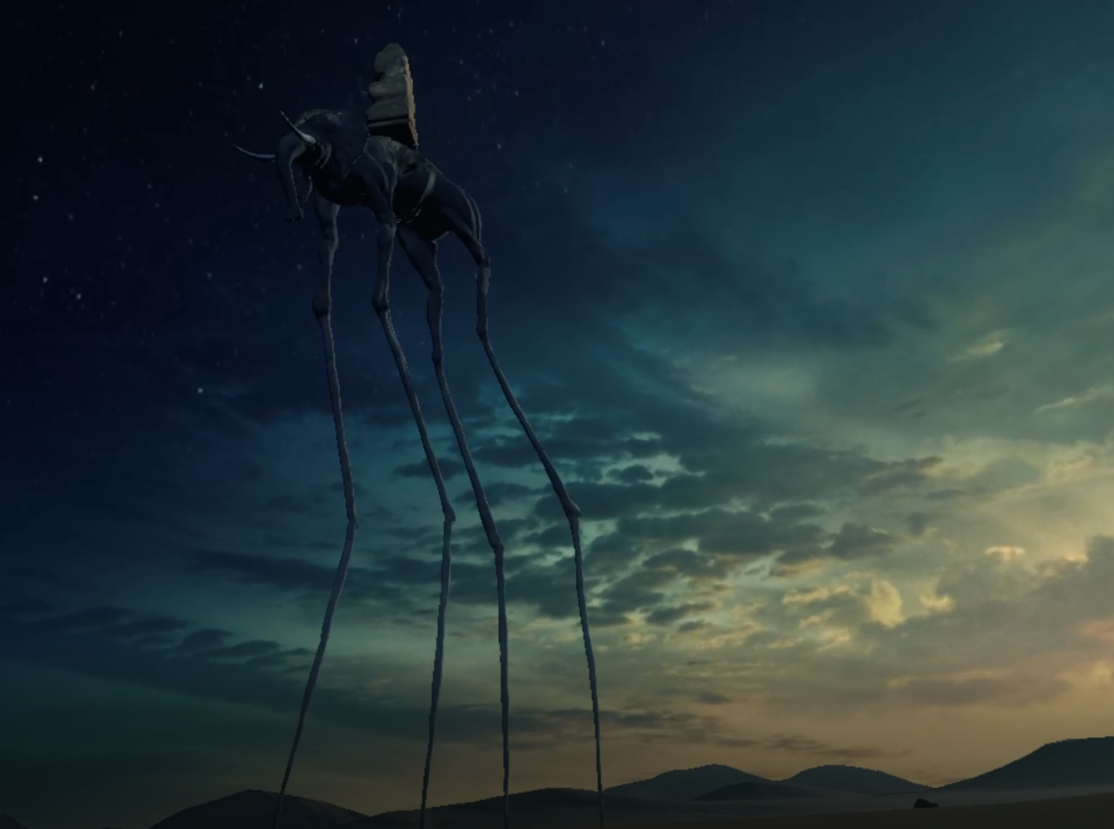
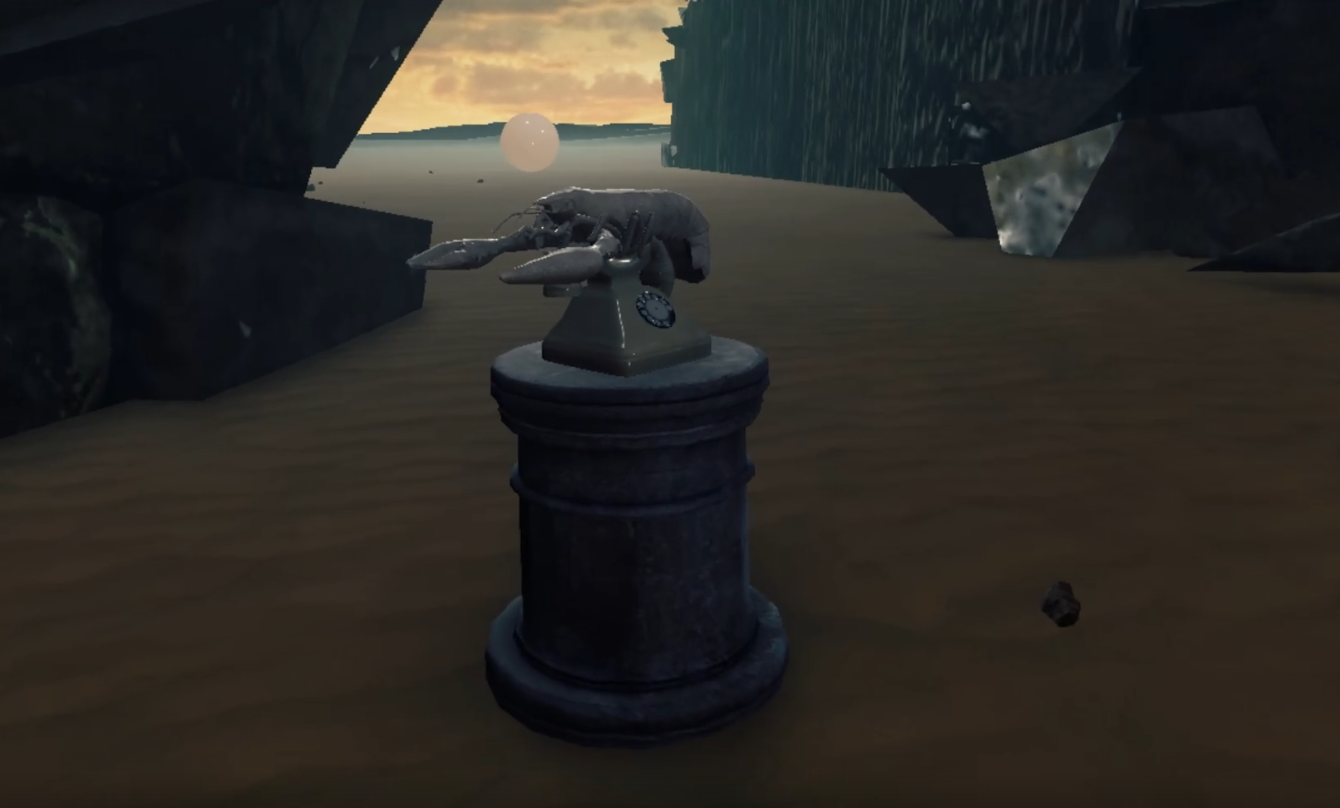
I had to laugh when the experience started up. The very first screen was instructions to stare at a glowing orb for 3 seconds to move around, with glowing orb included to begin the game. Interesting case study for the problems I was discussing in my Phase 2 project! This experience required me to move around large distances, and their inclusion of a reticle helped enormously. It only appeared when my gaze was near an orb, which left me free to explore the rest of the world without obstruction. On the actual experience, I was able to navigate in whatever order I pleased. Some orbs were only accessible from certain points, and at other points a new event was triggered. I moved out to the fringe of the desert on the other side of these structures and encountered elephants with the legs of an insect towering over me and making their way past. They continued to walk throughout the scene. Or I turned a corner and encountered a lobster sitting on top of a phone. Audio in the scene included soft rumblings or ambient effects, said to represent Dali’s potential thoughts in the scene. Few words were distinguishable to me but it really added to the dreamlike state of the place.

In the teleport actions themselves, the user actually slides through the space quickly to the given point. There’s no fade in/fade out or blink occurring. You’re able to see the ground moving below you and your destination. The only time this became an issue for me was when ascending or descending the long spiral stairs in the tower - I didn’t realize the next orb would just throw me directly up to the top. Not too dissimilar from when Saruman propels Gandalf up to the top of Isengard in Lord of the Rings: Two Towers.

Anyways. I feel that context is important in this experience. Had I been visiting the museum I would have probably had more of an appreciation for the things included in the experience. I have a very base knowledge from taking Art History in early college, but my understanding of Dali doesn’t go much further than that. As a user at home, that additional information must be sought out independently from the experience itself. I also wonder if the “linear 360 experience” is crafted to form a particular narrative or just a path that covers all of the points. I didn’t have time to go into that this time around, but I’d like to make a closer comparison in the future.

I moved on to The Night Cafe: A VR Tribute to Van Gogh, made by Borrowed Light Studios.

I’m going to have to revisit this experience, as the only way to navigate was using a console controller. Kind of odd to make that the only source of input, but until I can get that set up I’ll just give my static impressions of the first scene. The assets and animations are very beautiful, and the style of the room definitely matches. In the spaces where they had to guess at detail, such as the wall and door behind me, the makers said they took reference from other paintings and were able to match his style pretty well. The intro leading up to this sequence was an image of The Night Cafe painting before fading into the actual scene.

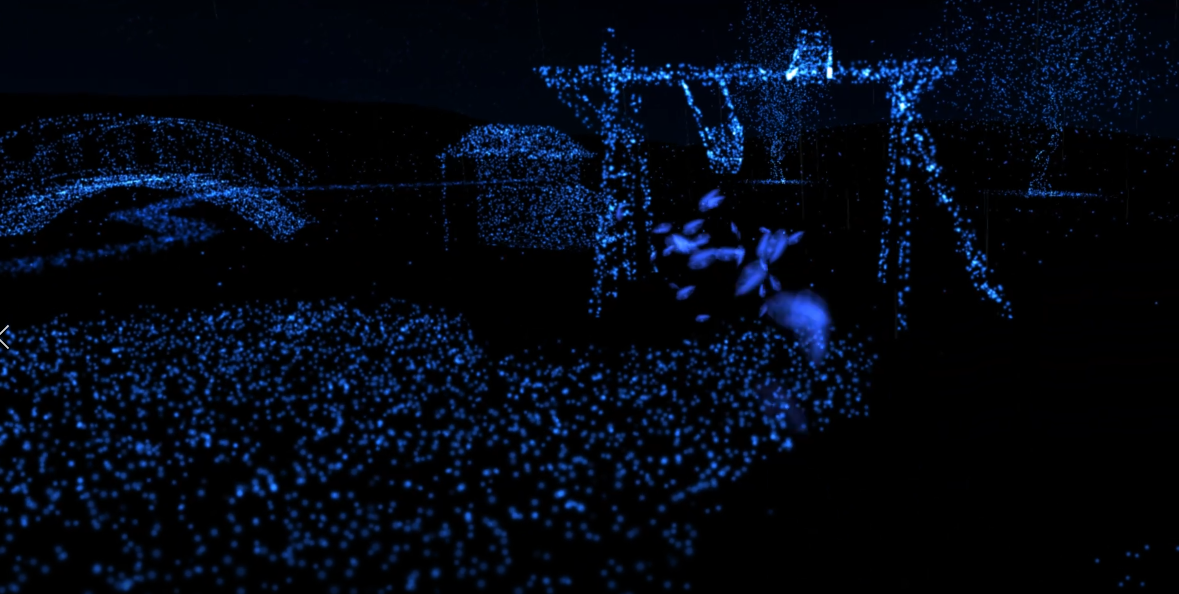
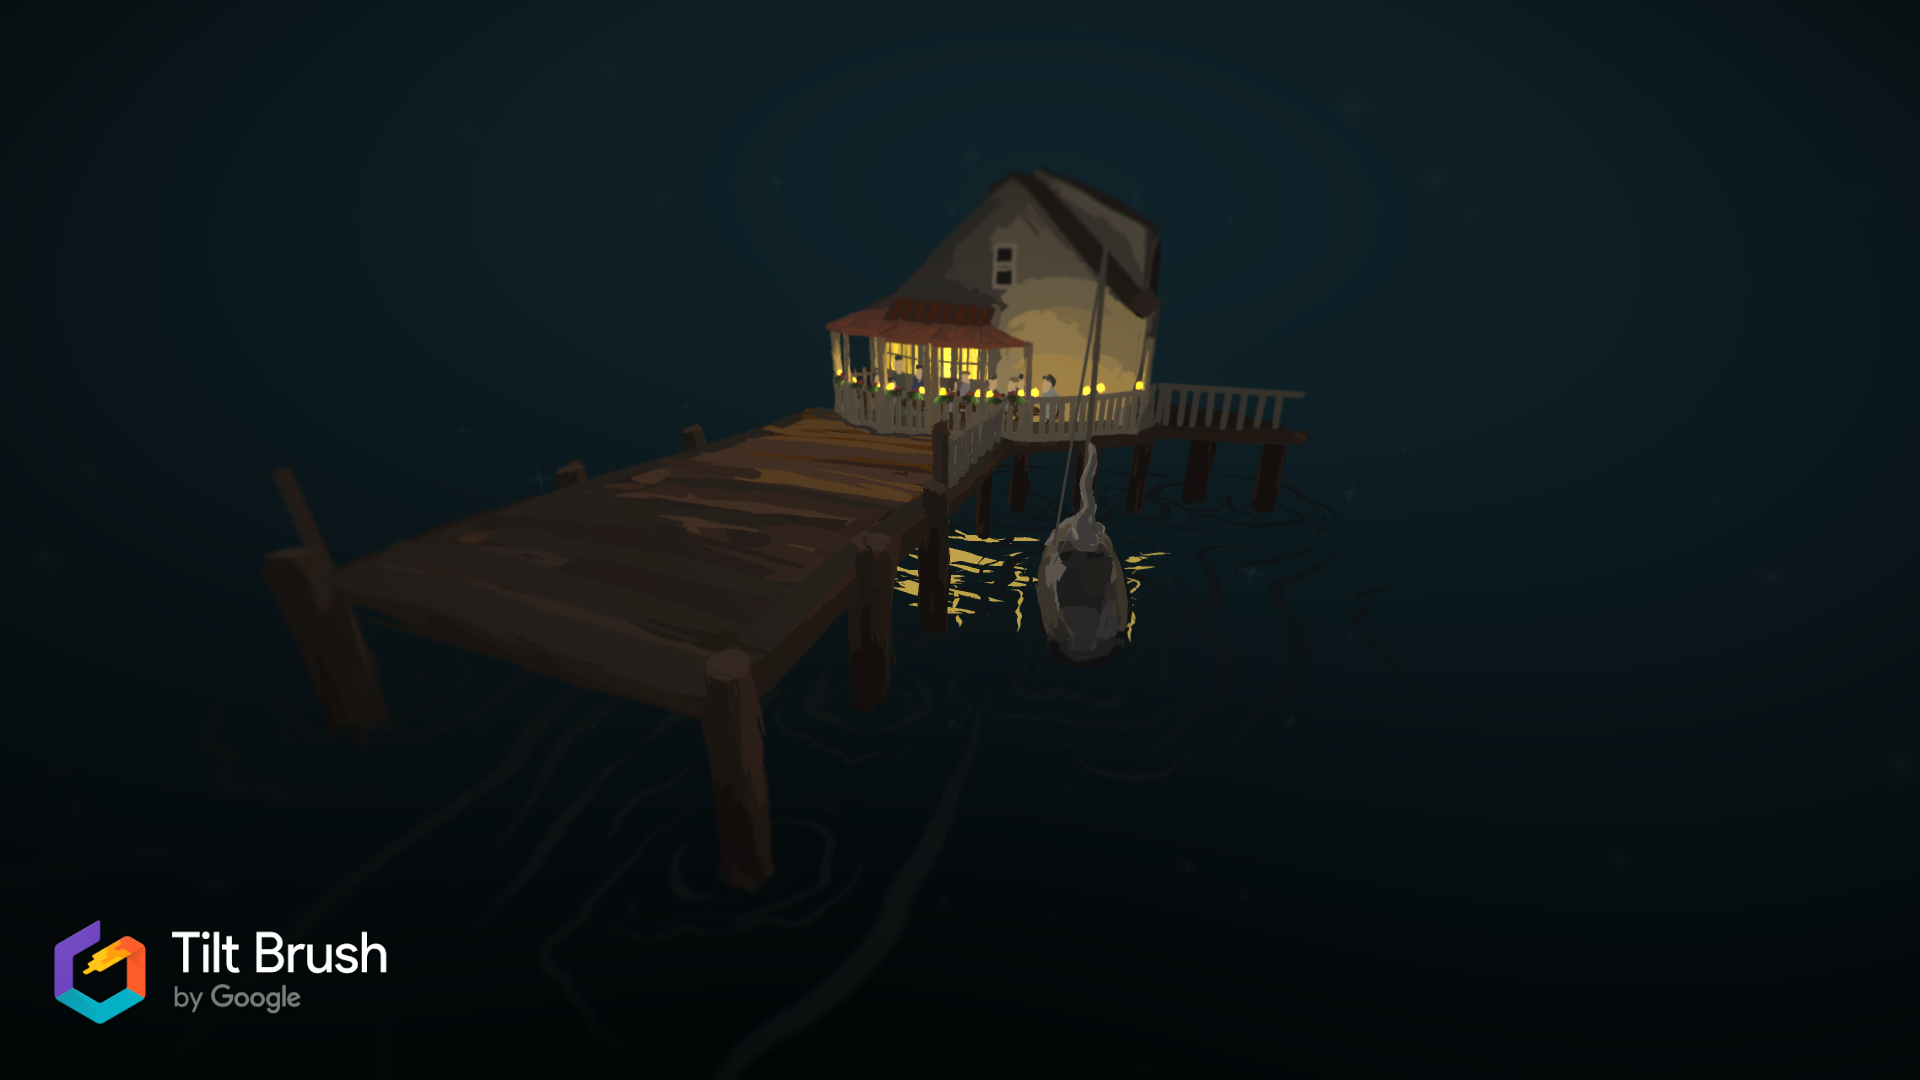
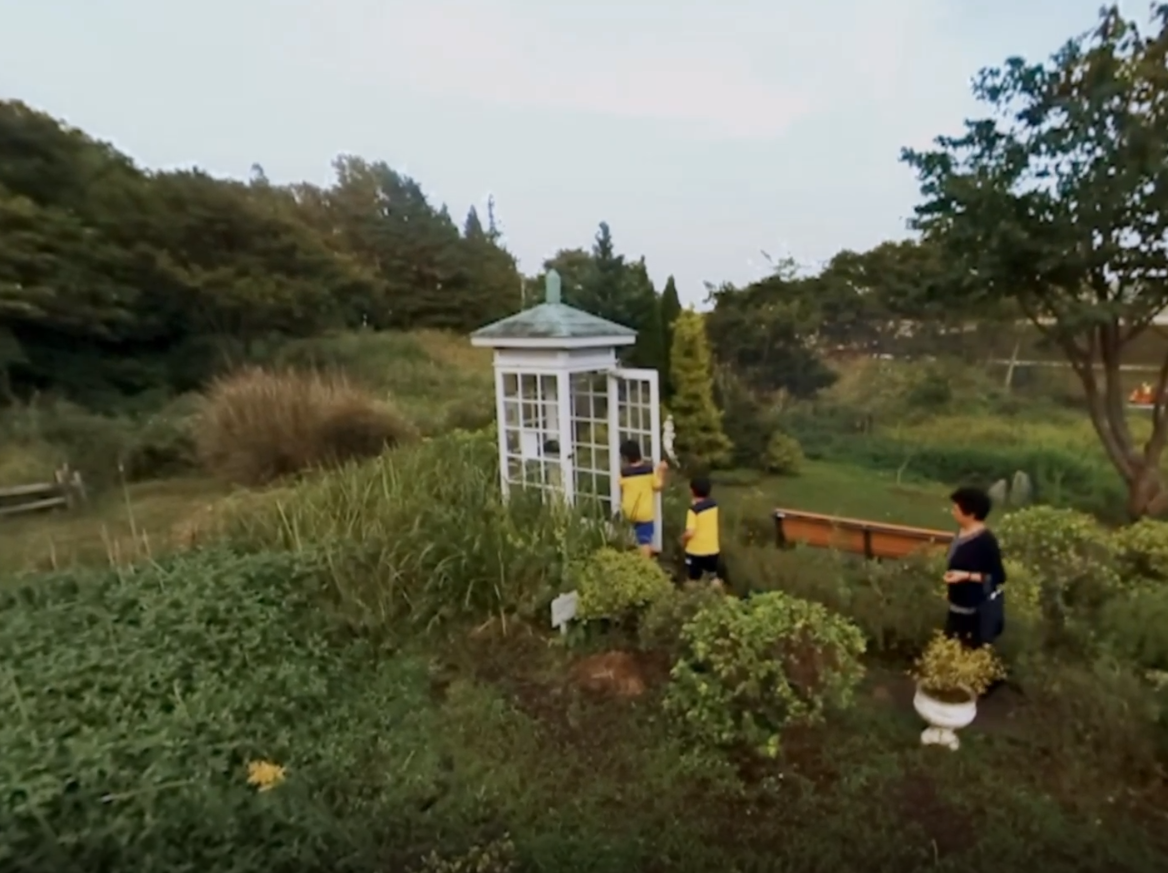
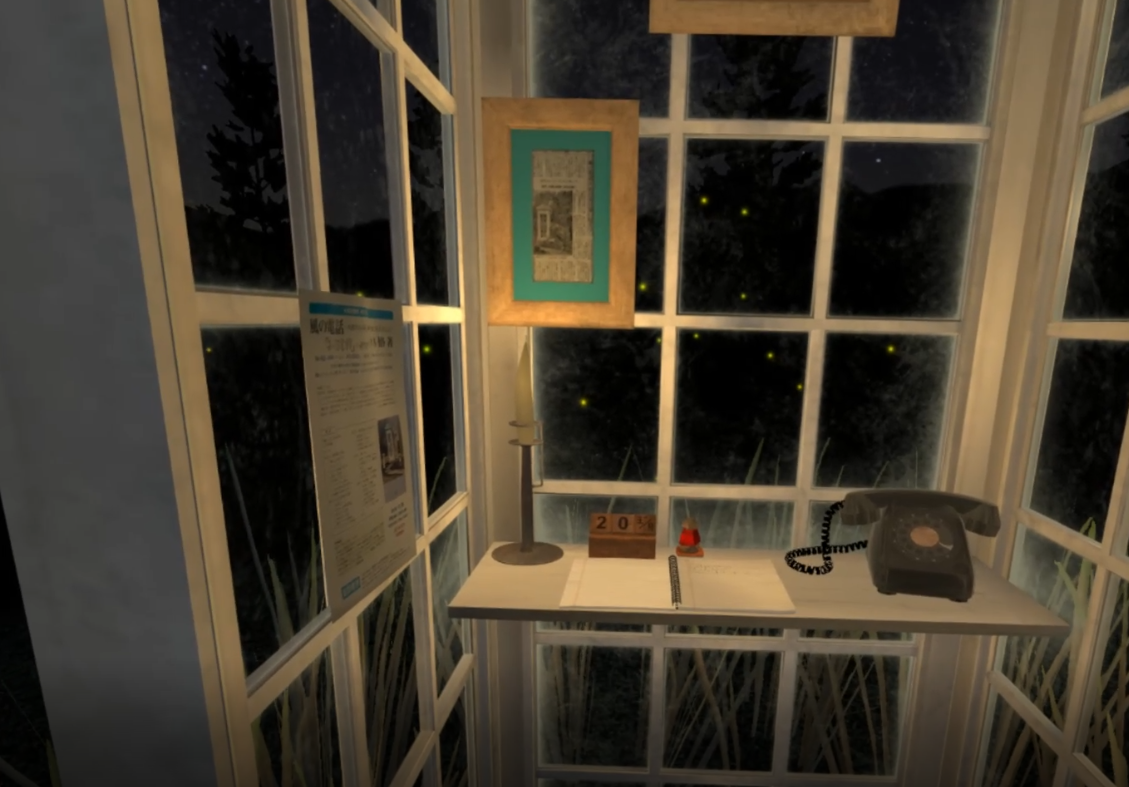
The last experience was Phone of the Wind, an interactive film based on a phone booth in Japan used to connect and speak to departed loved ones.

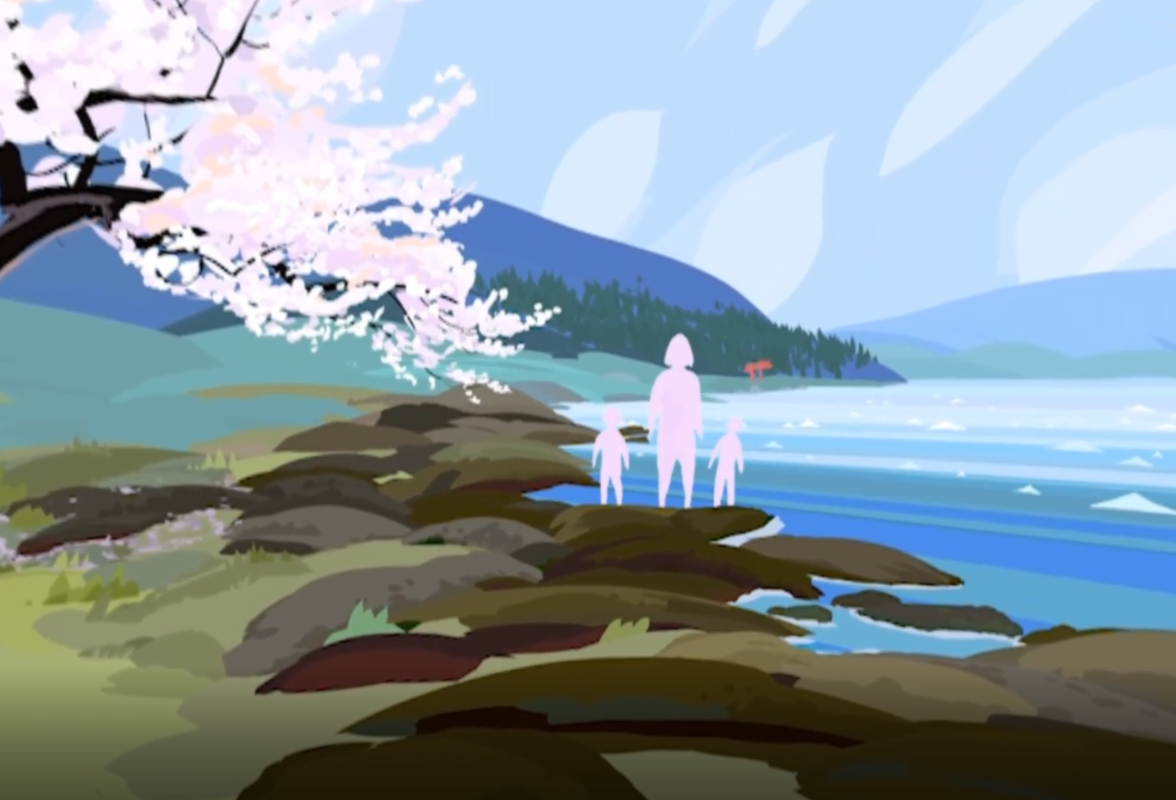
This phone booth is well documented, actually sitting in the town of Otsuchi, Japan, and built as a way for people to grieve and heal after the 2011 earthquake and tsunami. In the experience, you listen to three people talking to their loved ones in the booth. I was really surprised by the types of visual content included; users begin the experience from the perspective of a drone actually flying over the booth. As each story begins, the world transforms into an animated scene representing what is being said. At the beginning and end of the experience, the world is made of 3D assets. I’m not sure the transition was smooth due to them being full world transformations, but it definitely added variety and personality to each story.

The interactive aspect of this film comes in at the very end. The user is given the option to enter the booth themselves and leave a message for a loved one. I really love that this was part of the experience, and I can see some similarities between this and Where Thoughts Go. Users can choose to skip though and move on or to take a moment to privately reflect. The few instances of movement in here with the flying drone or the user entering the telephone box is forced, there is little control over your location in the scene.

It was difficult to find any information about this experience beyond what’s given on the Oculus store - the developer’s website is now private. But snooping around the reviews was… its own experience. Some users loved it and were crying, others thought it was stupid and shouldn’t be allowed on the store due to it not being “fun”. From their comments I gather that many, like me, had no idea this was a real place with its own history and meaning to a community, not just a filmmaker’s idea. While I don’t think that information is necessary for the purpose of the experience, I wonder why this information isn’t more readily given and attached to real life events. Knowing the history helped ground the story for me.

CONCLUSIONS

These were very different interpretations of real objects or places. I think seeing how some of the gaps in information were filled in with reference, though for the two I was able to fully experience I think the outside context and experience was not fully filled in for the user. I feel that I needed that additional information to truly enjoy and understand the content to its fullest extent. I think designers are taking these experiences that were initially in exhibitions and putting them on the Oculus or Steam stores, but not accounting for that missing information and how that experience outside of the headset is part of the overall design process. These outside research experiences this week have really made these points clear to me, and have been helpful in clarifying my thoughts about how to organize the content outside of VR in my framework.


04/13/19: Gazing into Phase 2

Phase 2 Updates

Progress has been made! I’ve been focusing on getting gaze detection into the scenes I put together for the demos last week, and I think I finally have some momentum going. Initially my schedule for Phase 2 was to start small- activate a button, make something happen by looking at it. I saw a few scripts included with the SteamVR SDK, but there’s very little documentation on their actual usage. I even looked through the Google SDK for Daydream and the Oculus SDK, but those scripts were not especially helpful.

So I just built it myself. I have a general understanding of the process: write a script sending a ray from the camera to collide with objects, isolate the objects to their own layer, and then have something happen once that collision occurs. In this case, the test was to change a cube from blue to red when looking at it. Initial tests had the raycast changing the color of a cube when pointing at the ground as well as the cube.

Raycast test in Unity - cube still changes color even when looking away from it.

With some research and experimentation, I found out the issue was in my definition of the mask. I want the raycast to only affect the objects under this particular layer, and I wasn’t representing that layer correctly in the script. Everything worked properly after fixing this line, and I was able to move on.

Successful raycast test, with fixed script shown.

This detection is great, and I can definitely use that to trigger reaction animations in the mob characters within our scene. But the next step was using it as a means of transport through the scene. I made another cube and expanded the script to include a second layer specifically for teleportation, wrote a function that would change the color so I knew I was looking at it, and delayed the teleport by a variable time (3 seconds) so it became an intentional action. This script is flexible enough to identify different objects and teleport points, and gain information about those spaces. It also includes a distance cap so that objects beyond a certain point (5 units in the test scene) cannot be activated.

Gaze Teleport Test: 4/13/19.

Next Steps

Troubleshooting. I did notice that the precision of the gaze is difficult in the headset. I suspect that scaling up the colliders to be larger than the objects themselves will make it much easier to move from place to place. I also saw a little jump without a fade that happened when doing the playtest in the above video — I have yet to recreate this, but I’m going to keep an eye out for it.

The next step for this device, once properly adjusted in this test scene, is to bring it into Scene 01 of Tori and I’s project. I have a few adjustments to make there before another demo on Tuesday, but I’d like to have this in as a means of locomotion before then. After that, I’ll be using this to trigger additional animations or environmental effects to see what they add to the scene, and experiment with placement of these triggers temporally and spatially.

OUTSIDE RESEARCH

This week’s outside research was inspired by my Intro to Cognitive Science course. One of my required response papers was based on an article titled “The Mind’s Eye” by Oliver Sacks, published July 2003 in The New Yorker. Sacks, a neurologist, writes about the varying experiences and adaptations of the blind to the loss of vision from the physical world based on personal accounts. He begins with John Hull, who experienced deteriorating vision loss from the age of 13. Hull eventually progressed to total blindness by age forty-eight, and along the way kept journals and audio recordings discussing the nature of his condition. Not long after losing visual input, Hull experienced what he calls “deep blindness”, a complete loss of mental imagery where even the concept of seeing had disappeared. To account for the loss of visual input, the brain (in all of its wonderful weird plasticity) heightened other senses. Sound connected him deeply with nature and the world around him, experiencing true joy and even producing a landscape of its own for him.

Sacks realized that Hull’s experience was not universal. Other accounts are discussed with people who can utilize a mental landscape to solve problems, produce powerful mental scenes, and manipulate this “inner canvas”. He questions whether the ability to consciously construct mental imagery is even all that important, eventually concluding that heightened sensitivity resulting from blindness is just another reproduction of reality, one that is not the result of one sense but an intertwined collaboration of all the senses from all levels of consciousness.

I mention this because I found “Notes on Blindness” on the Oculus store, a VR experience based on the audio recordings made by John Hull.

I have to say, the trailer really doesn’t do it justice.

The entire experience is based on Hull’s strong connection to natural audio. I went through this experience seated, but standing would work just as well. There are six scenes or chapters to play, each themed on a particular point: “How does it feel to be blind”, “On Panic”, “Cognition is Beautiful”. In the initial scene, you appear in a landscape built of tiny dots. I could make out surfaces and the shapes of trees, but overall you are alone. As the audio plays, Hull describes the individual sounds of the park and they build into this thriving scene - with the point that objects only appear if they are making some form of ambient sound.

Since writing this article, Sacks has published a book under the same name discussing broader sensory losses such as facial recognition or reading.

Screenshot from Scene 01: “How does it feel to be blind” of Notes on Blindness.

While the vast majority of this experience is observational, there are points where the user is required to interact with the scene. In one scene, I am given control of the wind to blow and reveal trees and a creaky swing set at a park. In another, I am required to gaze at highlighted footsteps in order to move forward and given a cane in one hand to tap on the ground, illuminating the immediate ground below me. The designers made smart choices with where they implemented these methods - gazing at the footsteps and the cane occur in a scene related to panic and anxiety, one where I as a user feel useless despite being given an action. In the wind, it emphasized the point of the revealing power of nature. All along the way, Hull narrates his feelings about these sounds and how they give him power where sighted people may disregard or even fear them.

The sound design throughout is phenomenal. And in the scene about panic, I absolutely felt it. The sounds that had previously signified a release and peacefulness turned against me and it became a hostile unidentifiable world with unorganized structure and an intense color switch. The visuals emphasized a different kind of seeing, but were still stunning to look at and representative of the descriptions being given. Despite the world being visually beautiful, the sound always was clearly the priority and the emphasis on cognition.

I did have a VR game title that would give another perspective though. Where Notes on Blindness functioned as a storytelling experience, the game Blind utilizes these interactions as game mechanics in a psychological thriller. The main character awakes without knowing where she is and missing her sight, requiring the use of echolocation to visualize the world around her. I thought this shift of focus and mechanic would make for an interesting comparison.

In all honestly, I only played the first 20 minutes of the game due to time constraints. And the fact that I could feel my anxiety skyrocketing the first time I looked down a dark hallway with no indication of what lies ahead. I’ve played enough horror games to want no part in that.

However, I was able to experiment with some of the puzzle solving mechanics and the interactions the user has with sound. Much like Notes on Blindness, when no sound is playing I am unable to see ANYTHING in the scene. No sense of space. That combined with the complete silence makes for an eerie atmosphere. Throwing objects will temporarily illuminate sections of the scene, and in the introduction the user is guided by a gramophone producing sound to illuminate a path or guide the user to a specific spot. I have watched a walkthrough of the entire game and know that later on you receive a cane to use. There is a requirement for environmental interaction that is more present than in most games- without it, the game does not exist at all.

The beginning of the game includes a short story sequence shown in a comic-type format before the user “awakes” in a dark space. In the intro level there are three basic puzzles to complete that introduce the user to the mechanics - a safe, a maze, and sound buttons. In the safe, the user can see two dials but no markings. You must rely on the vibrations from the controllers to unlock them. The maze is located inside of a box- by moving around a handle, you can navigate a small ball through the passages and illuminate the interior of the box. And the sound puzzle forces you to focus on a particular melody and play its segments in order.

Navigation through the scene is a bit odd. Because I was playing on the Oculus, without a third sensor I am unable to turn my back on the two sensors above my monitor. The limited motion was a little frustrating when I just wanted to turn around to open a drawer. And the user walks by pushing the joystick, sliding forward/backward. There are minimal options for user motion beyond turning off strafing.

CONCLUSIONS

I found it really interesting how the designers for both experiences were able to take the same base information and bring them into unique narratives and interactions. I can actually plot both experiences within the framework that I’m building, as far as the roles of user and designer, and the experience definition. It’s hard to find narrative content with the same basis currently, and I expect I’ll start seeing more patterns when I add them into my research experience spreadsheet. I’m starting to see a lot of the same design decisions I’m now making in my own prototypes present in these built experiences, showing that designers are asking themselves many of the same questions along this process.

04/07/19: Rebuilding for Phase 2

Over the last week, the majority of my focus has been on showing demos of our thesis project at the ACCAD Open House and the Student Art Collective. Quite some time has passed since Tori and I were able to show our progress to anyone outside of ACCAD, and as we didn’t have a working prototype from last semester… we needed to make one that was able to be shown and experienced by the public.

I took what was our Fall prototype and completely rebuilt it between Saturday and Tuesday evening. Part of this was to bring the project forward into a new version of Unity, but I also wanted to include the height adjustment from Phase 1 and a different mob configuration. This build would also require the user to begin the experience sitting on a bench before standing to progress, an interaction I have not tested before in this scene.

My Phase 2 project was temporarily put to the side in order to get this ready for public, so I was not able to test out of the gaze-based interaction. I decided instead to hit a middle-ground between Phase 1 and Phase 2- timed teleportations. Not in the control of the user at all, but a little less disturbing than the sliding motion we previously used. This included a fade in/fade out to signal the motion was about to occur - a fairly simple visual, but actually caused a ton of technical issues. The fade would show up on the screen and not in the headset. For future reference, there is a SteamVR_Fade script that you’re required to use in order to make that appear properly in the headset - normal UI settings do not seem to work in this scenario!

The new environment height scaling feature also changed how I put certain assets in the scene and parented things to each other, as offset pivot points and use of a Unity Terrain asset caused some weird placement issues when the scene was run. And through both demos this week we faced some Audio problems, with the volume being either too low or coming out of the wrong ear. Two solutions to this: better headphones, and making sure the VR camera has an audio listener attached. The SteamVR Camera prefab does not have one attached automatically! And yes, it took me way too long to figure that out.

I rebuilt the Prologue sequence based on some feedback from earlier on in the semester, including more images of Ruby and taking into account the order in which the images appear to create better flow in the scene. For demo purposes, I also included a “start menu” triggered by the operators (Tori and I - spacebar to start the prologue), and an “End of Phase 1” scene that loops back to the start menu.

The Student Art Collective on Tuesday went well - we were set up at a space in Knowlton with the Vive Pro and Wireless Adapter. Actually, that was my first time using the Wireless for anything, and it was perfect for this project. Most of the attendees were students, though we did have a few parents/professors show up and try out the scene. It was a 3 hour exhibition, which gave Tori and I a good measure of how long mobile setup would take and get back in the groove of giving a 30 second explanation/VR prep to new users. There was a short calibration process during setup with the bench to make sure users were facing the right way and the bench was in the center of the play space, but it everything ran smoothly after that.

Friday afternoon was the ACCAD Open House. Tori and I showed our Six-Week prototype at last year’s event, and played that video on a screen this time around to show our progress in the year since. We didn’t have the Wireless for this event, but the scene worked just as well with a tether. We had some wonderful conversations with guests about our work and where it’s going. It was easier for me this time around to speak about our project - I felt much more informed and confident now that we’ve grown from the “exploring technology” phase to the “conceptual development” phase.

FEEDBACK and CRITIQUE

Both of the demos provided valuable information. The most common reaction and comment we received after users exited the experience was about the height change in the scene. Having the mob members towering over and changing at users, some of whom are used to towering over others, was intimidating and placed them in the correct mindset for this experience. We also heard that they appreciated the prologue in the beginning as framing for the experience. It seemed that more of the guests this year had heard of Ruby Bridges before, and once teacher even told us she had a classroom of middle school kids who love Ruby’s story.

The main issues we experienced were technical or had to do with user flow in the experience. Audio was a real issue in the beginning - fixed by cranking the volume to accommodate the noise of the space and using better headphones (thanks, Tori!). The fade in/fade out of the scene seemed to be fixed by having both the SteamVR_Fade script active and the original Fade image active, though sometimes it would flicker between teleports. In the Prologue sequence, images appear around the user in a circle - which would be no problem if the user was in a spinning chair, but on a bench it tends to break flow when they have to turn their head all the way back around to continue looking. Some users who stand to get out of the car will continue to walk around, while others stand in place- not really an issue, but it poses a risk of tripping over the bench unless Tori or I move it. This was especially dangerous with the Wireless demo - users without a tether are more likely to forget and take off. The Student Art Collective demo required one of us to stand at the periphery of the lighthouses once a user was in to make sure they didn’t wander off into the crowd or walk into something.

CONCLUSIONS

Overall it was a great experience and I appreciated getting to see how far we came in the last year. And now we have this great demo that I can use to prototype for Phase 2! The upcoming week has calmed slightly in GRA and interview obligations, so I will be able to actually catch up on my production schedule and begin to implement it into this prototype. Along the way I’d also like to polish some of the issues that came up this week and smooth it out, such as the asset pivot problems I discovered and the weird fade flickering.

03/24/19: Phase 1 Conclusions

Reaching the end of my Phase 1 investigations led to the reiteration of one very powerful concept: context is key.

My work over the last five weeks has been investigating how designers move a user in VR, specifically with user agency and how designers can direct the users down a particular path. Within this particular scene, that path was a long sidewalk that takes quite some time to traverse. I experimented with teleporting using the prefabs available in SteamVR, with scale and location of the user in VR, and playing with the transitions between different kinds of motion - from moving car to teleport points to a plane.

Even though I was not able to achieve everything I outlined in my initial schedule, everything was functional and pretty neat in the scene.

However, feedback that I received after demonstrating the scene and then going through it myself was that teleporting actually takes the user out of the experience. The appearance of the teleport points is unnatural in this space that I am trying to create, and using a controller itself is arguably a hazard to immersion. It brings the user’s thought back around to what they’re doing instead of what the people around them are doing. I’m incredibly grateful for that insight - I hadn’t thought of it from that perspective before, but having made the scene I have to agree.

I was really lucky to get to show this scene to Shadrick Addy, a designer and MFA student who worked on the I Am A Man VR experience, who sat down with Tori and I for an hour to discuss our work on this project. He offered much of the same critique about the teleporting, pointing out that in context it doesn’t make sense. Masking this motion with something that fits in context with the story would be much more effective - for example, using gaze detection to trigger the movement forward. A mother urging a daughter forward might look back, gesture, or verbally ask her to keep moving. In this, we could build a mechanic where the user looking at the mother after these triggers would generate their motion forward in the scene and along the narrative.

Using this gaze detection would have the benefit of eliminating controllers completely, something I discussed previously but didn’t fully understand the benefit of until having these conversations. In discussing the immersion this can bring, I asked him about a common structure I’ve seen in VR experiences so far - this sandwiching of VR between two informational sessions. Our project does this with an introductory Prologue as well, but my question was whether to add information in the experience as it progresses or leaving it alone. He suggested that the addition of information would only serve as a distraction from the scene itself, a distraction that might prevent the emotional reaction and/or conversation that Tori and I are attempting to create. There’s some really interesting layers there: in how the main scene is encased in narrative, how the prologue and “epilogue” scenes frame the experience, how the use of VR itself is encased within a system that provides context for the technology, and that space is designated and placed within an exhibit discussing larger themes - all informing each other.

Coming back from the tangent, Phase 1 helped answer my question as far as the type of motion I should be considering within this space and why. I was able to work out some of the smaller technical bugs that will go a long way in the long run. And I was able to spend a lot of time doing some outside research on VR experiences to help understand the decisions currently being made in other projects.

What’s Next

Phase 2 naturally follows Phase 1, and I think here the best option would be to build up. I learned a lot from the last few weeks and I would really love to develop some gaze control mechanics. Being able to move forward in the space powered by gaze in a crowd and testing this crowd reactions that I didn’t get to in Phase 1 would go a long way towards development this summer and in the fall. I’ll be articulating this plan a little better next weekend after I’ve written this proposal and work has begun. I will also be recording Phase 1 for documentation and uploading that to my MFA page for documentation.


OUTSIDE RESEARCH

Spring Break happened since my last post and I took advantage of the time.

Museum: Rosa Parks VR

Over break I found myself at the Underground Railroad Freedom Center in Cincinnati, OH, where they’re currently hosting a Rosa Parks VR exhibit.

I was really interested in how this experience was going to be placed in the Freedom Center, and what the VR content was going to consist of. This was my first time using VR in a public space, plus I came in not knowing much about the experience itself. I tried not to watch videos or read articles - although looking for the video above I realized it’s incredibly difficult to find any information about it. Up on the 3rd floor of the Freedom Center in a corner to the right are four seats from a school bus on a low platform, and a table for the center attendant to take tickets/give information. The experience was made in Unity, uses Samsung Galaxy 9s and mobile headsets (which were cleaned after every person), and headphones.

Full disclosure, my headset had something VERY wrong with the lens spacing and I ended up watching the experience with one eye closed.

I saw the same sandwich structure here as what Tori and I are using - an introductory sequence, an uninterrupted 360 video experience of the user being confronted by first the bus driver and then a police officer, and then an exit sequence discussing historical ramifications and present day context, all narrated by a voice actor speaking as Rosa. Having the users sit on the bus seats was a really nice haptic touch that I enjoyed - that weird texture and smell just can’t be faked. The user is embodied in the experience, being able to look down and see what she was wearing on that day. Each time slot is 4 people for group every 5-10 minutes, and in our time waiting I saw people of all ages coming over to go through the experience. In order to start, the user has to look directly into the eyes of an image of Rosa Parks for a certain length of time.

I thought that the embodiment was a really effective choice for a static seated experience that requires little to no active participation. The user is reminded by the attendant at the beginning that they can look around in all directions. I was most surprised by how it was situated in the center. Fortunately Rosa Parks is a pretty well known figure in history, but if you didn’t know anything about her there was nothing to inform you in the surrounding area. The informational segments in the experience spoke mostly of what was happening in that time period. Being a standalone attraction sparks curiosity in wanting to know about the experience while being part of a larger exhibition may give greater context in the long run… so I suppose it depends on your goals for the user where this is placed. I think I personally would have liked more information to surround the experience, especially considering how complex the other two exhibits on the floor were.

I think I would need to do this experience again to examine how I felt coming out of it. I wasn’t especially affected - more distracted by the odd 360 video editing happening in the middle to try to increase depth and the funky lens adjustment in my headset - but I did appreciate the nature of the experience itself and its placement in the center. And I was able to find parallels between their development and what Tori and I are working on.

Museum: Jurassic Flight

This was the other VR experience I got to do inside of a museum. We discovered it completely on accident in the Museum of Natural History and Science in the Cincinnati Museum Center.

Me flying as a pterodactyl in Jurassic Flight. Skip to 0:19 for the actual experience start.

After Rosa Parks VR, this was as opposite of a VR experience as I could manage. Jurassic Flight makes use of equipment called Birdly, which I last saw in a video of its prototyping stage. The experience requires you to lie on your stomach on this device, arms out to the side, Vive Pro strapped to your head. You take flight as a pterodactyl, soaring above trees, rivers, and mountains, observing the other dinosaurs living their lives. There is no goal here, no informational aspect to the experience. It’s all about the haptic feedback. There’s a fan at the front of the device that increases and decreases with the user’s air speed, the device tilts forward and backward based on your pitch in the game, and you control direction with the paddles at the end of the “wings” of the device.

The experience is situated just to the right of a big dinosaur exhibit, which provided plenty of context before actually going into it. It’s not particularly thought provoking or educational but it does add on to the content already addressed in the museum from a fun perspective. It’s about 5 minutes, very scenic and peaceful (minus the initial few seconds of motion sickness during a dive), and it was made in Unreal so the environment and lighting was really stunning.

Again, not really able to make a connection here (pre)historically or in structure of the experience, but I was really fascinated by the haptic feedback that occurred and that novel flying experience.

Anne Frank House VR

I found this experience on the Oculus Store and had to give it a go. Unlike the past two, I went through this experience at home on my own machines. I read Anne Frank’s Diary in elementary school, though most of the details escaped me as an adult. This experience recreated the Frank’s annex while they were in hiding from the Nazis.

Again I found the informational sandwich structure. The user is offered the option to go through a story mode or a tour mode through the annex - I chose the story mode. This begins with a fairly long narrated introduction with historical images, followed by the exploration of the annex. The user requires very little interaction beyond pointing and clicking to the next point. Once there, narration begins, and we hear Anne Frank telling us about her daily life in each of these spaces. It’s a linear path through the space and the only interaction is really moving from point to point.

It’s beautifully recreated. The quality of the environment really called me to examine it closely. I wanted to see the pictures on the walls, the books scattered over the bed, what crossword questions were in the paper. Each progression revealed a little more about the family and what their everyday life was like. Hearing these stories in contrast with the empty spaces the user explores creates a wistful mood. I didn’t want to make any noise myself due to the emptiness and hearing about how the family had to remain quiet during the day to avoid rousing suspicion.

The whole tour took me around 20 minutes, and I felt like I really did learn a lot just from seeing the space and hearing fragments about life related to each segment of the house. The choice of motion seems to come from the fact that this seems to be an experience made for mobile and thus requires a controller of some kind. Beyond the point of the cursor, I never see the controller itself. It seems like a good compromise that doesn’t threaten the immersion in the experience.

Traveling While Black

I’ve been meaning to do this experience for the last three months. Now that I have, I can almost guarantee I’m going to need to do it again.

Traveling While Black addresses the issues faced traveling across the country in the past by black Americans, starting in the 1940s and ending in 2014. The interactions and interviews all take place in Ben’s Chili Bowl, serving as a hub and safe space throughout the course of the experience. Every interview occurs in a booth, with the user switching locations from one seat to another with each new person. The visuals themselves are beautifully executed and edited, running strong parallels between past and present. At the very end of the experience, the user sits across the table from Samaria Rice as she speaks about the day her 12 year old son was shot by police in Cleveland, OH.

There was no embodiment, no interaction - the user is watching and listening throughout the whole experience. Placing the user in an intimate setting like a diner booth and in close proximity to those being interviewed allows the user to feel like part of the scene. It’s a 360 video that’s about 20 minutes long, ending with the point that safety is still not guaranteed for black Americans.

I came out of the experience strongly emotional and had to sit for awhile to really absorb everything. Truthfully, I’m going to need to do the experience again to actually analyze the structure and think about the decisions being made and how 360 decisions may differ from animated VR. But I do know that this is the kind of effect I want to have on the viewers of our project. And I wonder if anything stylized, not film, could create that level of personally jarring human connection.

Conclusions

Having gone through a few historical VR experiences now, I’m seeing this sandwich pattern of information more and mode. And I think I understand for the most part why this is occurring. I’m also seeing how multiple narratives are being organized cohesively as well as how one narrative can be distilled to give a whole picture without saturating the user with information. I’m going to continue with this next week and see what other kinds of narrative thought-provoking things I can find, as well as any other museum VR exhibits existing - of any kind - that I might go and explore.

03/08/19: Video Update on Phase 1

This is going to be a relatively short update on how far Phase 1 has progressed in the last few days, but finally including some video footage of the scene working, along with some of the tools I’ve been brushing up on to apply this week.

The above video is a quick demo of the teleport point placement and scaling in the scene.

What was most surprising for me was just how long the sidewalk actually became. It felt like our last prototype was dealing with issues of time because the walk down the sidewalk was too short or the walking motion was too fast. At the height of a child, the building itself becomes this mammoth imposing object rather than just a set piece or a destination. The teleporting really emphasizes the distance too, all of the points are just at the edge of the teleport curve. I think I got lucky there. Overall this layout feels smoother and I’m excited to start putting in the other scene elements.

On some technical notes:

  • During our demo on Thursday it was pointed out that some objects aren’t keeping scale with the ground or street planes. In the video I can definitely see the lamp posts hovering off of the ground- this may just be a matter of making sure the final assets in the scene are combined into one set object. Still experimenting with that.

  • I found in this scene that the teleport point on top of the stairs was actually really hard to get to - you can actually see me struggling with it in the video. I underestimated how large the stairs would become at that height.

  • Which leads me to the suspicion that this height ratio isn’t quite right. I recorded this experience while seated, so I thought it might just be something wrong with the math. I repeated the same thing while standing and had the same issue. I can play with some numbers to get that right.

  • This was my first time testing SteamVR with a headset other than the Vive. Up until now all of my development has been using the Vive headset and controllers. Oculus is what’s available to me in this moment so I took the opportunity - it connected no problem! Teleport was already mapped to the joystick on the Oculus Rift controller. Cue my sigh of relief for a more versatile development process.

I have begun working with the car animation, starting with placing the user.

030819_Phase1a.PNG

I made the loosest possible version of a block car in Maya with separate doors and brought it in just to have something to prototype with. This is where the user’s location in space is going to become an issue- I have to make sure they’re aligned with the driver’s seat. We’re going to have the user sitting in the demo anyways, so we might be able to just calibrate the seat with the environment and have the user sit on the bench.

Working on a GRA assignment this week I also learned how to use the Audio Mixer in Unity. Turns out I can group all my different audio tracks together and transition between various parameter states. Who knew!

Apparently not me. I suspect this is going to fix A LOT of the audio issues we were having in the last prototype, especially having to do with consistency - some of the volume levels were… jarring, and not in the intentional design type of way.

Critique

In class, I think I opened up the wrong version of the project, because all of the environmental objects were scaling without the teleport points attached. When I got home I realized that it was all fixed on my current version! One less thing to tackle.

Going away from the technical for a moment, Taylor posed an interesting question to me: how do we categorize this experience? I realize I’ve just been using the word “experience” but we’ve also discussed “simulation”. Adding that to the long list of queries for this open week ahead of me - confirming a proper term for what we’re working on, and justifying that definition.

What’s Next

  • Car animation

  • Composing Crowds

  • Connecting theory with my actions

  • Resuming my lineup of VR experiences

03/03/19: Phase 1, Midway

In the last two weeks, the physical production of my Phase 1 project has slowed in favor of investigating the theories and plans behind my thesis investigation. I came to the realization midway through Week 2 that I was approaching this prototype much the same way I was approaching the last three and not weighting my theoretical framework or design goals into the decision making process.

Starting with the main project development, here are some of the achievements from the last two weeks:

  • Fixed a bug where the environment was adjusting to the player height but left behind the Start Point, causing the player to actually appear way off mark.

  • Getting the start point to actually move the player to the right spot. I can move the play space, which at least gets us to the right area. This may be more of an issue in the car scene, but the teleport points will cut down potential issues of running through objects or agents in the crowd.

  • Added teleport points to the scene.

    • This actually checked me on my scale once again. I initially only had three points along the sidewalk, and on testing it in the Vive I found that the pointer from the controllers couldn’t even reach the first point! To compensate for the user’s smaller relative size, I added two extra points, made the space in front of the school a teleport plane for free movement (to be explored in the crowd composition portion of the project), and placed a point on top of the stairs to avoid awkward stair collisions in Unity.

  • Major debugging time with SteamVR Input.

    • This was a huge issue, once again. But I’m slowly getting better at figuring out where the misstep is between Unity and my controller bindings. I brought a project from home to the Vive at school, and that particular computer had bindings that for some reason disconnected. Nearly two hours later, we had them satisfactorily connected and shut off the haptic feedback - for some reason, the default teleport in Unity had the controllers vibrating every 5 seconds.

    • Also came to the realization that controller actions only show up in the SteamVR Input Live window if there are functions in the scene that require the bindings to be active. So if I pulled up the window to check the bindings before, say, having the teleport prefab in the scene… it would look like the buttons aren’t working. But it’s because they aren’t being called! One of those tiny little victorious moments of understanding.

Phase 1: Next Steps

I am certainly behind in development for this scene - I should be finishing up the car animation. Next week is Spring Break and I will be here in Columbus cranking out work for the majority of it, which should make up some of the lost time from this week. Therefore the goals for this week are:

  • Complete the car animation

  • Troubleshoot/Playtest on Thursday with classmates

  • Ensure a smooth transition from the car to the sidewalk

  • Check in with Tori about any potential new data to add to the crowd/car, and be in a good position to move forward next week.

Theoretical Developments

Over the course of last week, I had several meetings about where this project is conceptually and where it’s going. I briefly mentioned this in my previous blog post introducing Phase 1, but want to begin documenting my progress here as I work through the language and questions required to articulate my thesis.

My thesis goal is to articulate a framework for designers of VR narrative experiences based on the weight of specific VR design elements (gamification, user identity, movement, visual design, etc), stemming from my interest in how to direct users through a scene with high levels of implied agency (control over the camera). The Ruby Bridges project is operating as the first case study for this framework as a historical narrative. After completion of Scene 01, I will be utilizing another narrative of a contrasting “genre” - currently thinking about mythological fantasy - to test this framework and compare how it is utilized when presented with two different stories.

A huge part of this is recognizing the specific roles that users and designers take on within the scene. In film, these roles are fairly distinct: the “designers” (writers) operate as the authors of the story being told. The directors and crew operate as the storytellers, visually interpreting the material that has been given to them. And the “user” in this case is a viewer, an audience member whose role is to view the narrative that has been visually curated and placed before them. These lines get a bit blurred when we consider video games. There are still writers and designers operating as the authors and storytellers. Users become players, who function as an audience for the world put before them and, to a limited degree, an author of their own experiences. Players have a degree of agency to them that allows them to function and impart change on this world within the game, though the storytellers can still choose to restrict this agency by placing boundaries on the edge of the world or controlling camera movements. Yet every player will play a game differently.

Virtual reality requires the creation of new roles. Users in a virtual space have more inherent agency than ever before with control over the camera and their physical pose. Designers still function as authors and storytellers, but also as directors are responsible for directing a user through the scene. Users, through their newfound agency within the world, then become part of the world as an actor.

030319_Roles.PNG

With these roles in mind, I’ve begun constructing a loose pathway for defining the goals of the experience and the elements that should be considered when working within VR. I designed this with a top-down path in mind, though it’s brought up some side questions about whether a bottom-up approach beginning with exploration of one particular element would be possible. The map below is a working representation of the pieces I’m currently trying to put together, although I know this is a sliver of the questions that are asked when in the design process.

030319_WorkingFramework.PNG

It was pointed out to me last week that the Phase 1 project is tackling questions of the role of the User as an Author/Actor. I’m focusing on how the user moves through this scene, and whether giving them that agency is right for what the scene demands.

I haven’t added any VR games or experiences to my list recently - moving apartments has me at a bit of a disadvantage in this moment. But I have instead begun tackling a spreadsheet to examine various elements in these games I’ve been talking about and how they compare across a wide range of experiences.

Tori will begin adding her thoughts and experiences to this list. Next weekend I’ll be going to the Rosa Parks VR experience at the National Underground Railroad Freedom Center, and I was given some good references for experiences to examine over the next week - Traveling While Black among them.

Connecting my theoretical framework with my developing project, outlining specific goals, and being very clear about what I want these experiences is going to be the priority here for the next few weeks.

2/17/19: Phase 1 Begins

Projects like Orion and spending time on other VR applications has been a welcome break for exploration, but this week brings the return of thesis. We’re working on projects in phases, with Phase 1 lasting for the next five weeks.

I’ve been thinking about our prototype of Scene 1 (Ten Week Prototype) from the Ruby Bridges case study last semester. The final result was not a functional experience technically or visually, and after speaking with peers and receiving feedback I realized that I needed to go back to some fundamental concepts to examine some of the decisions made in designing the experience, such as timing, sequencing, motion, and scene composition. I feel that our last project started getting into the production value too soon when we should have been focusing on the bigger questions: how does the user move through the virtual space? How much control do we give them over that movement? What variations in scale and proximity will most contribute to the experience? These are the questions we started with and seemingly lost sight of.

In developing the proposal for my project I also began considering more specifically what I’m going to be writing about in my thesis. And, more importantly, beginning to put language to those thoughts. Recent projects have been allowing me to question what parameters designers operate with when we’re designing for a VR narrative experience. It gets even more complicated when we start breaking down the types of narratives being designed for. In this case, the Ruby Bridges case study is a historical narrative - how would those parameters shift between a historical narrative and a mythological narrative? What questions overlap? Orion was a great project for examining design process for narrative, and now in shifting to another, I’m interested to see how that process carries over here.

Phase 1: Pitch

Production Schedule for Phase 1

I will be creating two test scenes to address issues face in the 10 Week Prototype. The first will address Motion- how can a user progress through this space in the direction and manner necessary for the narrative while still maintaining interest and time for immersion? And does giving this method of progression to the user benefit the scene more than the designer controlling their motion? In the previous prototype we chose to animate the user’s progression with a specific pace. This time, I will be testing a “blink” style teleporting approach, allowing the user to move between points in the scene. Each of these points creates an opportunity for myself as a designer to have compositional control while still allowing the user control over their pace and time spent in that moment. This also provides an opportunity for gamified elements to be introduced, which is something I will be exploring as I move through the project.

The second scene address proximity and scale, creating a scene where the user adopts the height of a six year old child and scaling the world around accordingly. Even to the point of exaggeration to experience that feeling for myself. It was suggested in a critique last semester that I create these small little experiences and go through them just to understand how they feel for my own knowledge, and I agree with this method - more experience would certainly help inform the final design decisions. I will again be experimenting with the composition and density of the mob outside of the school to create some of these experiences.

Week 1

I purposefully scheduled Week 1 to focus on planning out the rest of the project and getting a strong foundation built. I planned out what I was going to do specifically in each scene and brainstormed various ways to solve technical issues. Writing my project proposal had already helped solidify these plans, but I’ve developed this back and forth process with my writing. My sketchbook helps me get general concepts and ideas going, where the proposal then puts formal language to these ideas. While writing the proposal I usually find a couple of other threads that I hadn’t considered, which brings me back to the sketchbook where I then update the proposal… the cycle continues, but it has been especially productive over the last two weeks.

I focused on getting the overall environmental scaling and test space created this week using assets from our previous prototype. The issue was having the user start the experience in the right scale and position every time. Locking in the camera in VR is a pretty big “NO”, and Unity makes it especially difficult as the VR Camera overrides any attempts to manually shift it to its proper spot.

Scaling was much easier to figure out than I expected - I’m just scaling the entire set to account for the height of the user at any given point based on the height of a six year old (1.14 m) rather than forcing a user to be a height that physically doesn’t make sense to them. I expected this code to be much more difficult, but so far it seems to work pretty consistently when I test it at various heights.

I’m still working on getting the recentering function to work. I found a lot of old documentation from 2015 and 2016 that doesn’t account for all the changes in Unity and SteamVR. There’s some good concepts, and even a button press would be great for now. Still planning on continuously exploring this, and I expect I’ll be working on it throughout Phase 1.

NEXT

  • Begin Blink teleport testing through the scene.

    • When I made this schedule, I didn’t realize that SteamVR has a Teleport Point prefab. So, yay! Production time cut down! I’ll be using that spare time to add in primitives simulating the placement of the crowd and brainstorming potential gamification/timing. I may also go on a search for some audio and add that to the scene as part of my testing.

  • Experiment with button pressing versus gaze direction. How does the scene feel without controllers? Would gaze navigation be effective here?

  • Playtest #1 with peers, gaining feedback on the button or gaze mechanisms and other developments made during the week. Will also gain feedback on the scaling and positioning of the user.


OUTSIDE RESEARCH

The games I played this week were all very physically involved with a lot of motion required on the part of the player. However, none of these games used methods that required teleporting or “artificial motion” via joysticks or touchpads. All were based on the motion of the player’s body. Even more interesting, I experienced a strong sense of flow in these games than in past titles, though each for different reasons. Considering my thesis, which would not be this action oriented, it’s helpful to see how specific components in this games - sound, motion, repetition - are utilized in ways that ultimately make a flow state possible.

FLOW VIA SOUND: Beat Saber

Beat Saber is a VR rhythm game that operates as a standing experience, where players use their arms and lean to hit the cubes with sabers on the beat and in the indicated direction. Unlike the others, I’ve been playing this game for a few weeks and have had time to examine increase in skill level as well as what kind of experience I was having. It was initially very difficult to get used to the cubes flying directly at me and to be able to react to the arrows indicated on the cubes - a longer adjustment than I expected, actually. I play games like this on my phone using thumbs, and my body knew what it needed to do… but was having a difficult time getting my arms to react to it. After a couple of weeks I can now play the above song on Hard mode, which is what I’m including for this group of games.

Every time I play a song, I usually get to a point where I experience flow - able to react to the cubes as they come and follow the rhythm without really even thinking about it (and significantly better than if I am thinking about it). It’s a state that feels instinctual and occasionally feels as though time slows down, a common description of flow. Sound is what’s driving that experience, without the music this would be much more anxiety-inducing and stressful than enjoyable.

After playing I was thinking a lot about Csikszentmihalyi’s book Flow, where he outlines several important features in a flow activity: rules requiring learning of skills, goals, feedback, and the possibility of control. Even with varying definitions of what is considered a game, most require those components in one way or another. He references French psychological anthropologist Roger Caillois and his four classes of games in the world - based on those, Beat Saber is an agonistic game, one in which competition is the main feature. In this case the competition is against yourself to improve skills and others to move up in the leaderboards. However, as frequently as I did fall into flow, I also fell out of it easily when a level grew too difficult or beyond my skills.

FLOW VIA MOTION: SUPERHOT VR

I’m not quite sure how to categorize Superhot VR, but it’s the most physical game I’ve ever played in VR. Players can pick up items or use their fists to destroy enemies making their way towards you in changing environments… the twist is, time only moves if you move. Every time I rotate my head the enemies get a little closer, or if I reach out to pick up a weapon suddenly I have to dodge a projectile. As the number of enemies increased with each level I found myself kneeling, crouching, or dodging. There is no teleportation or motion beyond your own physical movement.

Everything here is reactionary. I experienced a strong level of flow, unlike the intermittent experience I tend to have in Beat Saber. Time being distorted here and used as a game mechanic almost seemed to echo those flow states. The stages are all different with minimal indication of what is coming next, and often the scene starts with enemies within reach. I didn’t have to think about what buttons or motions were required to move, it was a natural interface - I could just move my body to throw punches or duck behind walls. While this was effectively immersive and did result in a strong flow state, I was pulled out of it immediately every time I ran into a wall in my office or accidentally attacked an innocent stack of items sitting on my desk.

Sound was minimal, which I very much appreciated but sets this game in stark contrast to Beat Saber. The focus of this game is motion, not music or rhythm. On a continuous side note from the last two weeks, death states in Superhot VR were much less disruptive than the other games. The entire environment is white, so the fade to white and restarting of the menu isn’t very jarring or disruptive to the experience. It was easy to jump back into the level and begin again. This may be an interesting point for transitioning my thesis between scenes- having a fade or transition that is close to the environment rather than just doing the standard “fade to black”. I suppose it depends on the sequence I’m designing… a thought for next week.

Elven Assassin VR

And last, this is a game that combines a little bit of everything. Elven Assassin VR requires you to take the role of an archer fending off waves of orcs planning to invade your town. Your position is generally static with some ducking and leaning, and the ability to teleport to different vantage points within the scene. This deals in precision and speed, and the physical motion of firing the bow. The satisfaction of hitting a target in this game was immense, and I ended up playing until my arms hurt. The flow in this game comes from the rhythm of motion - every shot requires you to nock, draw, aim, and release the arrow to take down one enemy. There isn’t really a narrative occurring in this game at the moment. It tends to operate more like target practice, and the concentration required was what induced that flow state.

Falling out of flow was a little easier here with technical glitches - tracking on my controllers would get disrupted and my bow would fly across the world while I fell to a random orc sneaking through the town. Their use of a multiplayer function is also really interesting here, and the social aspect may be an interesting avenue to explore with this game.

Conclusions

I didn’t actually expect to talk about flow at all, it was just a happy side effect. These are three VERY different games and that experience of flow was the strongest commonality between them. This kind of goes back to game design as a whole rather than specifically VR design. But those little differences in how each game approached physical action and reaction to the environment really drove that point for me. Where Elven Assassin VR focused on action that was repetitive and chaotic, Beat Saber focused on the rhythm of those actions and applied them to the template of the song. Superhot VR left the chosen action up to you, but suggested some paths and required movement to occur in order to advance. The result was neither repetitive nor rhythmic, but required control.

I am not planning on making experiences so heavily focused on action and movement as these, but bringing what I’ve seen here from the choice in motion to smaller actions or interactions with the environments in my thesis work might help me answer some of the design questions I’m exploring in the Phase 1 project. How can a user move through a space? I’m considering teleporting from point to point, but have not yet thought about the potential secondary actions on behalf of the user - those spaces where gamification could occur. These games re-framed motion for me, reminding me to define more specifically the type of motion expected of the user, and ensure that the motion (or lack of) enhances the experience itself.

02/10/19: Reviewing Orion

After five weeks, the Orion project has come to a close. And as with most project, the final result was vastly different from what I anticipated when I began.

Textured image of Orion in UE4 editor

Textured image of Orion in UE4 editor

PROCESS

When I began Orion I anticipated a fairly straightforward process. I would be working with Quill and Unreal to learn the pipeline for each and between the two. What I had forgotten is that I have never created an observational narrative experience from scratch in VR. I am usually planning for some form of interaction, or in the case of my thesis project the narrative and environment are already described for me. Traditional storyboarding and animatic techniques were not going to work for me, which is where my foray into Maquette and Tilt Brush came in. Every step of the process was steamrolling through technical issues to see what worked and what didn’t work.

Process path for Orion

I realized that I really just needed more time to learn the painting and animation techniques for Quill along with all its quirks. I was excited about painting the cabin last week, but ultimately the asset ended up not working and I still build the asset using Maya and Substance Painter… I have never been so happy to be back in Maya, to be honest. I used the terrain tools in UE4 and the “Forest Knoll” asset pack purchased a few years ago to build the rest of the environment. I used a few Quill animations, such as the candle and the stars, as “accents” to the rest of the scene.

On a personal process note, while putting together the scene I made the decision not to use any visual reference at all. This was for two reasons: to avoid hyperfocus on unnecessary details, and to operate within the essence of memory. The project description was to show the essence of our memory in 15 seconds - well, 15 seconds is a very short time in VR. That’s usually the amount of time it takes for a viewer to orient themselves and focus in on the story. I didn’t want to overwhelm with an overly detailed environment that misses the point of my memory. And if I used visual reference, I would shift focus from my own memories to what it “should be”.

CONCLUSIONS

Even with all of the roundabout processes, I felt the final result was remarkably close to what I remember. Closer than I expect the original storyboards would have been. I think those would have been visually exciting and fun to watch, but that’s not what this moment was about. It was a quiet fifteen seconds on the deck in nature with just the stars and the sound of the trees. I have yet to share this experience with my partner to see how her memory might differ from my own.

I also learned a lot about the technical aspects of these tools, and personally did not enjoy using Quill for most of my painting time. It was fun to make some looping animations, but I doubt I’ll ever actually use this again for a project in the near (or distant) future. The final result was something I probably could have made in three or four days of work in Maya and Unreal, but I feel that I’m at a good point to move forward if I want to use Unreal for future VR experiences and feel more informed about the pipeline options available to me.

NEXT

  • Documenting Orion. I’m having a difficult time getting a video of the full experience because the scene is so dark. In the headset it’s easy to see, but the screen recordings I have taken so far have been really low quality and dark. I’m currently working on some rendering options in Unreal that may produce a better result.

  • Begin Phase 1 Project. I will dedicate next week’s post to the Phase 1 project centered around my thesis, but currently I’m still working out a final plan and some language to describe the project itself.


OUTSIDE RESEARCH

Continuing my theme of playing VR games and experiences for research, this week I went for a bit of a different track. I did some digging around in the Oculus and Steam stores, and I was able to play four of the games I had lined up.

BOARD GAMES IN VR

I think the initial question here for me was “why”? I enjoy board games, specifically the social aspect. Sitting around with friends chatting, accusing each other of hiding cards, accidentally bumping the board and sending pieces flying. It’s all part of the experience. I noticed on the Oculus store they have several Chess applications, so naturally I had to download one. And I also found a Catan VR app that I wanted to try.

(I found out while writing this post that both applications are made by the same studio called Experiment 7)

The only real difference we have between a board game in VR and a board game in real life is the social aspect, which is really what these games are trying to create. Catan’s environment looks like a mountain lodge with scenes of mountains outside and a nice soundtrack, with four chairs sitting around a table. Chess is similar, taking place in a library by default. I played against the AI for both, which in Chess produced a little robot figure watching me across the table while the Catan foes were painted portraits that had moving eyes and facial expressions. That bit was a little unnerving, to be honest.

I got absolutely destroyed in both games, but I was surprised how much I enjoyed the experience of sitting in a chair interacting with other “players”. The animated board in Catan was a nice touch, although things move so quickly it took some getting used to. Being able to physically pick up a chess piece and hesitate or fiddle with it before moving was great improvement over playing typical browser games. I felt present in the world and able to interact with the other players, feeling real frustration with them when I lost resources or had a bad roll. I was worried that these games would simply animate the board and leave it at that, but the efforts made to engage the players in the space and with each other made for a much more effective experience.

EXPLORATION and PUZZLES

The first game I played is called “I Expect You to Die”, where the player is a secret agent going on missions where the path forward must be determined by actions and clues in the space, and often the process to figure out this path results in a gruesome death. I played the first level of this game a few years ago, but since then they’ve added a beautiful animated introduction and several new levels. This game is meant to be played seated with the player reaching out or leaning to move or using their telekinetic prowess to bring objects to them.

In this case, the lack of locomotion around the scene increases the challenge and still makes for an enjoyable experience. It becomes accessible for all kinds of players and play spaces, and the missions themselves have good variety… though the deaths are still extremely startling in VR. The controls especially seemed to work and I enjoyed a great level of dexterity in the scene switching between objects and using them with ease.

The last game was “Internal Light”, an escape room style game where the user must navigate a creepy dark building to make it to the outside with a tiny ball of light as your guide.

Now, when I started this game, I didn’t know what it was going to look like or what kind of gameplay there was going to be. You start off in a cell chained to a bed in a scene that looks like its out of Resident Evil. There will be a week when I go into horror games, but I was not planning on it to be today and, well, I’m a chicken. I immediately started sweating and wanted to leave (escape?). The game itself is not a horror game, it’s just creepy. But the environment was effective for building suspense and tension.

What really sticks out for me here is locomotion. The player moves while holding a button and alternately swinging your arms back and forth in a skiing motion. I have NEVER seen this before and it was oddly effective. To navigate the player is required to be crouching and dodging security, and there’s a special kind of anxiety when swinging your arms to move from one cover to the next, hoping you’re moving fast enough. Even though I was standing I didn’t get motion sick, and was able to run through most of the game fairly quickly. I didn’t see any options to adjust these settings.

CONCLUSIONS

All four experiences used their environments to create presence in the space, and included a level of AI “social” interaction. Whether it was the calm atmosphere conducive to board games, the action hero inspired music and imagery, or the anxiety-inducing horror themes, the environments were really the selling point for the experience. The social interaction between computer and user (with the potential for multiple users) negates the isolation that VR can sometimes induce as discussed last week. I’m still curious about why that form of motion for Internal Light worked so well, and I am curious to see if any similar methods are used as I continue to explore what VR experiences are out there.

2/3/19: Painting and Planning

As a production week, I’ve been splitting my time between getting audio set up in Unreal and getting objects made in Quill. The last few days are where I get to put it all together with the last bit of animated assets.

I’m operating a little in the dark right now (pun intended) on what the final look of this piece is going to be. I timed out some atmospheric fog to reveal the scene slowly and made some cues for the sound effects: a match lighting, trees swaying in the wind, ambient noise for the scene around. The narration is in the scene, but I still need to adjust the timing and put it all together.

Quill has been easier for making static objects. I painted the cabin setting for the user - quicker than I expected using the straight line tools and some colorize to get the final shading in. The candle currently in the scene feels a little too bright, so I tried to go darker and see what the lighting in Unreal can do. Something annoying about painting things like this in Quill- if you’re painting a lot with a specific color, the lack of lighting tools in the program makes it really difficult to see the cursor against those colors. I got lost trying to find where my brush was in the cabin sometimes even though my hand was right in front of my face. Click the images below to check it out, though they’re really dark when not in the program.

This last leap is about putting the pieces all together and testing it out. By the end of today I should have all the assets in and will be doing the final bit in Unreal. We were able to get both Quill and Unreal working in the labs, which significantly increased my production time.

What’s Next

  • Finishing the last few Quill assets

  • Compositing the 3D and Quill assets

  • Finishing audio timing

  • Add a “Restart” button, so that the experience can loop at the viewer’s choice or provide an easy restart between viewers (a reach, but would be ideal)

  • Troubleshooting


Outside Research

NARRATIVE

Throughout this project I’ve been thinking about how to conduct the viewer’s attention to the events you most want them to see, while taking into account that they have agency over the camera itself. Part of that has to do with seeing the viewer themselves as an actor within the scene, and the designer as a form of director. And how that production process would differ in VR compared to the 3D workspace - that’s something I’ve been struggling with myself in this project, finding that path in a very short amount of time. An article about “Cycles”, a VR short that Disney released late last year, came across my path.

Disney’s “Cycles”, from AWN article. Source

“Cycles” has a really interesting visual feature in that, when a viewer looks away from the central action to an area off to the side or behind them, those features desaturate and become darker. I also read that they used Quill to create storyboards for the film and developed a number of virtual tools to experience each stage of the process both inside and outside of VR.

GAMES

Moving away from the Quill project and towards my Thesis, I decided to use our unexpected Snow Day to conduct some VR research… using my chunk of time to experience the variety of things available on Steam and broaden my understanding of what techniques are being used.

I started with The Talos Principle VR, a game that I enjoy playing on the PC. When VR was first released, many game studios started porting their current titles over to VR by just changing out the controls and letting the content flow just the same. I wanted to be able to do a direct comparison of the two.

Screencap from Youtube playthrough by Bangkokian1967 (source)

Screencap from Youtube playthrough by Bangkokian1967 (source)

What I was really exploring here was how they approached movement. The Talos Principle is incredibly nonlinear, where players generally get to choose how and where they go, and what path they choose to take to get there. It’s a puzzle game with generally realistic assets, and movement to avoid enemies is a huge part of successfully completing each stage.

The player gets enormous amounts of control over how they want to move through the game, showing every option about how you move and how the camera adjusts for that movement. I started with teleporting, which works okay to get across long spaces. But in confined spots with enemies that require you to move quickly, the few seconds it takes to acclimate to your new location tended to result in the death of my character.

Oh yeah - dying in VR? More disturbing than I thought it would be. It’s just a little explosion sound and a fade to black, but still very startling.

Walking using the touchpad didn’t make me as sick as I thought I would be after I adjusted the vignette over the camera and made sure to stay seated. Standing resulted in quick loss of balance and motion sickness, though I noticed that movement in a direction where I wasn’t looking also made me a little queasy.

Overall, I thought the adjustments made to the motion in the game worked well and I was able to play for over an hour before taking off the headset. I’m not sure if the game experience was especially different from playing on a PC, but I’m also aware that I already know the story and it may be difficult to judge how immersed I was when I already know how the game works.

EXPERIENCE

The last thing I wanted to look at was an experience called Where Thoughts Go: Prologue, available in Steam. The user sits in an environment and is presented with a question, where they can listen to the anonymous answers of other participants and then record their own to move on to the next. There are five questions, and I still spent over an hour in this experience.

Where Thoughts Go: Prologue, Chapter 2.

Each environment changes to suit the question, from the lighthearted first question to darker and more somber for the last. The experience was incredibly meditative - the environments are pleasant to sit in. The little orbs in the image are the responses of previous people. You listen to their voices answering, and I was shocked by how open and honest the answers were. Being able to hear someone’s voice crack a little bit as they talk about a sad event or get higher discussing an upcoming wedding to their love just pulls me further in to the space.

VR can be considered isolating, as for the most part we’re all just sitting by ourselves in a headset in our own worlds. This took an isolating experience and turned it into a communal feeling, a place where you can be vulnerable without risk. There are no usernames or accounts, just a recording. When a user adds their own recording to the space, you pick up the orb you’ve just made and pass it off to join the world. It becomes a sense of closure and just enough participation that I felt like part of the experience.

Where Thoughts Go: Prologue, Chapter 2

Conclusions

I realized that I haven’t been very involved in what’s happening in VR outside of the academic research world, and need to continue going through these experiences alongside my own research. As I go through I’m keeping a journal of notes from each experience and what I can take away from them. I would like to play a made-for-VR game next week and see how that feels compared to a port like The Talos Principle, and search for other more community-based experiences like Where Thoughts Go.

1/27/19: Quill to Unreal

Where last week was full of conceptual challenges, I encountered all of the technical challenges over the last few days. Before moving too far into production in Quill, I wanted to make sure this was a pipeline that was feasible and functional within the time span I have. I also wanted to double up my time by facing on the technical challenges and still working on an animatic.

Maquette was a good first step last week. I have found that planning for VR in VR is a key part of the development process… yet it’s still difficult to choose a tool. While Maquette presented many opportunities for rapid spatial iteration, what I really needed - light placement, pipeline development, and audio - just wasn’t viable in that environment. I needed to get Unreal functional. I was able to get Quill and Unreal working together on the same computer in the lab, but still face issues with frequent crashing and Quill being incredibly picky about tracking. I haven’t faced those issues on my home setup, and so I’ve been doing most experimentation on my own setup.

I’m still getting used to the controls in Quill. They don’t feel especially intuitive, though I am slowly getting better with time. Working on another project in Tilt Brush earlier in the week, I was able to get more of a feel for painting techniques in a program that I feel is much more pared down and easier to iterate in. Jumping back into Quill afterwards felt a little more comfortable and I am getting faster. To test the pipeline I animated a candle flame and sparks that are a major lighting source in my story:

Animated flame in Quill

Animated flame in Quill

I watched Goro Fujito’s video on how to animate brush strokes for falling leaves- incredibly helpful, though I was still having a rough time getting a hang of that painted lathe trick to make solid objects.

I exported that out of Quill as an alembic file, and that’s where some of my trouble began. There is very little documentation on the pipeline for bringing a Quill animation into Unreal. Unity has its own alembic importer and shader for Quill, and Maya has some decent documentation. I tried bringing it into Maya, exporting into different formats, bringing that into UE4 and Unity. Just having a ton of issues getting the animations to play properly and texture to display.

It turns out the final process was to export the alembic from Quill, import into Unreal as the experimental Geometry Cache component, and make my own material with a vertex color node. I’m pretty sure I can separate individual layers in Maya and export them as their own alembic files for use, but that’s a process for the more complex elements in the scene and I haven’t tested it yet.

I started building a scene around that, getting some lighting in there and blocking out some of the bigger landscape features that I’ll later be painting.

UE4: Blocking in geometry.

UE4: Blocking in geometry.

Unreal has a pretty good Sky Sphere with illuminated stars, I’m using that as a stand in right now. As I blocked in shapes I made sure to check periodically in the Oculus that the scale made sense for what I’m trying to accomplish. I am also familiar with the Sequencer tool in Unreal, and so have been using it to key values in the scene to create a basic animatic. The result is a developing block-in for my project that functions as a VR animatic while I get more familiar with Unreal. The viewer starts in a dark fog, which then lightens briefly to reveal the candle lighting. Over time the fog recedes and the stars show. I plan on guiding the user’s attention with specific lighting cues, the first already in the scene with the rising sparks on the candle.

Current state of the sequencer, using to coordinate my animations.

Current state of the sequencer, using to coordinate my animations.

Going through the process, I think my biggest question right now comes down to scale (again). I want the viewer to feel small in the beginning, but then transition to feeling close and connected. Scenes in VR have a tendency to feel very large, distances seem much farther than they should be. I’m interested to see how much more effective a dramatic shift in proximity to the viewer can be in a VR space. On a project last semester I fell into a habit of testing the scene in the VR Simulator instead of in the headset. The result was a scene that felt too large for the user, and I’m already starting to catch those instances just by working in the headset more frequently. Animating in Quill has been really helpful as well, as I’m able to use my body as a reference.

Next Steps

Adding in the narrative audio will be the first step of this week to work out the timing, and bringing in more Quill animations and static models by the end. Now that I understand the pipeline a little better and how to move around Unreal, I’ll be able to bring in all new work and add it to the scene as I go.

I have also begun collecting sound effects, and will be using those to build my scene up throughout the week.

1/20/19: Considering the Narrative VR Pipeline

Planning a narrative experience in VR requires its own pipeline and structure. Logically I already knew this, but I still went into development with the same animation mindset. I spent this week focusing on fleshing out the narrative itself, creating storyboards, and determining which technical paths are viable - a process that reworked itself along the way.

Gathering References

I began gathering some reference this week, looking for potential lighting inspiration and trying to determine how these scenes are created. Goro Fujito’s work was great inspiration, but I realized that watching his renders and videos are exactly the same as watching a traditional animation - I needed to experience the scene itself, see where the lighting takes place behind the viewer, above the viewer. How does the scene play as a whole?
Tilt Brush to the rescue. Tilt Brush provides the ability for users to select scenes uploaded by other artists and watch them being painted in VR or skip ahead to the final result. I went through many of the scenes while in the Vive, focusing on those whose lighting most closely matched my own or whose style would be useful to observe.

Keeping in mind that Quill does not seem to have the wide variety of playful brushes available here, watching how the artists structured these scenes gave me some ideas for potential visual styles and techniques. After-Hours Artist is the only one I experienced that used 3D models that were then painted on top of, something I meant to explore further in Quill. Backyard View showed a series of single paint strokes layered in front of each other, then using a “fog” brush to emit a tiny bit of light and create depth. It was incredibly effective and dramatic in this case. And in Straits of Mackinac, the artist created the illusion of water by setting the background to a dark blue and implying reflection with only a few brush strokes.

Just by being in VR I found I was able to more fully deconstruct the scenes than I would in a still render, setting the path for my way forward.

Story(board)

At the same time, I have been fleshing out what it is I want to happen in this experience. The result was the following initial concept:

As I was working through the story, I grew frustrated.

Storyboards are a standard part of the animation pipeline, and I fell into the process of making one without realizing that the end result would be nearly useless for conveying what I am trying to create for this experience. Storyboards assume that designers have control of the frame, that what is presented to the viewer is a carefully constructed composition flowing from one scene to the next. At this point in VR, the designers have next to no control over the camera. I can choose which direction the viewer may start out facing. I can provide a limited scene with nothing else to focus attention on. I can attempt to draw their attention with sound cues and peripheral movement. At the end of the day, the viewer gets to control which details they experience within this world. Creating these storyboards did help me generally work out what I would like to happen within the experience, though I do not believe they are useful in helping me convey that to others.

I’m currently taking a Narrative Performance in VR class that is discussing many of these topics, and one helpful thing from this week was a Variety interview quote from John Kahrs discussing the making of Age of Sail. Kahrs comes from an animation background and talks about having to break that pipeline in order to develop an animated VR cinematic. “I was told not to storyboard it and just dive into the 3D layout process, which, I think, was excellent advice.” In that same lecture, this diagram from AWN article
Back to the Moon’ VR Doodle Celebrates Georges Méliès was presented:

The designers for that experience split the scene into sections and mapped out the action occurring in each part of the scene at every time. Thinking about the scene in this way, as a production rather than a composition, changes the way I’m approaching both the narrative itself and the production process.

Time to change tactics. VR manipulates space, not a frame. It then follows that I should begin feeling out that space in order to “storyboard” my animations.

I moved into Microsoft Maquette.

Maquette offers ease of material. I can place basic 3D shapes at all scales, manipulate a painting and text tool, and create multiple scenes that can be easily scanned back and forth to watch progression. I can view these scenes from a distance or at the viewer’s level. After experimenting with the tools, I began building a primitive scene to understand spatially what manipulations I wanted to happen. The result is an odd combination of an animatic and a storyboard.

Technical Progress

I did some experimenting in Tilt Brush, first with painting and then with the export pipeline. I am currently still waiting on Quill and Unreal Engine to be available in the lab, but will be spending this weekend working on my Oculus at home to see the results. Tilt Brush gave me some practice working with painting in a virtual space, specifically dealing with depth and object manipulation. I chose to create one of the chairs from my scene with the candle sitting on it as a test subject.

Painting in Tilt Brush of a candle sitting on the arm of a chair.

I turned most of the lights down in Tilt Brush to get a feel for what the scene would actually be like, and see what the various brushes would produce in terms of light. Not very much, as we can barely see in the image above.

What I really wanted to test was the export process from Tilt Brush to Unreal Engine. Tilt Brush exports as an FBX with the textures, but upon importing to UE4 I realized that the FBX is split into pieces based on which brush you used for each stroke. Further, the materials don’t seem to work without undergoing a process in between to assign a vertex color map to the object. I’m still a bit hazy on this process, though from my understanding Quill exports in a different file format that will seemingly not require this middle step.

Unreal Test - bringing a Tilt Brush model in, without functional textures.

Unity, however, has a package made to work with Tilt Brush materials called Tilt Brush Toolkit. Once downloaded from Github and loaded into a fresh Unity scene, I was able to import my model without any issues from the textures. All I had to do was drag it into the hierarchy.

Unity Test - bringing in the Tilt Brush object after importing Tilt Brush Toolkit.

Next Steps

My steps forward are really just finishing up where I’m at now and making some real steps towards solid production.

  • Spending time animating in Quill. The next week will be getting some of these base animations down in Quill and trying to export into Unreal.

  • Determining which 3D models I’ll be creating and starting work on that, while blocking out their presence in UE4.

  • Finish creating Maquette scene mockups. Finalize story.

1/13/19: Investigating Quill

This week marked the start of a short project on experiential storytelling, memory, and light. We were asked to think about three memories in which lighting was an important factor, and write a short description of this moment. Emphasis was put on the word moment - this is not meant to be a life story. The idea is to bring the viewer into this moment, understand what it is that’s happening, and then exit in 15 seconds.

I started thinking about memories that had specific focus on lighting, and found it was more difficult than expected. There were plenty of memories where I could remember what the lighting was and appreciated it, but I had to find three where it really stood out to me. I found that when writing about them, I was walking a fine line between what I’m saying to the viewer and what they’ll actually be seeing in the experience. The descriptions were going to be recorded and part of the audio. For each chosen memory I already had a vague impression of what I wanted to accomplish, the most difficult part was deciding how much visual detail I would be including along with narrative, and how specific that narrative would be.


Chosen Path

“I was looking for Orion. He’s there, as always, but tonight he brought friends to fill the usually empty sky. Standing barefoot on the deck with only the glow of the candle, we stared at each other over the hills, making introductions.”

This memory is from last May, standing on the deck of our house in North Carolina. My partner and I drove down from Columbus for my birthday. The area isn’t very populated, mostly woods - on a clear night it’s easy to see all of the stars. We stood outside the first night we got there with all the lights out except a candle just looking at the stars. As a child I would always look for Orion every time I walked outside, it was the only constellation you could usually see from where we lived in Miami. The light from the stars, the candle, and the houses on the other hill really stand out to me in that memory, and I chose it because I feel that I could bring the essence of this moment to a viewer with varying levels of abstraction.

Panorama off the deck at North Carolina at sunset. Original scene where the memory takes place.

Process

In the past, my research has required virtually the same pipeline visually every step of the way. Block modeling in Maya, some texturing in Substance Painter (occasionally), and then putting it in Unity and adding lights. The focus was on making the program itself function rather than impart an experience visually. I want to take a step back and create something that imparts meaning without necessarily requiring the viewer to actively be a part of it.

Oculus Quill presents some really interesting opportunities for animating in virtual reality. I spent some time looking around and finding examples of these animations that might be similar to my own.

Artist Goro Fujito spends his time creating animations in Oculus, showing a variety of scenes and perspectives. Viking Rockstar is a great example of the type of color and lighting I want to use in my own scene, includes multiple shots and sound design. I wouldn’t categorize this as a virtual experience, but as an animation it’s beautiful and on the right track stylistically.

This short looped animation puts the viewer in the perspective of driving through the rain. With the sound design and lighting, it’s incredibly effective and shows how the user can be brought into an experience.

Fortunately, Fujito also posts videos where he shows his process and explains his animation workflow. I watched this to get a better understanding of how Quill functions and if it would be a good option for me moving forward.

The official website provides some resources on how to export animations and FBXs to Unity, though I needed to look externally for information on how to do this in Unreal Engine. I was considering using UE4 specifically for its lighting capabilities. I worked on the lighting for Project Sphincter while at CCAD, and Unity just hasn’t been able to compare. As of now, I am leaning towards this option.

Putting the final software choice aside for a moment, I decided to get into Quill and see if this was really something I wanted to commit to. Granted, I’ve spent maybe a grand total of 3 hours in it and probably need to watch some more tutorials, but the learning curve is pretty rough. I had a difficult time getting a hang of the controls, which are not well explained when first entering the program beyond a little diagram that pops up by default. These were the initial sketch results:

capture00000.png

Next Steps

After spending some time in the Oculus, I don’t think it’s practical to do the entire scene in this way. At least, not from scratch. I need to investigate bringing in models and animating over top of them, possibly as reference. It’s very difficult to gauge depth in there once the scene is moved around. I also need to look into animating only certain objects in the scene with quill rather the entire environment, or blending them together. This will help me determine a production schedule for the next two weeks.

Beyond the pipeline research, I will spend this next week gathering my final visual reference, sketching out a storyboard, and recording my story for timing. I have been gathering some information on lighting and technical terms in order to actually discuss the decisions I’m making on the lighting in the scene, and will be discussing that more next week as well.

Looking Back on Liminality

A few weeks have passed, and I wanted to wrap up the work we did on Ter(li)minal from September!

Our end result was a space in which we sought to place the participant in a liminal space, forced into a sense of waiting. You are constrained by lack of movement and lack of activity, only able to observe by looking around and rotating your head. Upon starting the application, the user sees a space sparsely populated by seated and walking figures. As you wait, small changes begin to occur. Once empty seats are filled with figures. Seated figures may change positions when you look away. The departure board gains more and more red delayed flights as time passes. Babies scream, planes take off, the space becomes more chaotic and crowded with each delay announcement. Figures began to break away from their straightforward march along the walkway and defy gravity, floating through the ceilings and moving sideways out to the planes landing. Finally the scene calms as the boarding call is made, and the player is allowed to move on.

In the process of development, I learned a lot about linking layered timed events in Unity. Once the sightline script was functional and able to be applied to multiple objects, it became a matter of making sure these events were allowed to occur at the proper times in the application. I had to go back to the basics: public booleans and instantiations. The sightline function ended up working out due to a tip from Alan to use Transform.InverseTransformPoint instead of the function with the frustrum planes. I was able to get the function working that same day and then it all became about timing. Sara made a rhythm chart for the project that I based all of the interactions on:

rhythmchart_3.jpg

Some critique points that came up:

  • Move camera back. The player’s face is too far forward over the model, and it’s nearly impossible to see the models placed nearby.

  • Add interaction to the models around the player. The boarding pass, phone, and books around the player were actually supposed to be moving. I ran out of time and just didn’t make it around.

  • The departure board is very hard to see. In our presentation, we talked a lot about being able to see these subtle changes in the environment around you. But the departure board was placed so far away that it was difficult to read and see these changes as they occurred. Moving it to one of the pillars by the player might be more effective.

  • Animated figures- be more intentional. Some technical issues came up with the loops on the animations and timing them out. While the number of figures does increase over time, it’s difficult to see once they start walking through the floors and ceiling. This happens fairly quickly- waiting for more time to pass and spacing out these occurrences would make it feel like less of an accident (although… to be honest… it definitely was an accident).

  • Line renderer on the objects seems to glitch a lot as they walk, gets confusing and difficult to see the figures.

  • Audio. Needs to be louder overall- very hard to hear on the phone even with headphones.

Overall I was very happy to learn the process for android development and get to work a bit with the Daydream. It was much easier than expected and very quick to prototype. I would like to revisit this in the future and make adjustments, though that may be more of a Christmas personal project. Learning about the sightlines is going to be especially useful for our 10 Week Ruby Bridges iteration that Tori and I are currently getting started- but the journey for that so far deserves its own post. More soon!

Weeks 1-2: Sightlines, Airports, and Liminal Spaces

Year 2 is now off and running! 

Most of my energy over the past three weeks has been focused on the first project of the year: a five week team effort for 6400. The same project that produced the MoCap Music Video last year. 

Concept

Our team was told the due date and to make something... very open for interpretation. My team includes two 2nd year DAIM students (Taylor Olsen, Leah Coleman) and one first year student (Sara Caudill). We eventually settled on creating a VR experience based on liminal spaces, specifically taking place in an airport, with the viewer losing time and identity as the experience goes on.

Liminal spaces are typically said to be spaces of transition, or "in-between"- a threshold. Common examples are school hallways on the weekend, elevators, or truck stops. Time can feel distorted, reality a bit altered, and boundaries begin to diminish. They serve as a place of transition- the target is usually before or after them. The sense of prolonged waiting and distortion of reality is what we intend to recreate in this experience. By placing the viewer in the gate of an airport and observing the altered effects around them, such as compressed/expanded time, we will bring the viewer into our own liminal space. 

All of our team members had an interest in working with VR and with games, so I looked for environmental examples of what might be considered a liminal space already existing within a game. The Stanley Parable sets the player in an office building by themselves, seemingly at night, which contributes to the odd feeling of the game- you never see another human, and the goal is to escape. The presence of a narrator and instructions (despite the player choosing whether or not to follow it) prevents this from being a true liminal space, but I feel that the setting itself creates a strong nod in that direction.

Silent Hills P.T. is much closer to the feeling we're getting to. The player constantly traverses the same hallway, though with each pass the hallway is slightly altered. There is minimal player identity, the passage of time is uncertain, and the player is constantly in a state of transition looking for the end. 

Sightline: The Chair became an important source material for us. Developed early on for the Oculus, the player is seated in a chair and looks around at their environment- one that constantly morphs and shifts around them. The key point is that these changes occur when the player looks away, and then are in place when the player looks back. This is an element I very much want to incorporate into our game. It really messes with the flow of time and creates a surreal feeling. Importantly, the player cannot interact with any of the objects around them- they must simple sit and wait for the changes to occur. 

Progress

From there, we met as a team and began planning out the experience- interactions, the layout of the airport, how time would pass, what events would be happening. An asset list was formed and placed online, as well as a schedule for development. We wanted to make sure everyone on the team was learning new skills they were interested in, and teaching others the skills that they have. Sara and Leah focused on visual and concept development- the color keys, the rhythm of the experience, etc. Taylor worked on finding reference photos, and began modeling the 3D assets we would need for the airport. 

For me, I spent the last few days focused on modeling the airport environment and beginning some of the interaction work in Unity. Based off of the layout we created in the team meeting, I was able to finish the airport shell and start working on some of the other environmental assets- a gate desk, vending machine, gate doors. 

I brought those models into Unity to start working on developing some code. Taylor made the chairs for the gate, so I placed those and got a basic setup going. 

090418_AirportEnvUnity1.jpg
090418_AirportEnvUnity3.jpg

I began working on some Audio scripts to randomly generate background noise and events- an assistance cart beeping by, a plane landing, announcements being made, and planes taking off/landing. That's about done, and I'll be posting an update video soon with the progress made.

The current problem I'm having is the script to change items when the viewer isn't looking at them. I found GeometryUtility.TestPlanesAABB in the scripting API, which forms planes where the camera's frustrum is and then calculates if an object's bounding box is between them or colliding with them. Is the object where the player can see it? I can successfully determine that an object is present, but when deactivated to switch to another GameObject, the first object is still detected and causes issues with the script I've written to try and swap it with another. I got it to successfully work with two objects, but three is revealing this issue in full force. I may try instantiating objects next instead of just activating them- either way, this test has allowed me to learn a lot about how Unity determines what's "visible". 

Next? 

This weekend, I'll be continuing to work on this sightline script for the camera and hopefully finding a solution. I also have several other environmental assets to model, and will begin textures for the ones that I already have completed. On Sunday I plan on posting a progress video of the application as is. We still haven't decided whether to use the Vive or attempt mobile VR, something that I've been especially interested in. Alan suggested letting the project develop organically and then make a decision near the end- I'm leaning towards the Vive for this currently for the familiarity and extra power, but on mobile the player is forced to be stationary and lacks control. More thoughts on that soon. 

First Year Wrap and Ruby Bridges: 6 Week Conclusion

In the first week of May, Tori and I completed our work on the 6 Week Prototype for the Ruby Bridges Project. It was presented, and then folded into a much larger presentation about our progress throughout the first year of our MFA program. As classes are starting back up, I wanted to make a post summarizing my journey over last year, the results of Ruby Bridges, and my current starting point. 

At the beginning of the year, I focused my efforts on the interactions between game design, education, and virtual reality. For me, this meant a lot of exploration and a technical education in these areas. 

My early projects focused on improving my skills in Unity. I worked on team projects for the first time in Computer Game I and obtained a real introduction to game design and game thinking. This also allowed me to develop my own workflow and organization in Unity. While exploring my personal workflow, I was interested in potentially using VR to organize materials and form connections throughout the scope of a project using Google Cardboard. The result was the MindMap project, which was a great introduction to mobile development and Google Cardboard, but provided limited usefulness for my work. It was tested using materials from my Hurricane Preparedness Project, a 10 week prototype developed to provide virtual disaster training for those in areas threatened by hurricanes. This was my first time using Unity for VR, and developing with the HTC Vive. The topics explored, including player awareness in VR, organization of emotional content, and player movement in a game space would eventually become the basis of my work on the Ruby Bridges Project. 

There has been a clear evolution in my own design process and focus, mainly with a shift from visual organization to functional prototyping. Earlier in the year I still had a heavy focus in visual elements and art assets, though with game design projects that experience suffered because the game was not totally functional. By the spring, I had shifted completely into prototyping and non-art assets. All of these projects challenged my process and boosted my technical skills, and then I brought these technical developments into a narrative context. 

EDUCATIONAL AND EMOTIONAL STORYTELLING THROUGH IMMERSIVE DIGITAL APPLICATIONS

In the Spring, Tori Campbell and I began working on our concept for the Ruby Bridges Project. Working together, we would like to use motion capture and virtual reality to explore immersive and interactive storytelling. Ultimately, we are examining how these concepts can be used to change audience perception of the narratives and of themselves. Ruby Bridges' experience on her first day of school is the narrative we've chosen to focus on. 

Ruby was one of five African-American girls to be integrated into an all-white school in New Orleans, LA in 1960. She was the only one of those girls to attend William Frantz Elementary School at 6 years old, told only that she would be attending a new school and to behave herself. That morning, four U.S. Federal Marshals escorted her to her new school. Mobs surrounded the front of the school and the sidewalks, protesting the desegregation of schools by shouting at Ruby, threatening her, and showing black baby dolls in coffins. 

This scene outside the front of the school became our prototype in VR. 

The Four Week Prototype focused on developing technical skills that we would need moving forward, specifically navigation, menu/UI, and animation controls. In doing so, I learned not just how to make these functions work, but the pros and cons of each.  This allowed me to make more educated decisions in the design of our Six Week Prototype. We gathered motion capture data from actors to work with the data in a VR space, and to help experiment with controlling the animations. 

My goal with the Six Week Prototype was to create a fully functional framework for the experience, something with a beginning, middle, and end. I created a main menu, narrative transition into a Prologue scene, the actual Prologue scene where the user is Ruby's avatar seeing from her perspective, and then an interactive scene where the user can examine the environment from a third person view. This view would provide background information/historical context, and drop into the scene from another perspective. Where the broad goals of the Four Week Prototype was technical development, this project was examining different levels of user control, the effects of this on the experience of the scene, and how to create an experience that flows from scene to scene smoothly even with these different levels of control. 

This prototype became a great first step into a much larger project. We learned a lot about creating narrative in VR, and though demonstrations with an Open House audience we discovered just how much impact a simple scene with basic elements can have on the viewer. 

THEORY

Broadly, my thread going into the year was how virtual reality can be combined with game design for educational purposes. Through these experiences, I was able to refine that to how immersion and environmental interaction along with game design can be used to form an educational narrative experience. 

Tori and I are focusing on different but connected elements while working on this project. I am working specifically with theories concerning self-perception, learning, and gamification. Structuring these together, I form a framework for my research. Self-perception theory is connected through the concept of perspective-taking, representing the user and how they reflect back on themselves and their experiences. Gamification represents the interaction the user has in their environment- provides the virtual framework for the experience using game design concepts. Learning theory places the whole experience in the context of education and the "big picture". 

WHAT'S NEXT? 

Over the next year, I will be continuing to work with Tori on the next stages of the Ruby Bridges Project. While we are still currently discussing our next steps, I would like to explore move environment building and structures of the experience. The Six Week Prototype was a great learning experience for how to set up a narrative flow and work through different levels of interactivity/user experience. But there are still so many other directions to push forward with it. Having the crowd react back to Ruby by throwing objects, yelling specifically at her, or even having all of their eyes constantly gazing down at her, further increasing the menacing presence. Playing with perspective-taking so users can switch back and forth between different members of a scene and determining if that ability contributes positively to the scene. Pushing other concepts of gamification, such as giving users a task while they are in there to highlight aspects of the environment (the closeness of the crowd, the size of Ruby, etc). Manipulating these environmental aspects will likely be the next step for me. 

I will continue to research the theoretical framework highlighted above and will likely be making modifications as I start to delve more into these topics. My classes begin next week, and as part of that I will be taking Psychobiology of Learning and Memory- this will likely have an impact on the theoretical framework, but I'm very excited to take what we learn in there and potentially apply it to the experiences.

On the technical side, I will be conducting small-scale rapid prototypes to test these concepts as main development on Ruby Bridges continues. Furthermore, I would like to experiment with mobile development on the side to see if a similar experience to our prototype could be offered with various mobile technologies, such as Google Cardboard or GearVR, perhaps even the Oculus Go. 

For now, I'll be organizing my research and getting ready to hit the ground running. 

1000 Ways How Not To Control Cameras

This week and the next three days form the final week of development for the Ruby Bridges 6 Week Prototype, and last week I outlined the functions that I would like to implement in the build for this week. 

The good news is, I learned a lot about how the SteamVR camera likes to operate. The bad news is, it took me all week to learn these lessons and adjust our prototype accordingly. 

Debug list from 04/21/18

Most of the issues I ran into had to do with moving the camera around a scene. The third person documentary view that I'm building was initially including a zoom function. I went through a couple different methods to get this to work: sliders, touchpad walking, scaling the environment. I finally got this to work using a UI slider. But I discovered that the effect was extremely jarring and didn't really add anything for the user- if they're going to be able to take on perspectives in the scenes themselves, the zoom function becomes redundant. I have decided to fix the camera to one point away from the environment and allow the user to rotate the scene manually to examine the tooltips. 

The other issue was locking the camera to Ruby's head. I could parent the camera to her motion without a problem, but the height of the user would influence the Y value of the camera transforms. I wasn't able to find a way to lock this even with research (although some online forums mentioned it's extremely disorienting to have head transforms locked in VR). To solve this problem for now, users will complete the experience in a seated position. This should have the added benefit of assisting with the motion sickness issues from the motion of Ruby's walk. 

On Saturday, I had a debug day and tried to work through all the issues that came up from testing on the Vive instead of the simulator. This included Menu buttons working properly, pointers, and disappearing controllers. The controller thing has to do with how I parent the camera to Ruby's head- they still function, but you can't see them. Still working on a solution for that. I also found that the environment itself was not centered and had tons of weird offsets, so I started a fresh scene with the environment in the right place- that solved a lot of the camera transform issues. 

Screenshot of current camera view for interactive scene.

NEXT

With the camera issues relatively sorted, I have to place the object tooltips into the scene and place the background/historical information on them. These will also include the buttons for perspective view in each part of the scene. Tori worked on creating a crowd using the new character models she made and did a great job offsetting the animations, so I'll be placing those into both scenes as well and cleaning up the overall function. 

Interactive Building

Last week of development! After taking into account all our feedback, Tori and I really had to think about how to round out this project. 

Tori will be working with the character animations and models, fixing some of the technical issues like locking the feet to the ground and replacing the robotic models with the avatars she created. While the current animations were still effective, the unedited animations and floating characters do crack the immersion. 

On my end, I had some technical issues that I wanted to fix too: locking the Camera to Ruby, crowd simulation with offset animations, and editing the audio to be more cohesive. But along with that I wanted to round out the experience. We put the interactive level aside to focus on putting together the prologue and receiving feedback on that experience. 
For the last bit of this project, I'll also be putting together a basic prototype scene to explore a 3rd person documentary view. The user will be able to rotate the scene and zoom closer, then use the tooltips to gain historical background. Within these tooltips will be a button that, upon clicking, will allow the user to join the scene on the ground, much like Google Street View. It's not a fully fleshed out experience, but will allow us to broadly explore some of the concepts we discussed back at the beginning of the project as far as how to transfer that information. This is a good starting point- users will still have control of their experience, and the information will be there for them to uncover at their own pace in a variety of ways. Meanwhile, we still have that perspective-taking ability there to continue the experience the user had as Ruby or other members of the scene. 

The scans below from my sketchbook show some of the notes taken while discussing how to set up this level. 

I did take some inspiration from Assassin's Creed, as discussed last week. The series itself has always included a wealth of historical information embedded within menus and the occasional quest. However, as a player, you have to go searching for this information, and the reveal tends to be a wall of text with the occasional image. It's underwhelming after running around a richly animated recreation of Rome or Havana. The new Discovery Mode provides text, images, audio, and video from both the game and reality. I found myself much more excited to experience a multi-modal presentation rather than reading text block after text block. This much text (as shown in the images below) really doesn't work well in VR- it's difficult to read the panels unless they take up the full screen and overall the immersion is just lost. I would rather focus on using the environment to explore and convey information rather than relying on text. 

In a similar vein, the newest installations of Tomb Raider include historical information with artifacts that players collect throughout the course of the game. Removed from the world gameplay, a screen comes up and players can examine 3D recreations of these items with a basic description of what it is in the context of the game/world. Granted, it's usually only a sentence or two, but not something really required by the game. It allows players to view the item up close and learn a little bit more about the culture of the world around them without overwhelming with too much detail. It's another way for players to experience this information. I thought about this when considering the 3D manipulation of the scene and engaging the user in the content. 

Another great example of this came from one of our readings (experiences?) for class this week. Refugee Republic, an interactive documentary, takes the viewer on a journey through a Syrian refugee camp in Iraq by scrolling through a panoramic illustration depicting different parts of life in the camp. The media often presents an inaccurate view of refugee camps, and the team who created it set out to create a more real image of life in this camp. While the landscape itself is mostly drawings, as the user scrolls along it transitions into film and image and text. The result is incredibly dynamic and provides a lot of depth to the experience, as each media is used for it's strengths. It plays to every sense, and that's what we're trying to do with this interactive level. I began thinking about how to choose what media and what information I present in this 3rd person view and what media might work best from the perspective-taking option. I'm going to start researching some more experiences and games that provide a similar media overlap. 

With this in mind, I was able to make decent progress on getting the level set up this week.

  • Prologue: camera is finally locked to Ruby. All users will experience the walk at her height, and without walking away from her body accidentally. In the interactive level, I'm contemplating giving the user the ability to walk around as Ruby without having her set animation. This was discussed multiple times as how impactful the scene could be if the user is seeing it all from Ruby's height and exploring at their pace. I don't think we'll have the time to get that in this time around, but a future feature to consider.

  • Created the new scene with a third person camera. Began implementing camera movement and manipulation functions, such as zooming in with a UI slider (harder than anticipated) and working on rotating the environment using the pointer from the controller.

NEXT

This week is going to be straight work on this level. Getting those features in will mostly be shifting the camera around, and once I have the process down it should go fairly quickly. It's also going to be compiling Tori and I's work into a final build and debugging as much as possible. I have yet to test progress on the new level in the Vive, so I'll be doing that tomorrow and every other day until it's due just to make sure the changes are working in the headset as well as the simulator. 


2 Weeks In: Crowd Building and Playtesting

Over the last two weeks, all of my efforts for the Ruby Bridges project have been focused on the Prologue experience. This included creating a crowd that surrounds the user, adequate audio, attaching the camera to a moving Ruby, bringing all of these animations into the same scene together, and a smooth transition from the introductory sequence to the actual experience. 

Troubleshooting the Prototype before the Open House. April 3, 2018

The crowd building was a real technical challenge for us, and we still haven't completely nailed it down. For playtesting purposes we took the captured data we had for four figures and duplicated it into a crowd, then instantiated that crowd once the scene started. Eventually what I would like to do is use a crowd simulation to offset the animations of the figures- looking at the crowd as it is, it's very easy to spot patterns where we duplicated groups and where figures are floating above the ground plane. It would also help us create a more faithful representation of the scene; I looked at some images taken from Ruby's fist few days of school to gauge where the crowd would be harassing her along the sidewalk and how close they were to her. Based on these the crowd was most aggressive on the sidewalk around the school, but were kept away from the front doors as the school had a fence all the way around it. 

For the transition into this scene, we wanted to give the user context for where they were and whose shoes they would be standing in. Upon starting the experience, the user is in a almost completely dark room listening to audio of Ruby talking about her first day of school from her perspective. Text cues come up with Ruby's name and what interview we're pulling the audio from, followed by the school, date of the event, and the location as she's talking. The scene then fades and the user reappears in front of the school.

While listening to some interviews with Ruby talking about her first day, I noticed some of these podcasts and interviews included audio of the crowds yelling at her. I was able to cut up this audio and loop the crowd yelling into the scene, along with some stock effects of neighborhood environmental noises. Tori recorded some of our classmates yelling specific phrases, such as "We don't want you here!" and "We're FOR segregation!" to add into the audio amongst the crowd. With the volume all the way up, this audio can be very chaotic and confusing. After a few moments just standing there and the headset on, I found it easy to lose track of where I was. The audio completely obscures anything in the outside world. The added chants grounds the user in the event and the time period. 

On Friday, Tori and I were able to demonstrate the current version of our prototype at the ACCAD Open House. Other than the two of us and the occasional classmate, we haven't been receiving much feedback from sources outside of the Design world. We were able to get some fantastic feedback from a wide variety of people of all ages, races, and experience with virtual reality. The topic itself raised a lot of interest with those walking by, and after a quick background on who Ruby was and our intentions with the project, most were eager to see what we had. 

After taking off the headset, we had a table set up with the children's book and post-it notes for guests to provide written feedback for us. We only had two written notes, but most of the guests asked questions and gave us their impressions afterwards.

  • One of the most frequent comments we received was "wow, it feels like you're really there! It's very immersive." I do take that with a grain of salt, especially as many of the guests were experiencing virtual reality for the first time. However, the fact that we were able to gain that reaction from so many of those who experienced a prototype with primitive forms and non-recognizable humanoid figures was very promising. Guests gave different reasons for feeling this way- the audio being powerful and negative, the crowd surrounding the user, seeing the crowd animated in VR.

  • Some guests cited brief dizziness during the movement as Ruby up the sidewalk. I myself experienced this when testing the prototype before the Open House. The fact that it was significant to mention after only a 3 second motion is important as we're going to be putting a longer walk and animation in the scene in the future. After the motion stopped, the users adjusted to the world. Part of this could be resolved by having guests sit for this experience- it can be disorienting to be standing while the character is moving. Though if we continue with the interactive portion of the experience, guests would ideally be standing and moving around. I have seen other solutions in VR ports of games like Skyrim where the edges of the screen are blurred on the periphery to reduce the feeling of sickness while the player is moving, and the blur fades once the player has stopped. This may be a good area to explore when we have longer animated sequences in the scene.

I had several conversations with guests who are instructors or educators, and all mentioned seeing the uses for this in the classroom.

  • One guest asked me if I would be working with educators in the development of this experience. Ideally, yes- this experience is meant to be implemented in the classroom, not to replace the classroom itself. It's very far in the future, but gaining feedback from instructors as to how they could best utilize this would be absolutely necessary.

  • Several guests commented on whether the experience would be appropriate for elementary-age students, after asking what our target audience is. To be honest, there is very little research on how kids those ages react to virtual reality. There have been studies that suggest kids ages 6-18 perceive virtual experiences to be much more "real" than adults (as discussed and referenced here), and that children ages 6-8 can create false memories after experiencing a virtual event (source). While we want to stay faithful to Ruby's account, Tori and I will have to discuss the implications of how "real" of an experience we create.

  • Following up on that question, another guest asked whether we had considered leaving the avatars of the characters as these robotic figures rather than assigning them race. She was interested in how the user might project onto these figures if a race was not assigned and thus change the experience for the user. I understand her point and this is a question being addressed on several studies dealing with racial bias and stereotyping- in that realm, leaving the user "colorblind" may be an interesting area to study. One such study involves changing the race of the user's avatar and observing how users of different races demonstrated bias when the avatar was different from their own race (finding it reduced explicit bias, with no impact on implicit- an interesting study to consider when we're having users experience Ruby's walk. Source). However, our purpose is to craft a world similar to that Ruby experienced to promote empathy, understanding, and connection between the student and Ruby. Race is a vital point to her story and understanding that this is just one of many moments during this time where she would encounter aggressive racism is vital to this experience.

The question of interaction was addressed when discussing the scene where the user would be able to explore the world. Guests asked what kind of interactions they might experience- would the crowd react to their presence? Would they be able to move around the scene? One guest suggested using gaze-tracking to trigger the crowd into throwing things at you when walking around the scene. In past critiques, the suggestion of having the crowd's heads all turn to follow you no matter where you are would certainly be intimidating (or even menacing).

It really comes down to what we want the user to gain from that freedom to explore. Initially it was to provide background knowledge of the event and learn more about the long-term effects/major components in the scene- how Louisiana fought her attendance, how the community reacted, what the rest of Ruby's education was like. The major question is how to go about delivering this information. Looking at perspective-taking, the user could embody different characters in the scene and listen to their internal monologue as a way of understanding different points of view. Or the user could walk around as their own avatar objectively, as if at a museum.

An Open House guest gave me a great case study for this "virtual museum" experience created by Assassin's Creed Origins. The game takes place in Ancient Egypt, and your character is part of a vast open-world environment. Ubisoft recently released a Discovery Mode for the game, featuring guided tours through landmarks and buildings. The player can run around the landscape at will as their own character. When a tour is activated, a guided trail is illuminated along with interactive checkpoints that features a narrator and extra written information/artwork added into a menu archive for later inspection. 

This seems to be a great way to keep player autonomy and the general elements of gamification consistent in the game while still conveying the relevant information. I own the game and have yet to explore Discovery Mode myself, but I will be doing so this week and discussing ways to move forward with Tori. 

NEXT

Tori and I will be meeting this week to discuss our next steps and compiling the feedback received from the Open House. With the current course, we will likely be working on the crowd simulation and the user animation for Ruby. The current walk is very short, and we will need to work on the animation cycles (and creating an idle state) so the characters do not just stop after a three second experience. We will also be testing out model applications for the crowd and adjusting the audio. 

Project Framework and Flow

Tori and I were able to discuss the notes I made last week on the flow of the project, and were able to finalize our plans for the next six weeks of development. 

Notes from planning out the experience structure.

We sat down together and discussed the flow of the experience that I had outlined. The first thing the user experiences is a start menu, with a start, quit, and options button. Upon pressing start, there's a transition in which the scene fades to black and displays the date and time to set the scene. Our feedback here from Maria was to provide other information to place the user in the experience by providing more background information, so we will be building on that and displaying more information about the story during the transition through audio and images. 

After the transition, the scene fades back in with the user as Ruby. This is a passive experience with no navigational control available. The user will start at the sidewalk, and experience Ruby's walk up to the door with the teacher. We debated the option of even giving the user menu control, or the ability to exit the experience- functionally, I think it could be detrimental and difficult for the user to have to force quit an experience in order to restart in case something went wrong. We'll be getting Alan's opinion this and other questions regarding gamified elements later this week. 

From there, we transition into the Interactive Mode where the user respawns with an objective placement on the map. They are not part of a particular group, but initially respawn as an outside impartial observer. The scene with Ruby has restarted, and they will view the walk they just took from other areas in the scene. The user has full navigational abilities. The animation will begin as they collect icons, prompting the user with a question, fact, or experience to witness. The idea being that the user moves along with Ruby, but avoids being constricted into a linear gameplay by being given the choice to pursue the icons in whichever order they desire. They will also have the ability to replay each checkpoint from a secondary menu. 

Further questions we asked had to do with the avatar of the player. When starting the Prologue, the player is seeing from Ruby's perspective and will be embodying her avatar. After that, what would the player's avatar look like? Would they even have one? I've been considering these questions with the Proteus effect discussed last week, and thinking about how this visualization would change the experience for the use.

Following more critique from Maria, we're moving forward with crafting the Prologue experience first. This week I did some research on the area and sketched a rough map of what our prototype will look like. William Frantz Elementary School has been restored as a historical site, and though it has a new academic center attached to it, the original building and neighborhood have changed very little from 1960 to now. I tried to keep the general shape of the building and placement of nearby streets/houses historically accurate for the prototype. 

Sketch of map for 6 week prototype.

I began working on the framework for the experience in Unity. I built the general environment, set up the player camera/controllers using SteamVR and VRTK, and started putting together a functional menu system to transition between each scene.  

Tori is going to be working on adding the animations captured in the last prototype to the scene, and choreographing their interaction. Once they're added in, I'll be making sure the cameras attach to Ruby's character for the Prologue and work on the animation controls for the interaction scene. For now, our priority is going to be completing the prologue experience and getting those elements functional. 

The theoretical framework for this project has been a work in progress, but I've been narrowing down the key theories and concepts we're working with. Most of what I've been examining has come from self perception theory, learning theory, and gamification. When presenting for critique, the feedback I received was to be less specific with the framework. I have plenty of information on the psychological aspects and even some on game theory, but very little on virtual reality itself. I'll be doing more research this week to fill those gaps. I have been told to read Art as Education by John Dewey by several professors and classmates. I'll be adding this to my reading list as well. 

Current breakdown of theoretical framework.

NEXT: 

  • Finishing up framework for the whole project build.

  • Functional Ruby experience in the Prologue

  • Transitions between scenes started.

  • Main menu complete with options.

  • Research

4 Week Wrap Up

Framing the Project

Over the last four weeks, Tori and I have been working on a proof of concept utilizing VR and Motion Capture. The larger goal for our project is to form an educational VR experience that promotes the development of empathy in elementary school literature. We have chosen to examine this by developing an experience based on the story of Ruby Bridges, though for this four week prototype we focused our efforts on overcoming new technology and starting research.

Why is this a problem? 

Virtual reality has been rapidly developing in areas such as video games and medical research, but less work has been done in the areas of children, empathy, story, and how we can tie these factors into education. 

This creates a unique challenge for me as a designer. VR creates a new range of possibilities for interaction, especially when combined with game design concepts. Examining these interactions and their implications in the context of the story will be a large role for me in the development of this project, and something I began to do with the prototype. 

Results

Above is a recap of my progress over the last four weeks. It includes a demonstration of each of the navigation, UI, and animation controls, as well as a sample scene created from the point of view as Ruby. 

My personal goals were to examine the interaction possibilities in VR, and learn to develop them for use in the Vive. I specifically worked with navigation, UI menus/panels, and controlling our animations using these menu assets. In terms of this prototype, I did not know how to do any of this in Unity using VRTK or SteamVR. I had to learn how the technology worked and explore those potential options in order to move forward. 

In the grand scheme of the project, these factors are very important in how the user experiences the scene and allows us to start asking questions about their impact. For example, if we limit a user's ability to navigate based on the role they're playing in the scene, how will that impact their impression of that role? If as Ruby the user has no control over their environment, will this convey the lack of control a six year old would experience? And if the user is able to navigate, is it less immersive to present them with a menu of tasks or create a more freeform navigation using the pointer and no text? Tori and I don't have answers to these questions yet as our research will help point us in the direction of the type of experience we will create. 

Above are the slides from our presentation in class.

Feedback

We received great feedback over the last four weeks. Here are some of the thoughts given on our prototype.

  • Consider looking at Suzanne Keene, Dr. Bruce Perry, and Mary Jordan in your research.

    • Bruce gave us some great avenues to explore. Although I haven't gone too deep into their research yet, Keene does some interesting work with how multimedia setups can be used in a museum setting and Dr. Perry works with children's mental health and psychology. I need to speak with Bruce again about what work Mary Jordan does.

  • Drop back on your aesthetic choices for now. Focus on function, determine what you want the experience to be first.

    • In our next steps, I agree that the aesthetics are going to need to be considered but not fully developed until we know exactly what we want out of this project. Tori and I have discussed in the past the fine line we walk between making an impact and creating something that actually scares students. While it's certainly not a focus just yet, we know that we don't want the final experience to be too realistic in appearance but still authentic.

  • Can you cut this project back to a more accessible technology for the classroom?

    • A fair point. HTC Vives aren't cost-friendly and unlikely to be found in any public school environment. Google Cardboards have been implemented in classrooms already and are much more feasible on a large-scale consideration. I think we can absolutely adapt what we've learned on a smaller scale and create something cross-platform, we just have to adjust for different mechanical experiences and technological issues. A conversation for the upcoming phases.

  • More research on developmental psychology and learning theory.

    • Absolutely. It's already on the list of topics we're gathering media on. I'll also be taking a class next semester on learning and memory, which will hopefully be bringing me more materials and context for this project.

  • What are the qualities of VR that would enable empathy or learning? Work towards answering this.

    • This ties in with choosing more accessible technology. Something we'll be working on answering - or at least guessing at - in the next couple of weeks.

  • Write your next steps with your objectives in mind- exploring empathy and storyness. Start bringing context into your interactions.

    • I am already adjusting my next steps to bring the narrative and the concepts we've been researching into these design decisions (discussed below).

Next Steps

Thinking about the prototype and the feedback we got, I would like to move forward and use these tools to develop a full narrative prototype. For me, this means mapping out a narrative framework for the experience with a beginning, middle, and end. This will include a more developed environment, with a blocked in scene for the school, neighborhood, and general placement of props as they would be in the actual location. A beginning scene with the user as Ruby, experiencing her walk up to the schoolhouse. Protestors surrounding the sidewalk, including sound in the scene this time. Forcing the user to walk her path before being returned to the scene to navigate on their own. The final result would be a prototype of a vertical slice- not polished, not focused on visuals, but purely interaction and narrative. 

While still complex, this scene will not require learning as much technical skill as our four week proof of concept. Therefore I will be using that time to continue to catch up with research and focus on the design of the experience. This step feels like a good leap from our technical exploration to trying out what we learned in a narrative setting.